Guide | MobiPOS > General > Changing Printer IP Address
Changing Printer IP Address
This guide explains how to change the IP address of a printer by using an iPad or Mac.
The aim is to have both the iPad and the printer share the same subnet as the router.
Users should identify the IP address of the iPad, router and printer beforehand.
To identify the iPad's IP Address:
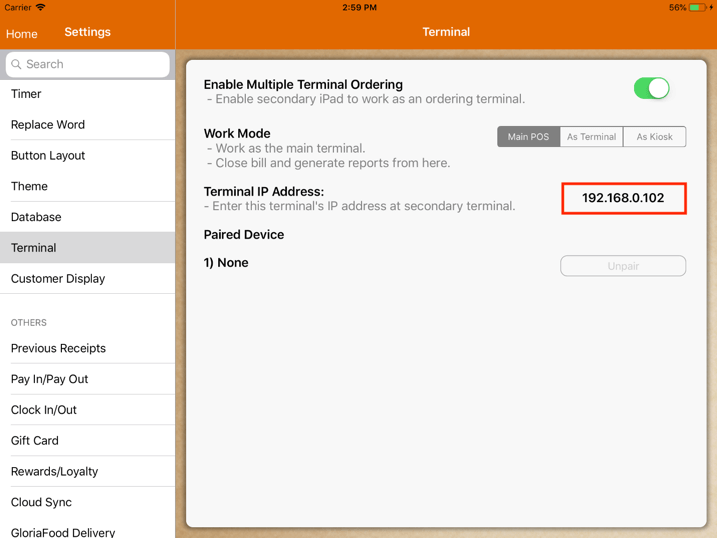
Open up MobiPOS application, upon logging in, proceed to Settings -> Terminal.
Turn on Multiple Terminal Ordering, you will see your IP address is being shown.
If an error is shown instead of the IP address, it means that the iPad is not connected to Wi-Fi.
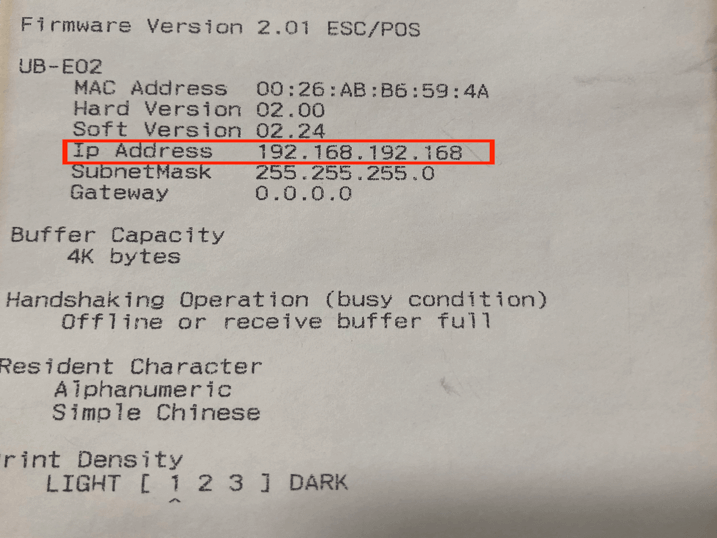
To identify the printer's IP Address:
Click and hold the feed button, then turn on the printer.
Keep holding on to the feed button while the printer is powering on.
It should print out a configuration sheet at the end.
To identify the router's IP Address:
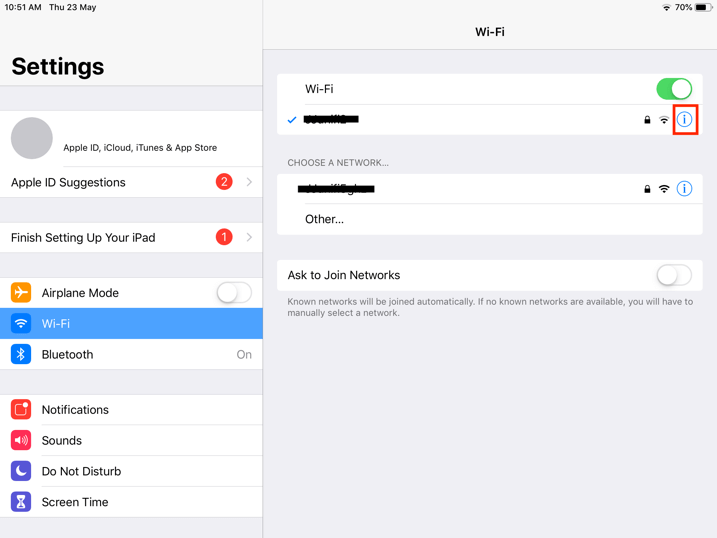
If your iPad is already connected to the Wi-Fi router, you should find your Wi-Fi router IP address in iPad Settings.
Go under Settings -> Wi-Fi, click on the Info button beside the connected network.
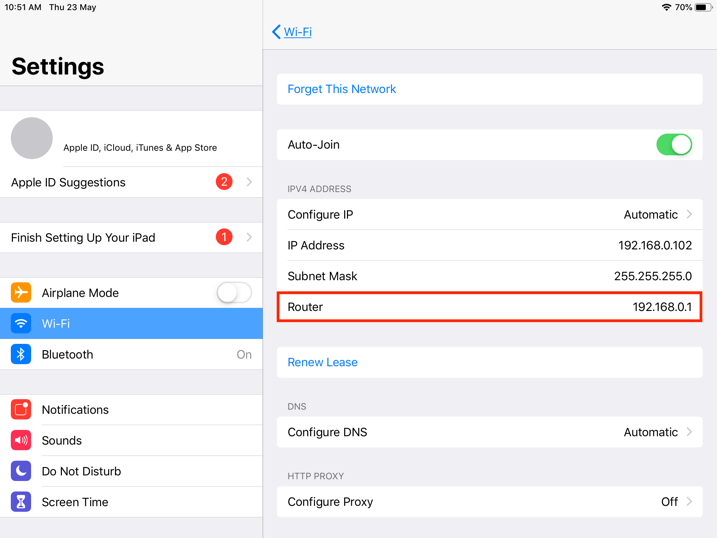
After identifying all devices' IP addresses, we will proceed to perform the change.
Using iPad
All devices involved should be connected to the same Wi-Fi router.
The printer should be connected to the router via LAN cable and the iPad is connected to the router through Wi-Fi.
In this example, the initial IP address for each device is as below:
iPad - 192.168.0.102
Router - 192.168.0.1
Printer - 192.168.192.168
For the printer and the iPad to work together, both of them have to be in the same subnet.
It means that either the iPad IP address has to be 192.168.192.XXX or the printer's IP address has to be 192.168.0.XXX.
However, there is no way for us to change the printer's IP address since we can't communicate with it right now.
Therefore, the IP address for the iPad should first be changed.
Then, upon connection, users will be able to change the printer IP address to the same subnet as the router.
Summary:
1) To change the iPad IP address to match the printer's subnet.
2) The connection between both devices can now be established, proceed to do configuration changes in the printer.
3) Change the printer's IP to match router's subnet.
4) Change the iPad's IP address back to its original IP address.
5) All devices are now in the same subnet, the printer works with MobiPOS now.
Firstly, on the iPad, go to Settings -> Wi-Fi as shown below.
Tap on the connected Wi-Fi tab on the right as shown below.
Upon tapping on the connected Wi-Fi tab, the screen will be shown as below.
Users are required to change the IP configuration to the manual.
To change it, tap on "Configure IP" as shown below.
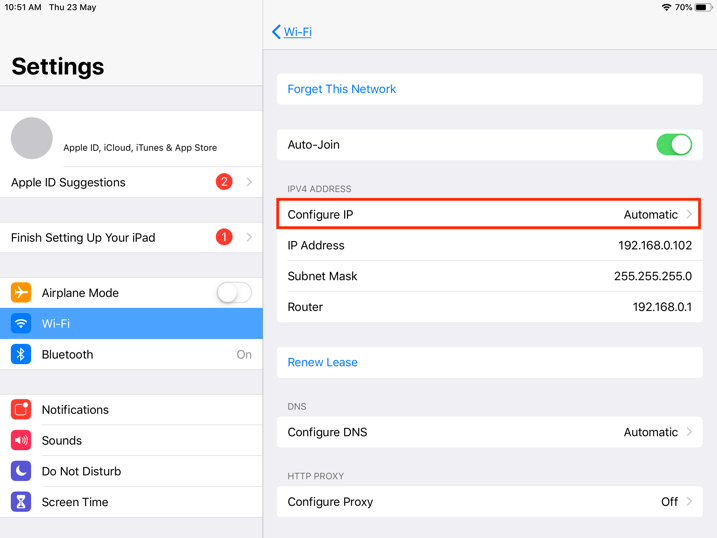
Upon tapping it, the screen will be shown as below.
Select "Manual", then key in the desired IP address of the iPad manually.
Next, key in the IP address, Subnet Mask and Router IP as shown below.
Do note that each device has its own IP address and cannot be overlapped.
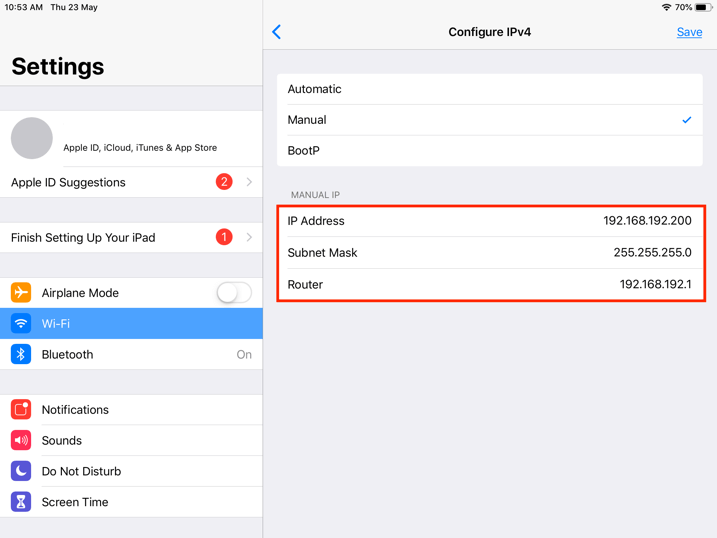
As displayed in the screenshot above, the IP address for the iPad has been changed to 192.168.192.200.
Now, the IP address for iPad, printer and the Wi-Fi router is:
iPad - 192.168.192.102
Printer - 192.168.192.168
Router - 192.168.0.1
Do not get confused with the router IP address (192.168.192.1) entered in the settings.
The actual IP address of the router is still 192.168.0.1, but doing so it confuses the iPad, thus allowing it to communicate with the printer.
Regardless of what the router IP address now is, the iPad and printer are under the same subnet and they are able to communicate with each other.
* If your printer's IP Address is 192.168.1.200, then you will need to change your iPad IP address to 192.168.1.XXX instead.
XXX meaning any number from 1-255. However, do not use 200 in this example as it is taken by the printer.
After configuring the IP address for iPad manually, go to Safari, key in the printer IP address, and press Enter.
As mentioned earlier, the IP address for the printer was initially 192.168.192.168.
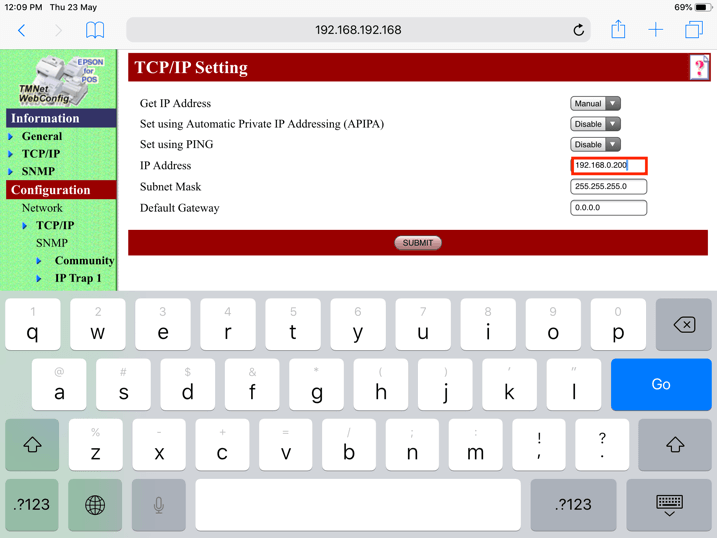
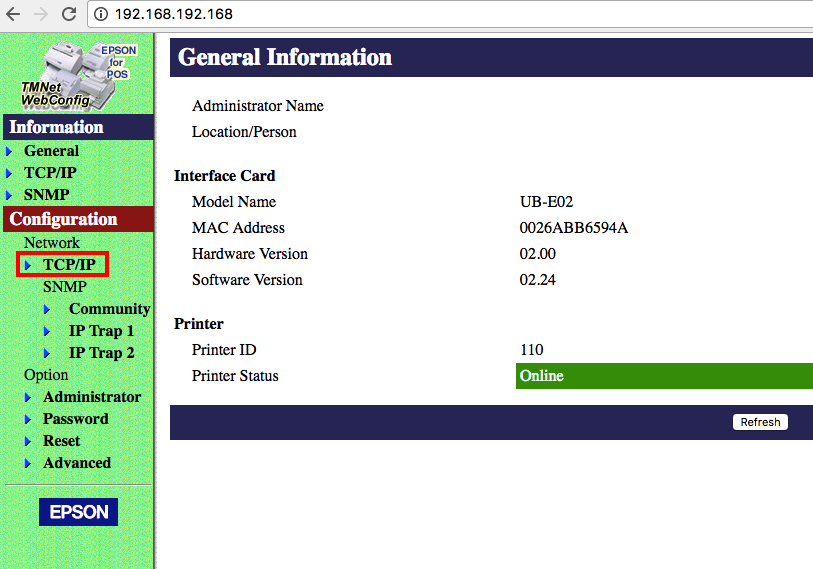
Upon pressing Enter, the printer configuration page will be shown as below.
If the website asks for a password, try both "epson" for username and password.
To change the the printer IP address, tap on the IP address tab on the right as shown below.
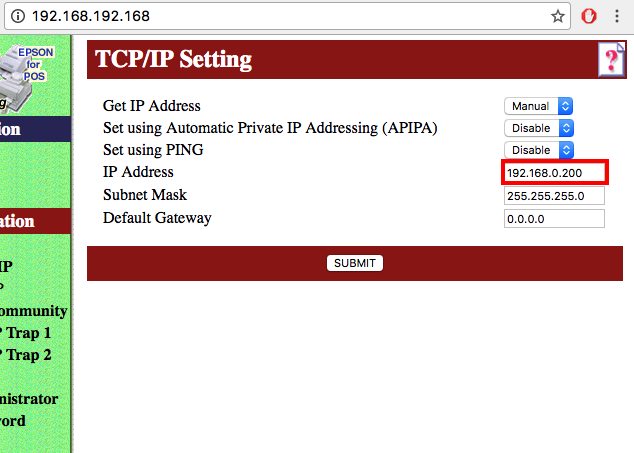
Then, key in the new IP address for the printer.
In this example, to match the router's subnet, the new IP address for the printer is set to 192.168.0.200 as shown in the image below.
Click "Submit" then proceed to reset the printer.
Now, the IP address for the printer should have changed successfully.
Next, on the iPad, go to Settings -> Wi-Fi -> Configure IP.
Tap on "Configure IP" and tap on "Automatic".
This is to reset the iPad IP address back to the same subnet as the Wi-Fi router.
Now, the IP address of each device should be:
iPad - 192.168.0.102
Printer - 192.168.0.200
Router - 192.168.0.1
All the devices now share the same subnet.
Users can proceed to key in the printer's IP address in MobiPOS app.
Try to do a test print to see if it works.
Using Mac
Alternatively, users can also change the printer IP address by using Mac.
Before keying in the IP address, you have to find out your printer's IP address.
This can be done by holding the feed button and power on the printer.
A configuration sheet will be printed out with the printer's IP address on it.
In this example, the initial IP address for each device is:
Mac - 192.168.0.166
Subnet Mask - 255.255.255.0
Router - 192.168.0.1
Printer - 192.168.192.168
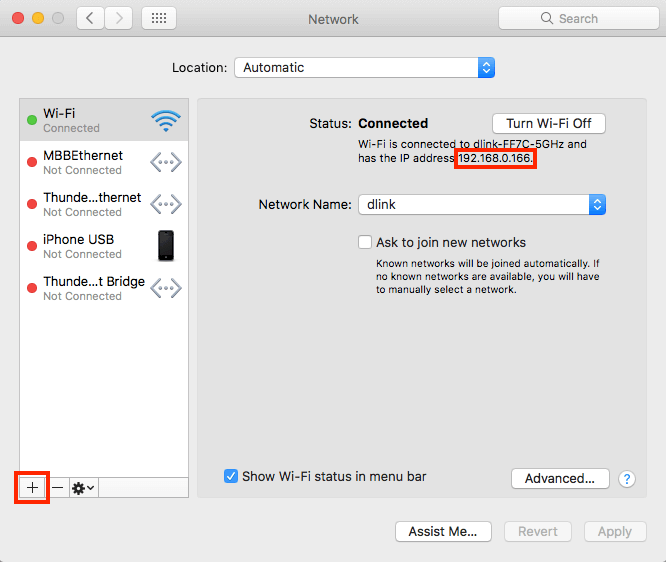
1) On the top right of the Mac screen, click on the Wi-Fi icon.
Then, click on 'Open Network Preferences...'.
Upon clicking it, the screen will be shown as below.
As shown in the image below, the Mac IP address is 192.168.0.166.
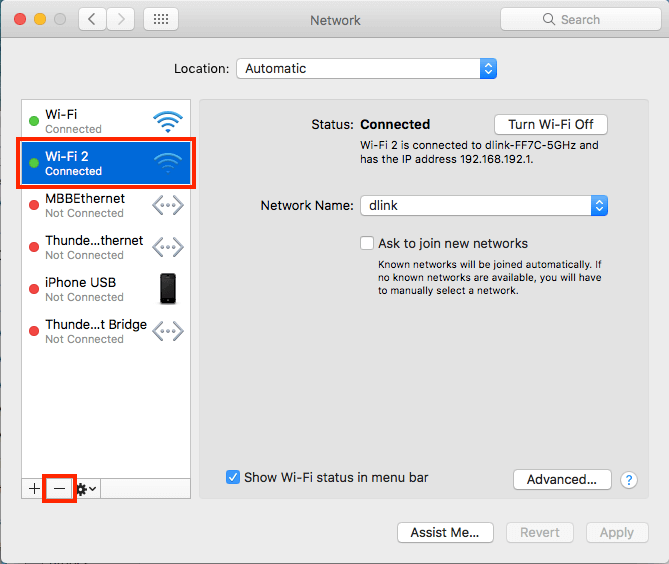
2) Click on the '+' button on the left bottom corner as shown below.
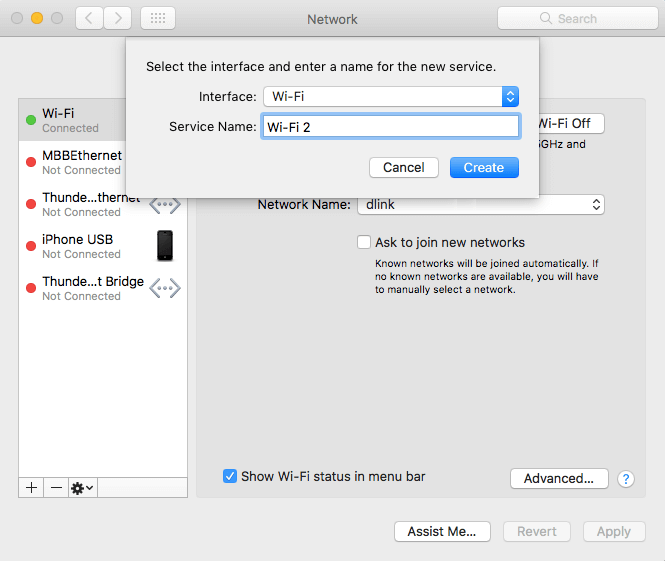
3) Upon clicking the "+" button, there will be a pop-up shown.
Select "Wi-Fi" and leave the Service Name as Wi-Fi 2.
Then, click on "Create".
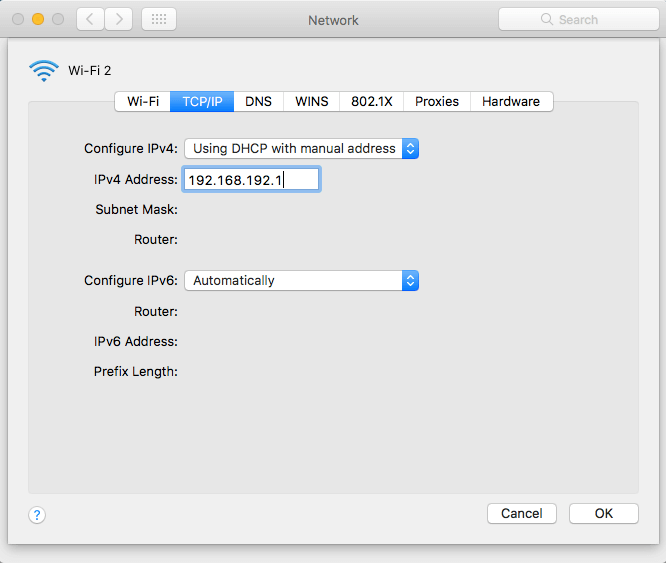
4) Now, reset the IP address for Mac.
On the top bar, click on TCP/IP and choose 'Using DHCP with a manual address'.
Then, under IPv4 Address, key in the new Mac IP address as 192.168.192.1.
Proceed to click 'OK' and click 'Apply'.
5) Next, go to Safari or Google Chrome browser.
Type in the IP address of the printer, "192.168.192.168" and press enter.
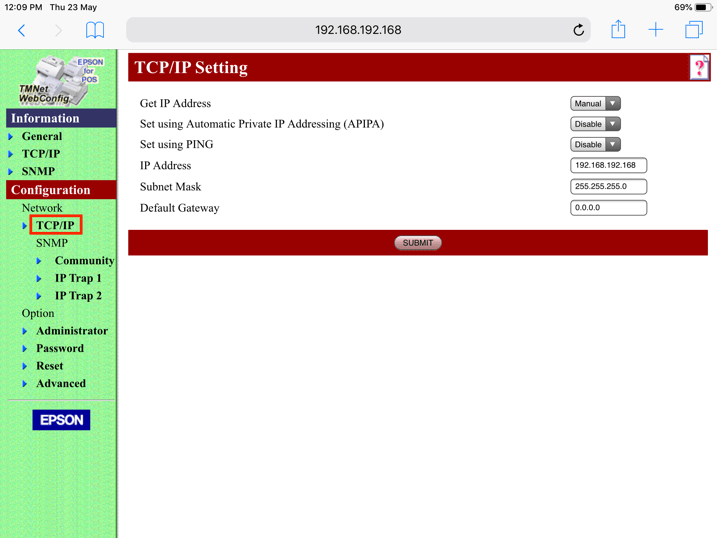
Users should be able to see the printer configuration page as shown as below.
Then, click on "TCP/IP" to find the IP address.
6) Under the IP Address tab, key in the new printer's IP address as shown below.
Then, click 'Submit' to proceed to reset the printer.
Now, the IP address for the printer should have changed successfully.
Next, go to MobiPOS application, key in '192.168.0.200' as the IP address and 9100 as the port.
Do a test print to see if it works.
If it does, go back to your Mac, select Wi-Fi 2, and click the '-' button on the left bottom to delete this network.
The IP address of each device now should be:
Mac - 192.168.0.166
Printer - 192.168.0.200.
Router - 192.168.0.1
All the devices now share the same subnet.