Guide | MobiPOS > Settings > Settings > General
General Settings
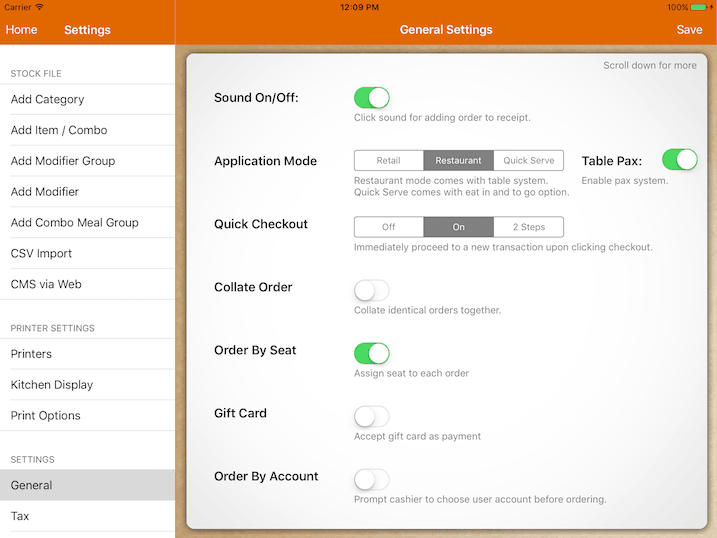
Application Mode
Retail - No transaction type selection. Table system will be disabled.
Restaurant - Transaction default to take away, assign table to transaction for dine in.
Quick Serve - Comes with Eat In & To Go option, default to Eat In.
Table Pax
Disable the option to enter pax while taking order for a table.
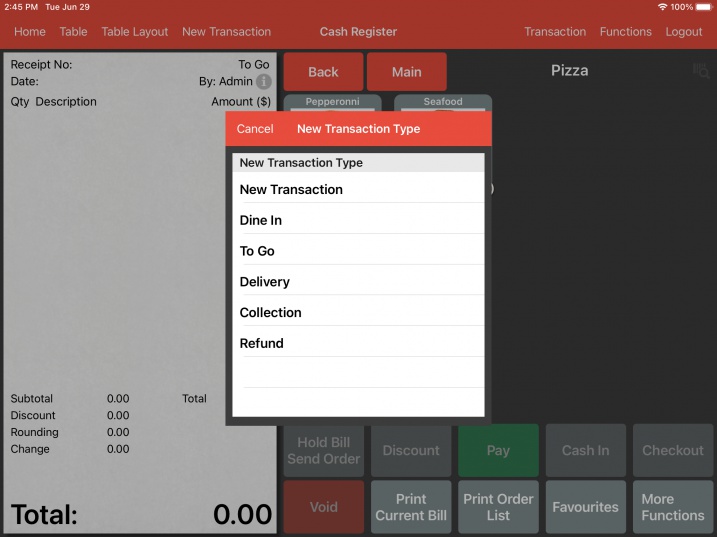
Enforce Transaction Type
If transaction type is not selected, a pop up will be displayed to force staff to select the transaction type upon ordering as shown in screenshot below.
Enforce Table Entry
To enforce each transaction to be assigned to a table, if table is not selected an error will pop up.
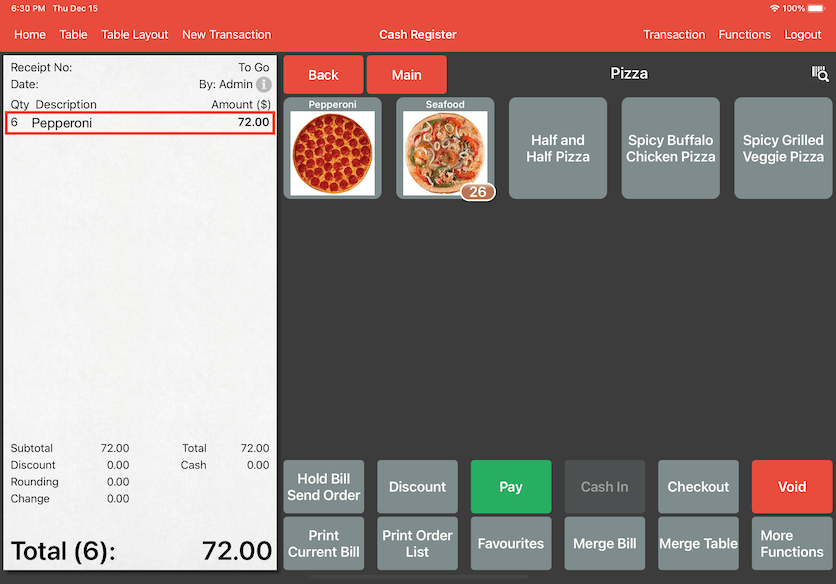
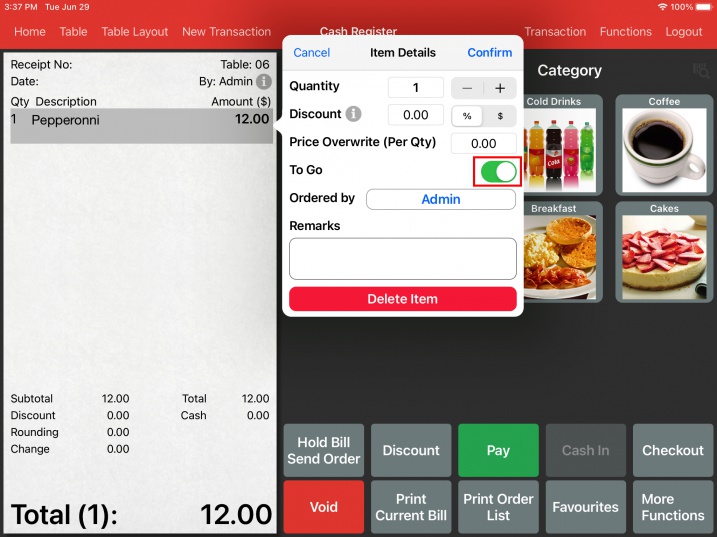
With all transactions forced to be assigned to a table, the only way to do "To Go" orders is to edit in the item details.
A bill example of table 06, but the order is actually a "To Go" order.
This setting can be customized to individual terminal/device, perform the saving in the actual device to make it unique from others.
You can configure iPad B and C to be enforced with table entry, but iPad A to not have this option.
This allows you to do "To Go" orders in the iPad A, while staff with iPad B or C needs to assign a table before ordering.
Quick Checkout
Off - Checkout button will be disabled. In order to close a bill, you are
required to click on Pay, Cash In then Checkout.
On - Checkout button will be enabled. One click on Checkout button to close the bill.
2 Steps - An extra Done click is required upon checking out.
Collate Order
Collate identical orders together.
Ordering 2 product A will appear 2 X product A instead of 2 line item.
Identical orders will not collate if one of the order has been sent to kitchen.
Order by Seat
Each order can be assigned with seat number or shared by the table.
Refer to this article for more info.
Gift Card
To accept gift card as a form of payment.
Refer to this article for more info on payment, activation and top up of gift card.
Order by Account
Upon hold or a new bill, pop up will appear for account selection.

All newly added orders's commission will be registered under selected account,
even if the current logged in user is not the same as selected account.
This is useful for the cashier to take orders on behalf of floor staff.
Bill Accessibility
Hide or disable user from accessing bill created by other user.
For admin type user, they will still be able to access bill created not by them.
Modifier Selection
Disable modifier's selection pop up if all modifier group under the item is optional.
To add extra modifier to this order, select the order in receipt and click Edit.
Rounding
Rounding follows the rule of rounding to the nearest.
Currency Symbol
Currency symbol will be printed in customer receipt and appear in each figure in application.
Modifier Symbol
By default, modifier symbol is set to "-".
As this is printed in the kitchen docket, they might mistake the "-" symbol to be "minus", which is to remove the modifier.
Change the symbol to the preferred choice of your operation.
Receipt Prefix
Receipt prefix will append to each receipt number.
Operation Hour
Operation hour affects report generation and it is fixed to 24 hours.
If your store operates from 10:00 a.m. to 10:00 p.m, we recommend 00:00 a.m. as the start time and 11:59 p.m. as the end time.
You should not set 10:00 a.m. as your start time even if your outlet
opens at that hour, because occasionally you might close bill earlier than the start time.
In this case, this particular transaction will be missed out from the report.
Outlet Name
Outlet name is shown in the email title if email receipt function is used.
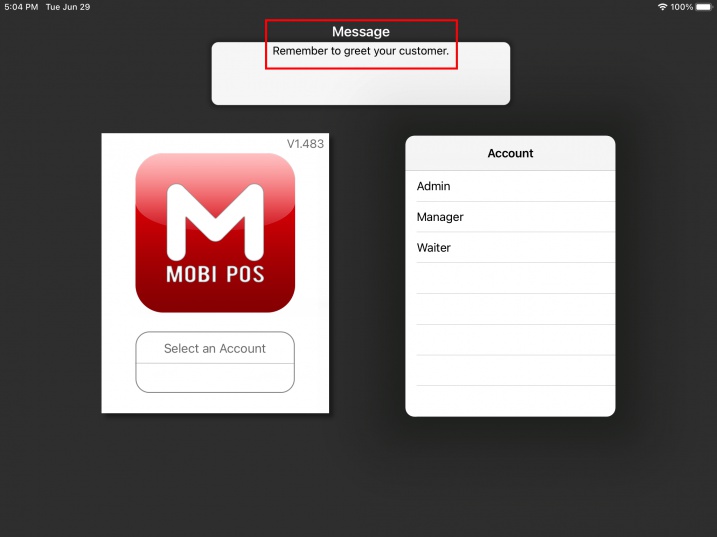
Outlet Message
A message that will be shown in the login page, serves as a reminder to all your staff.
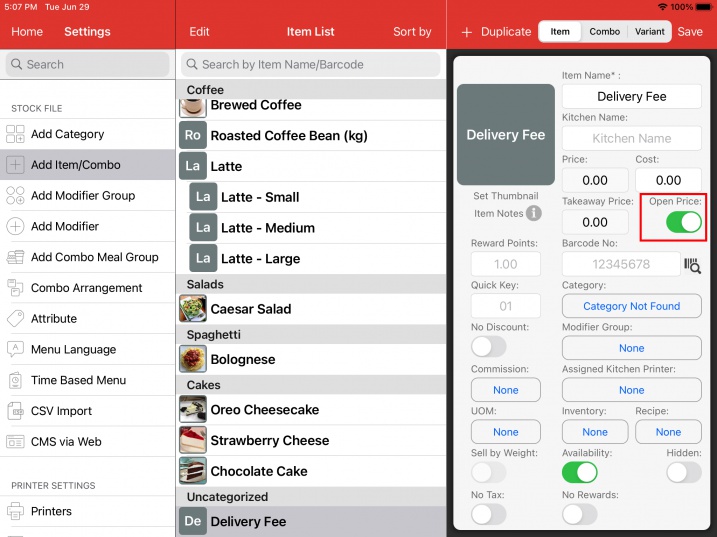
Delivery Fee
To support delivery fee in the system and online ordering, an open priced item has to be created before setting up here.
Proceed to Settings -> Add Item/Combo.
Upon doing so, click on Assign Delivery Item will show you the list of available open priced item.
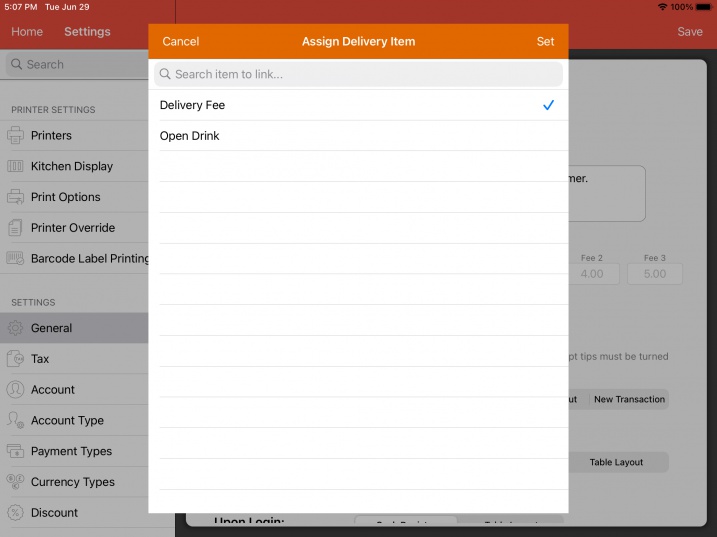
Select the item of your choice and proceed to click on Set.
You can configure 3 preset fees which will be available when you create a delivery order.
Preset fees that are configured here will not affect the calculation in online ordering.
Prompt Tips
If the payment type is configured to prompt tips, a tip suggestion based on the configured amount will pop up in both terminal and customer display, requesting staff or customer to select a tip amount for the bill.
This can be useful to increase average tipping amount for each bill.
Refer to this guide for more info.
Upon Hold
Option to logout user or proceed to table layout screen when user click on Hold Bill Send Order button in cash register.
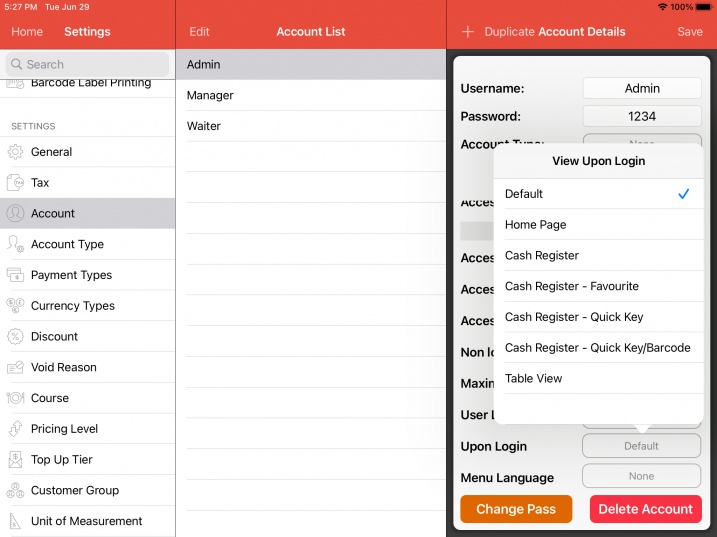
Upon Login
Configure the default page to display upon logging in.
This will affect all account except full admin account which is default to "Home Page".
To configure each individual account to a different page, it can be configured at Settings -> Account as shown in the below screenshot.
Login By Password
By Default when your staff login, they are required to choose their account before
typing in their password.
This might slow down the login process when the number of staff get huge.
By using Login By Password, they are not required to choose any account before typing in the password.
However to use this option, you have to make sure all account's password is unique.
To speed things up further more, you can use Login By QR Code.
Whenever the login screen appear, the iPad front facing camera will be turned on.
You just have to flash the QR Code image that contain your login password.
System will decode the QR code and login automatically.
An example of QR code with the password of '1234'.
In actual scenario, you can print this QR code and paste it on a physical card, then laminate it.
Your staff will hold the physical card, whenever they need to login, just flash the QR code to the iPad
front facing camera.
There are plenty of QR code generator online, you can google them.
Print Clock In/Out
Clock In/Out chit will be printed when a user clock in or clock out.
Total clocked hours will be calculated.
App's Language
Select the language you preferred for application interface.
You could also change the application language interface based
on the logged in user.
This can be done under Settings -> Account
-> User's Language.
Changing app's language will change printing language as well, however
user's language will not affect printing.
Refresh Language
Each language that is listed might not be fully translated.
You could help us to translate by logging into CloudSync -> Settings or click here.
Upon translation, click on Refresh Language to retrieve the updated language files.
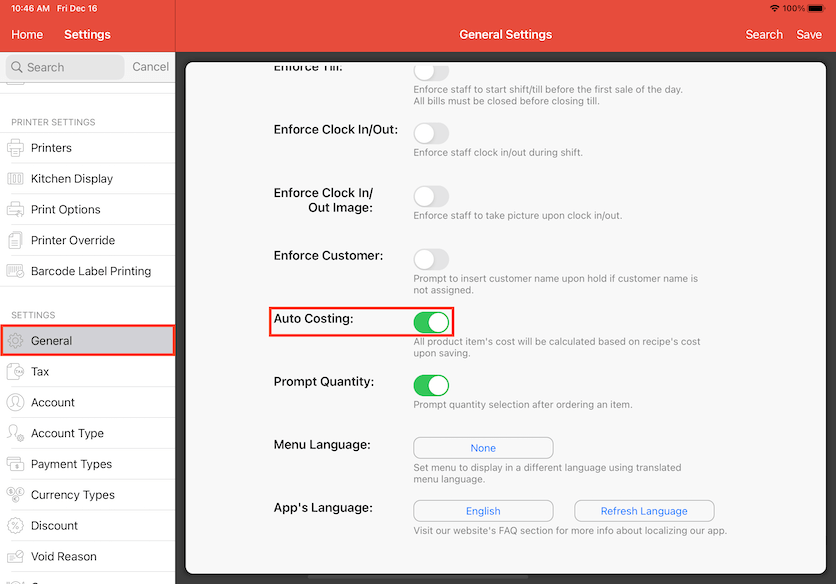
Auto Costing
Auto costing will affect the cost of main items if the cost of recipes are changed. This is relatively convenient since you do not have to update the cost of main items manually and all cost changes of recipes will be reflected.
Taking a Burger as an example, the cost of ingredients have increased. By changing the cost of the ingredients, the system will update the cost for the Burger automatically.
To begin, go to Settings and select General. Click to turn on Auto Costing.
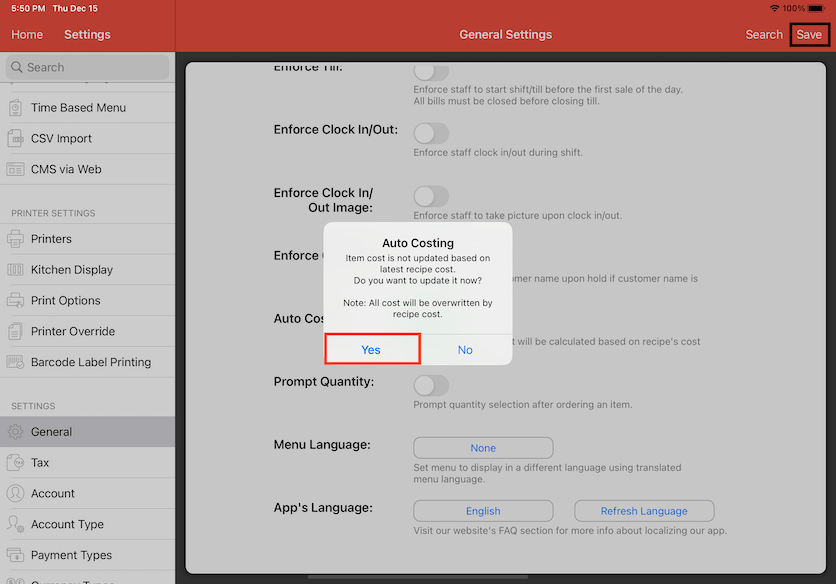
When Auto Costing is enabled, a tab will pop up to inform you about the cost changes of the main items based on the cost changes of the recipes. This will overwrite the cost of any existing item that is different from the recipe cost. Click Yes to continue. Click Save on the top right corner after.
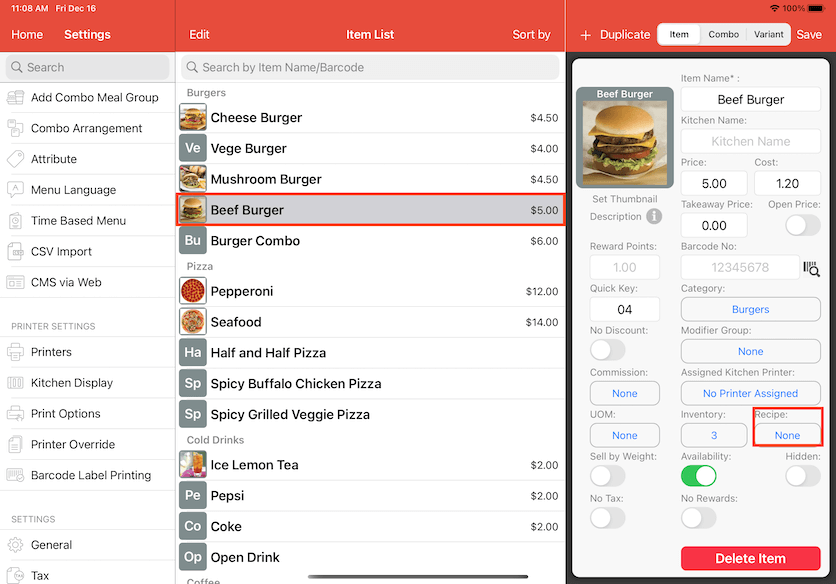
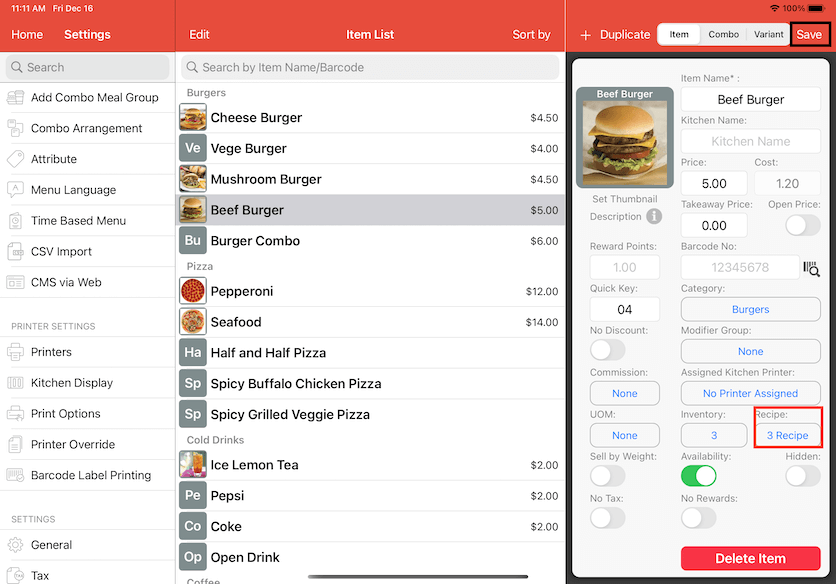
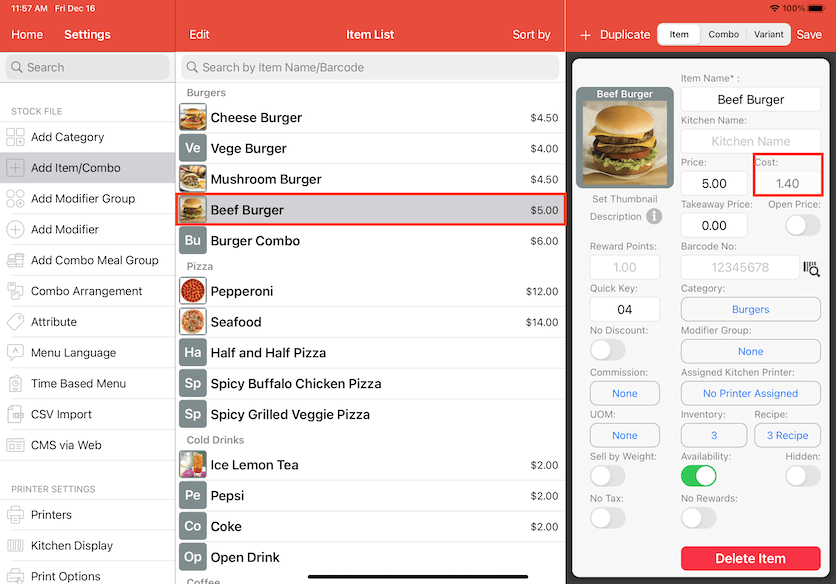
Go to Settings and select Add Item/Combo. In this case, a Beef Burger is selected as the main item. Click on the Recipe to assign the recipes to the Beef Burger.
Insert the recipe name and press Enter in the search bar. Click on the recipe and it will appear on the right under Item's Recipe with the cost shown.
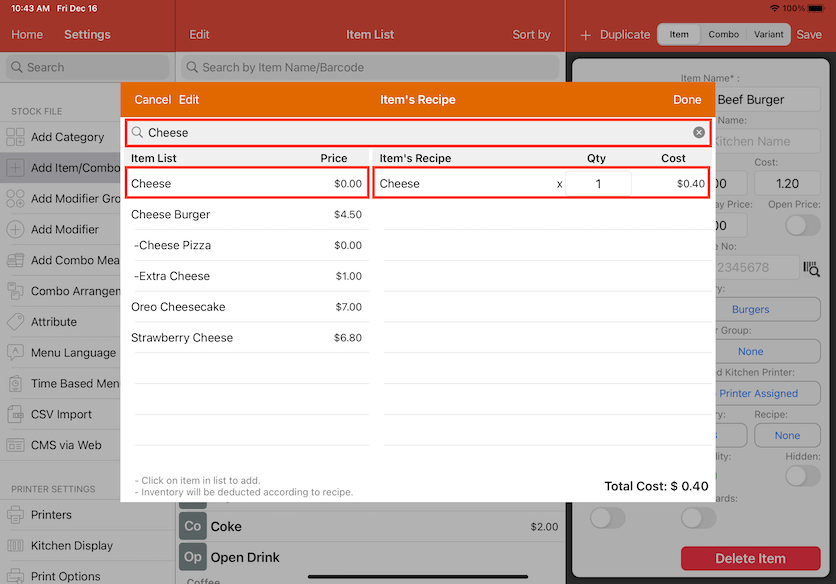
Multiple recipes can be assigned to the item. Patty and Bun have also been added to Item's Recipe. Click Done to proceed.
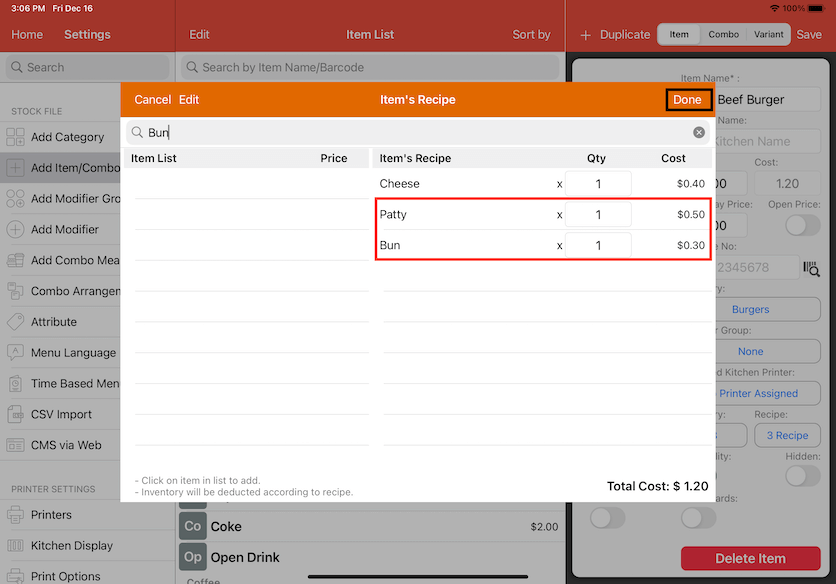
Now it shows 3 recipes assign to the Beef Burger. Click Save to finalise.
Note: the current cost of the Beef Burger is $1.20 and you are unable to change it when Auto Costing is turned on. In the next step, we want to update the cost of the recipes.
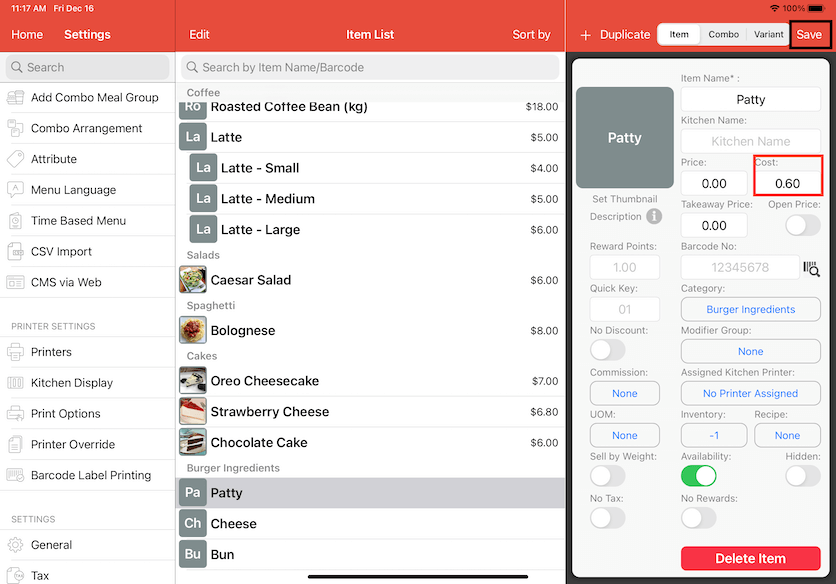
Select the assigned recipes to Beef Burger in Add Item/Combo to change the cost. Patty is selected. Simply click on the numbers to change the cost.

The cost is changed to $0.60 from $0.50. Click Save on the top right corner after.
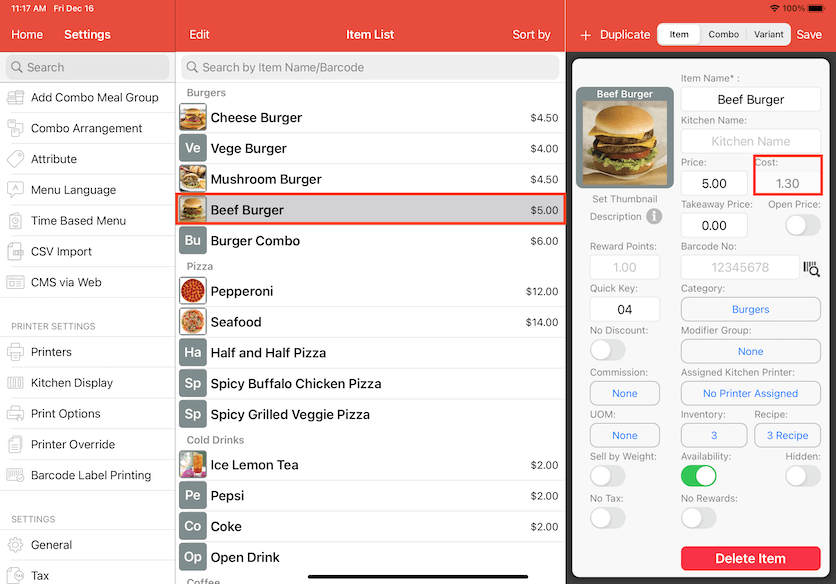
Select the Beef Burger again to check if the new cost is reflected. Now it shows the new cost at $1.30. The initial Beef Burger cost was $1.20 before we updated the cost of Patty.
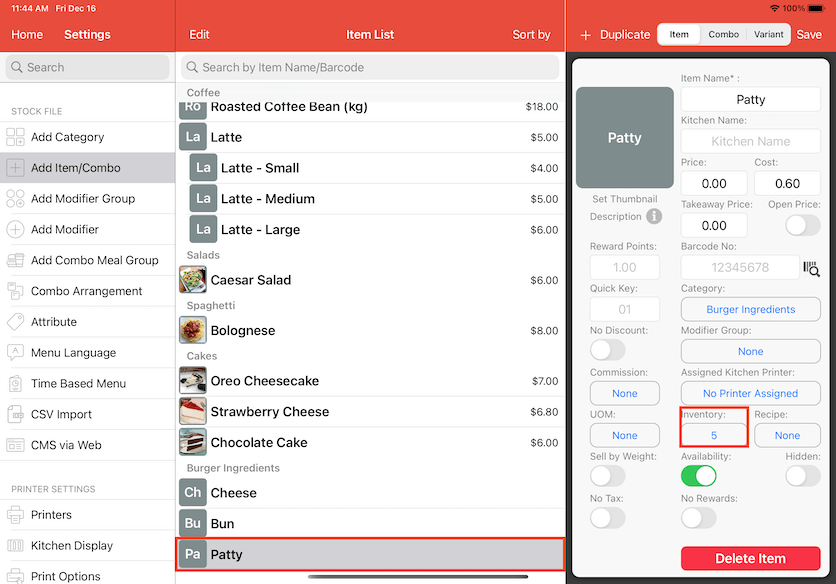
The cost of the recipe will also be affected when there is an adjustment to the inventory. For example, adding new stocks into inventory with a new cost when there are still old stocks present will change the cost of the recipe. In this scenario, we want to add new Patty stocks into the inventory. Click on the number to edit Inventory.
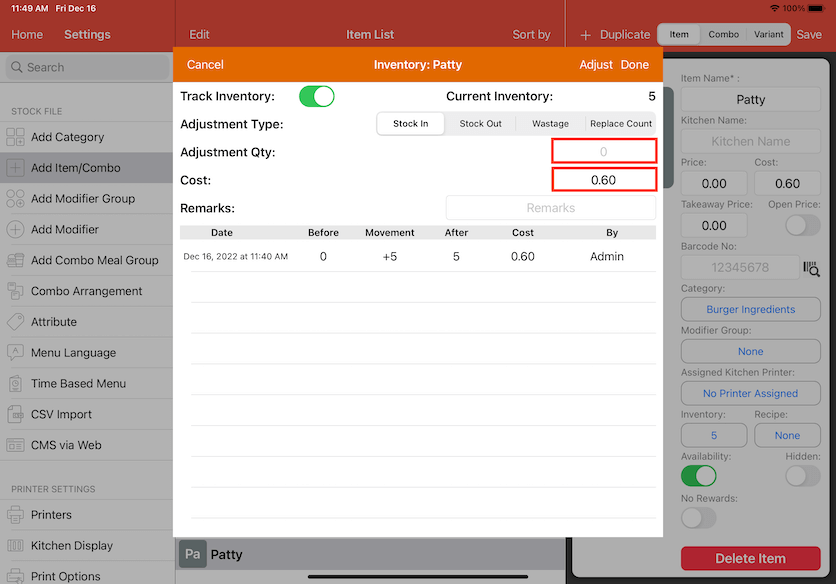
Insert the amount of new Patty stocks in Adjustment Qty. After that, click on the number to update the new cost of Patty.
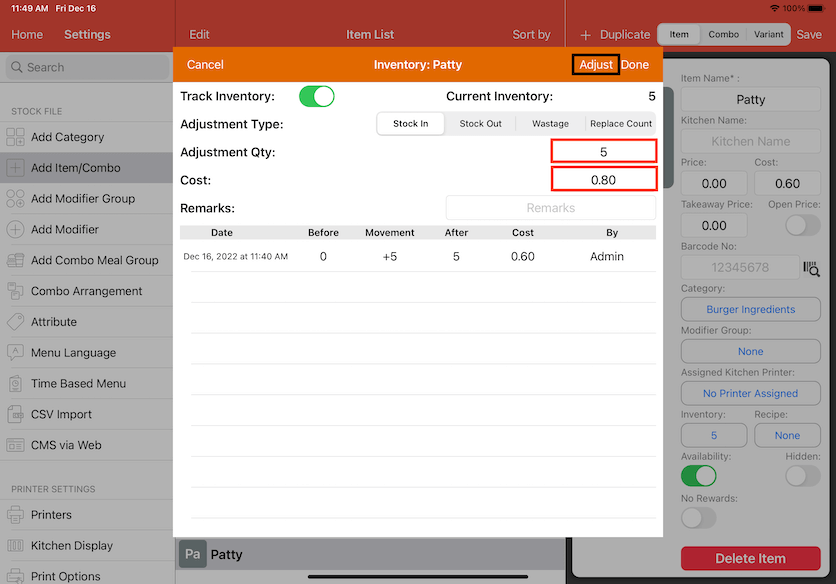
There are 5 new patties to be added and the new cost is $0.80. Click Adjust on the top.
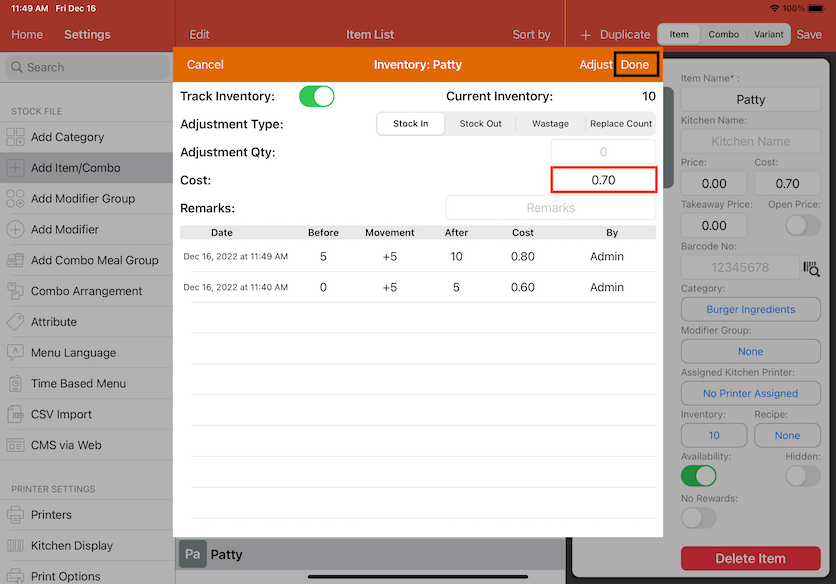
Now it shows the changes under Remarks where the new cost and quantity have been entered. The system has also change the cost of Patty by averaging the old and new cost. The new cost of Patty is $0.70. This will also reflect cost changes to Beef Burger. Click Done after.
Select Beef Burger again and you can now see the new cost being updated automatically at $1.40.
Note: There can be 2 layers of changes only when it comes to changing the cost of recipe. Meaning, it will affect the cost of the items assigned.
For example, Patty is assigned to Beef Burger and Beef Burger is assigned to Burger Meal. Changing the cost of Patty will change the cost of Beef Burger and Burger Meal automatically. However, there cannot be more than two layers of changes so if Burger Meal is assigned to another item, the cost changes cannot be reflected for that item.
Modifier Group on Category
This guide explains how to assign a Modifier Group to a Category without having to assign it to individual items. For example, we can assign Sugar Level as a Modifier Group to Bubble Tea instead of assigning it to individual bubble tea flavours. Refer to the example below detailed explanation.
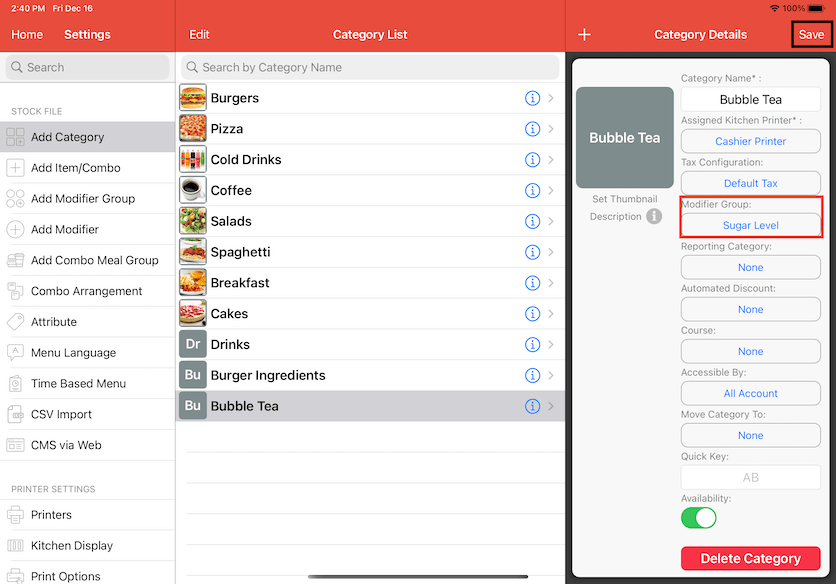
First, go to Settings and select Add Category. Bubble tea is selected as a Category. Click to edit the Modifier Group.
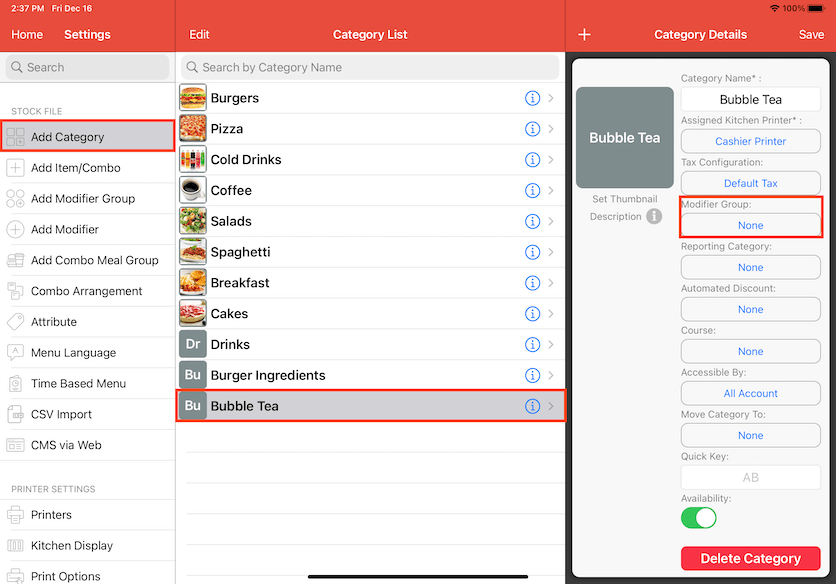
Now it shows the available Modifier Groups. We want to assign Sugar Level to Bubble Tea so click on the Modifier Group.
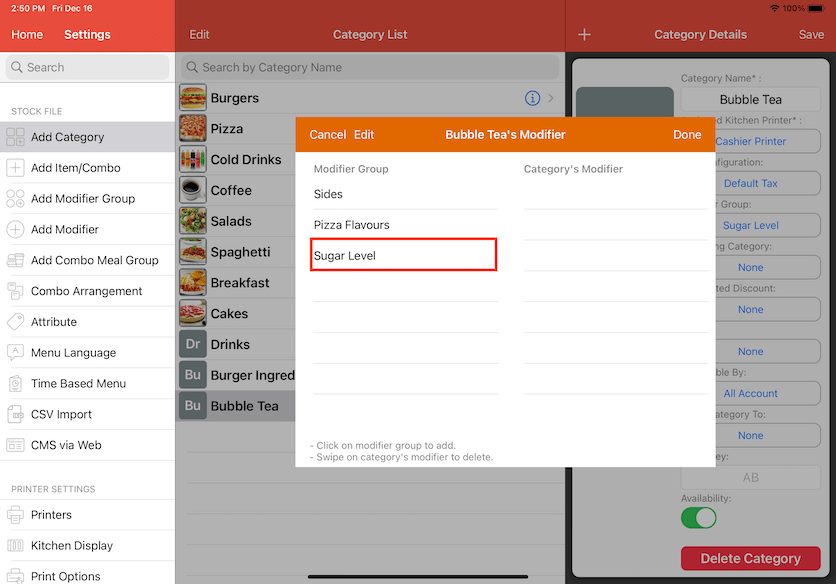
Sugar Level will appear on the right under Category's Modifier. Click Done after.
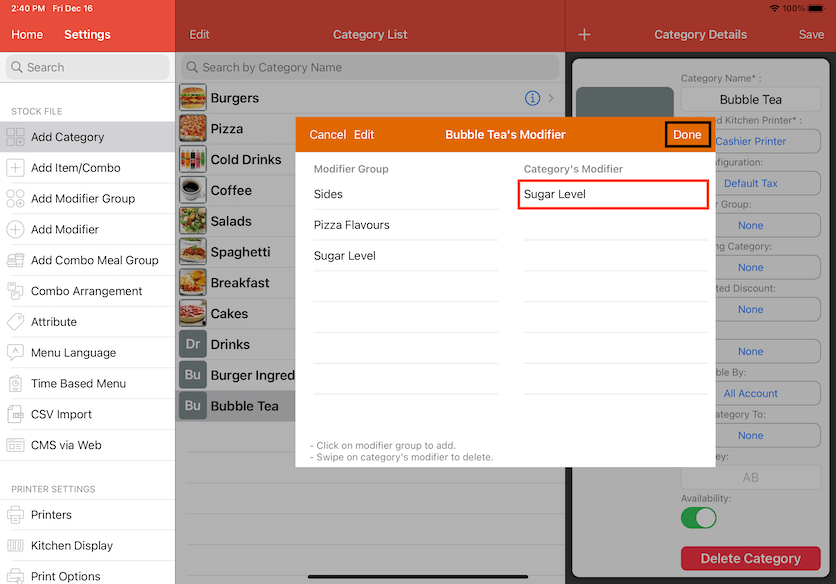
Sugar Level is now assigned to Bubble Tea. Click on Save to finalise the changes.
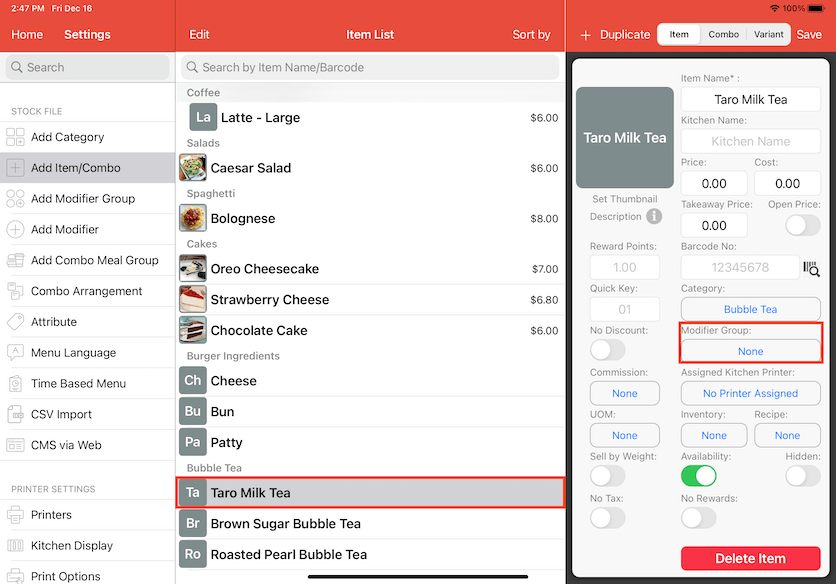
Although the Modifier Group has been assigned to a Category, it will not show up in individual items. But all items under that Category will still be affected when ordering in Cash Register.
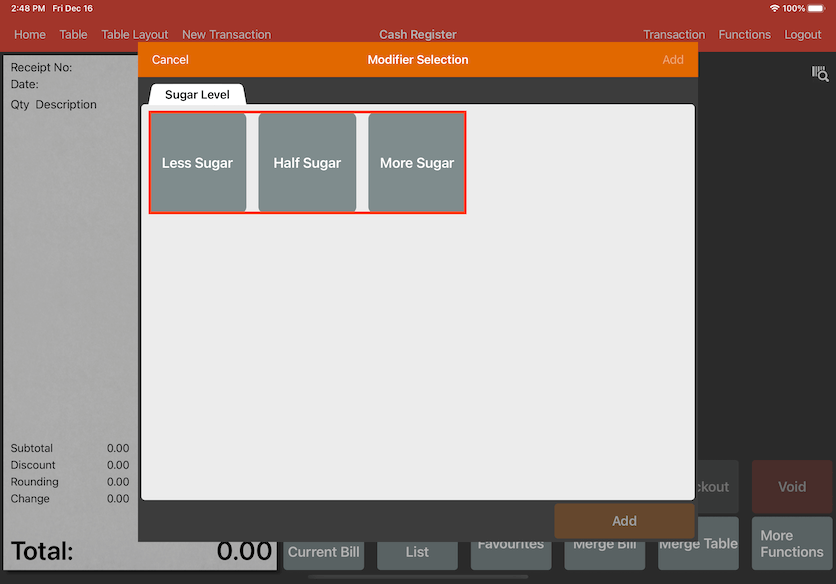
For example, Taro Milk Tea is an item under Bubble Tea (Category). Sugar Level is the Modifier Group that was assigned to Bubble Tea, so all items including Taro Milk Tea will have Sugar Level as their Modifier Group when ordering in Cash Register.
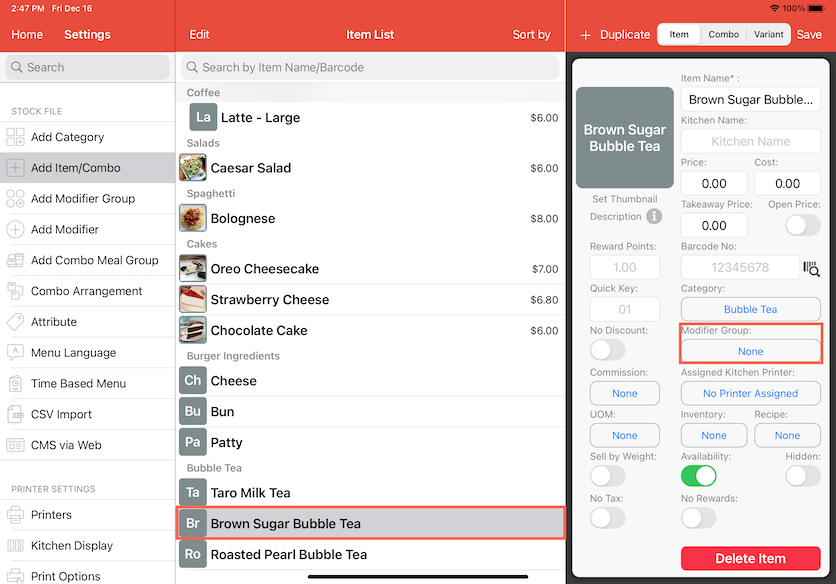
Another example, Sugar Level also does not show up as a Modifier Group in Brown Sugar Bubble Tea.
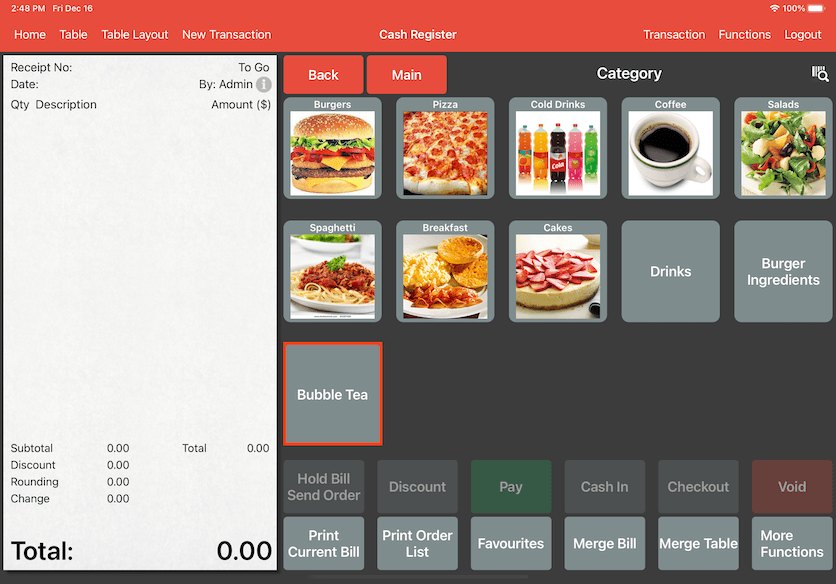
Now we will try ordering a Bubble Tea to see if the Modifier Group have been reflected on individual items. Select a Bubble Tea in Cash Register.
Select your item. We have selected Taro Milk Tea in this example.
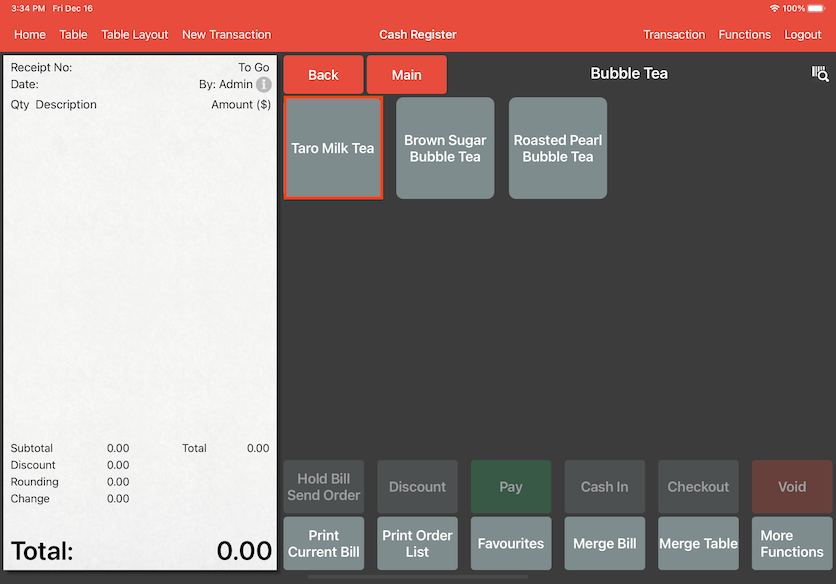
Now we can see the Modifier Group is present when ordering Taro Milk Tea.
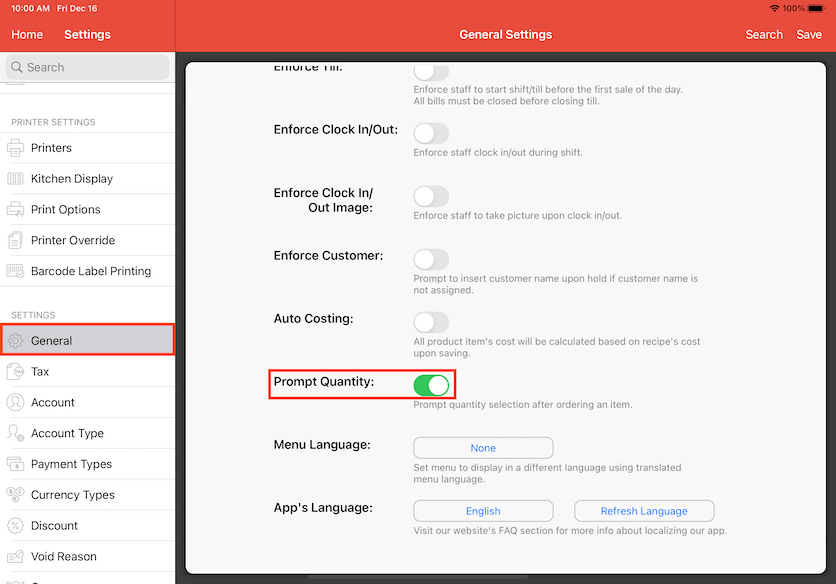
Prompt Quantity
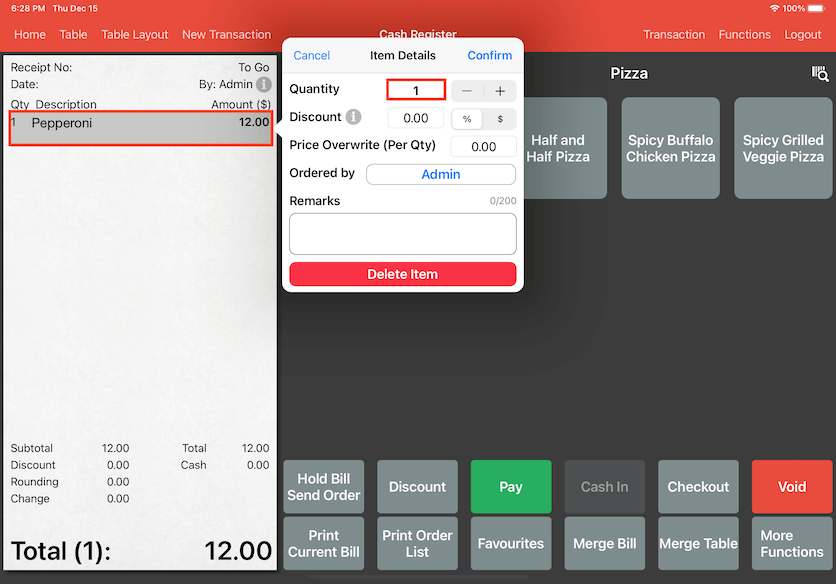
Prompt quantity allows you to change the quantity right away while selecting your items in Cash Register. This is especially useful when it comes to bulk ordering of items.
To change the quantity the usual way, you can click on the item in the bill and item details will show up for you to edit the quantity. This can be troublesome and time consuming if you need to do this for every item which contains multiple quantities.
To configure Prompt Quantity, go to the main page and select Settings.
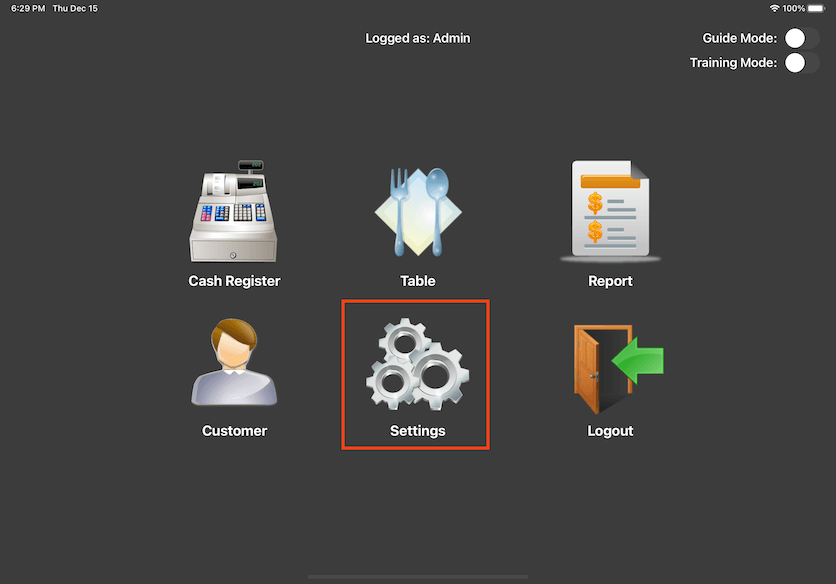
Select General then click to turn on Prompt Quantity.
Once Prompt Quantity is turned on, select your items in Cash Register. The quantity tab will pop up immediately and you can edit the quantity. Click on Set on the top right to exit the tab.
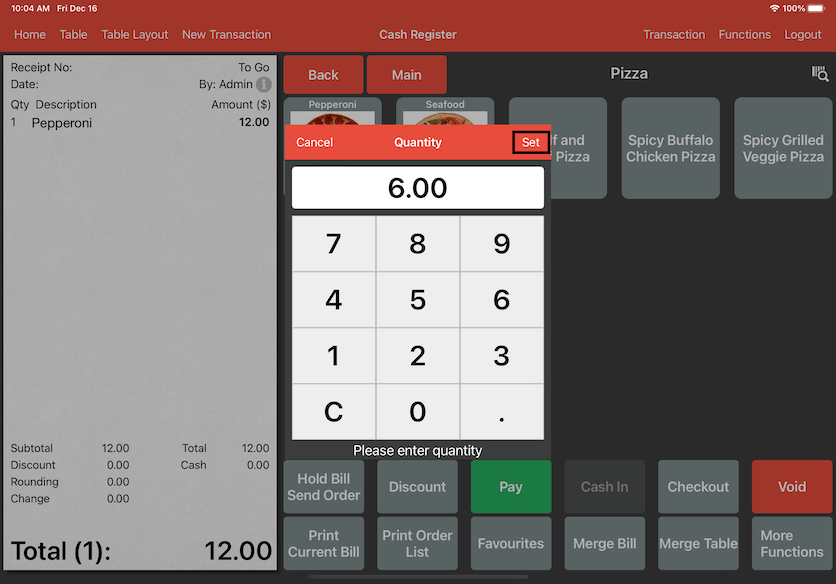
The quantity will now appear in the bill beside the item.