Guide | MobiPOS > Terminal Setup > iPad Terminal Setup
iPad Terminal Setup
This guide explains about secondary iPad terminal set up and pairing.
The image above is a sample of a terminal setup.
Secondary Terminal (iPad)
Generally, we refer the main iPad as the main POS or main terminal which acts as the server while the term secondary terminal is used to
refer to any secondary order sending device.
User is required to have an additional iPad with MobiPOS downloaded.
To set up multiple terminal ordering for a secondary terminal, please follow the instructions below:
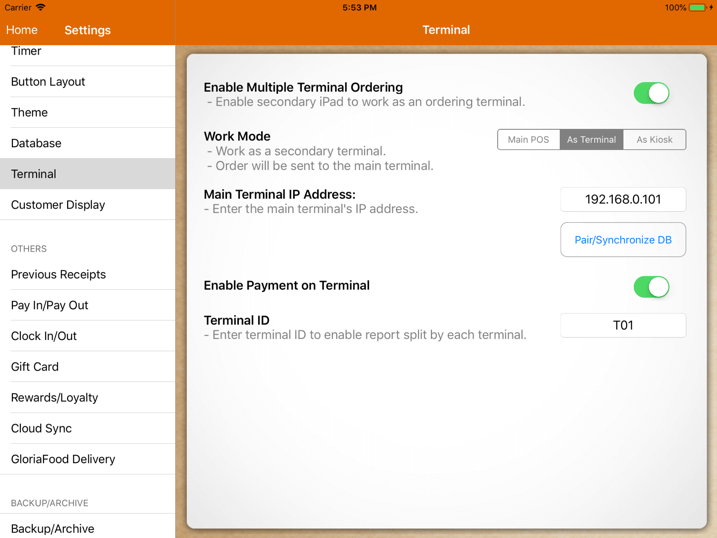
1) In your secondary iPad app, under Settings -> Terminal, turn on the switch of Enable Multiple Terminal Ordering on the right.
2) Beside Work Mode, select "As Terminal" instead.
3) Upon selecting the work mode as "As Terminal", insert the main terminal IP address.
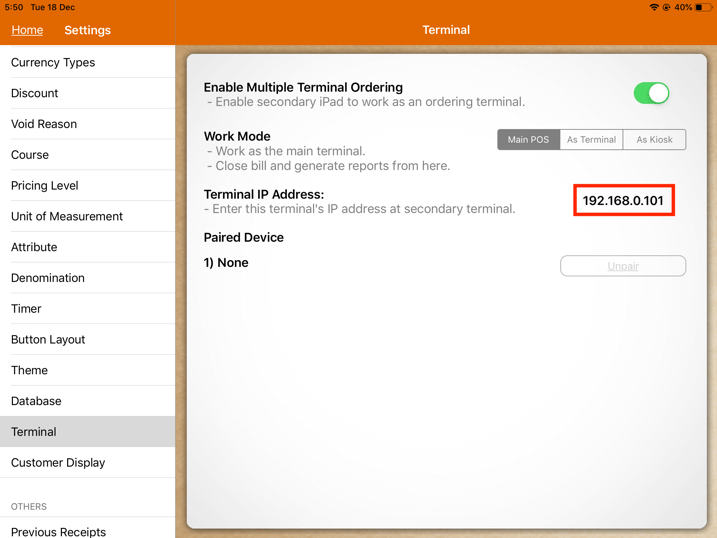
To obtain the main terminal IP address, at the main POS, go to Settings -> Terminal.
The main terminal IP address can be obtained beside the text field "Main Terminal IP Address".
The main terminal IP address from the main terminal is shown as the image below.
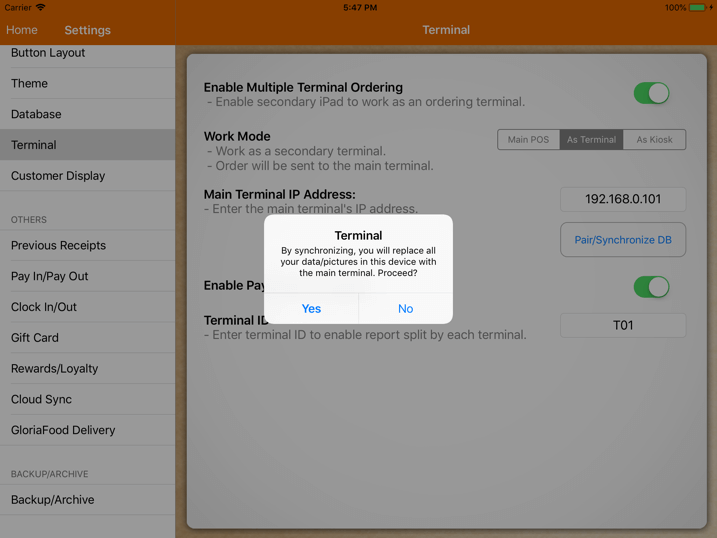
4) Tap on "Pair/Synchronize DB".
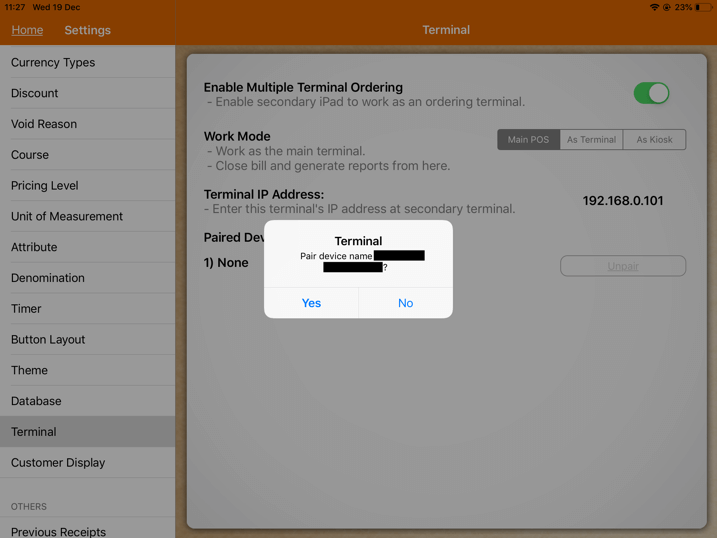
5) For initial synchronization, the screen pops out an alert as shown below.
In order to pair it, select "Yes".
The pairing will be canceled if "No" is selected.
Upon selecting "Yes",
there will be an alert in the main POS asking for approval to pair, as shown below. Select "Yes".
Now at the secondary terminal, the synchronization starts.
Do note that the terminal retrieves all information from the main POS and erases its own.
If pairing is done in the wrong direction, you might lose all information.
For example, trying to pair from the main POS which contains all your information with a device
that contains only the demo information.
Enable Payment on Terminal
By default, the added terminal is not able to close bills.
At the secondary terminal, turn on the switch beside "Enable Payment on Terminal" to allow the terminal to checkout bills.
Assigning Cashier Printer in iPad Terminal
When payment is enabled in the terminal, the bills will printed at the main POS' cashier printer by default.
In order to have their own designated cashier printer, make sure the cashier printer is already in the printer list setup.
Setting up or adding a new printer can only be done through the main POS.
At Main POS
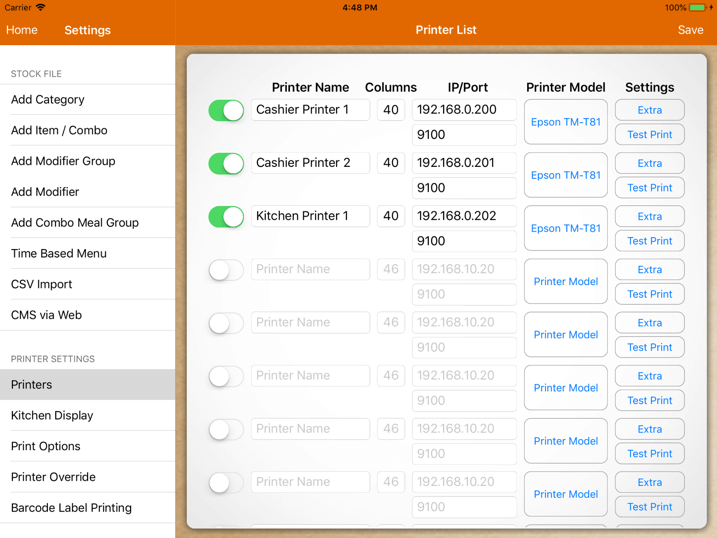
Go to Settings -> Printers.
Insert all the relevant information, then tap on "Save" at the top right corner as shown below.
In this example, we are using "Cashier Printer 2" as the terminal's printer.
To know more about printer configuration, kindly refer to
Printers for guideline.
At Secondary Terminal
In order to get the updated printer list that has been set up at the main POS previously, the user has to sync with the main POS again.
Upon synchronization, go to Settings -> Print Options.
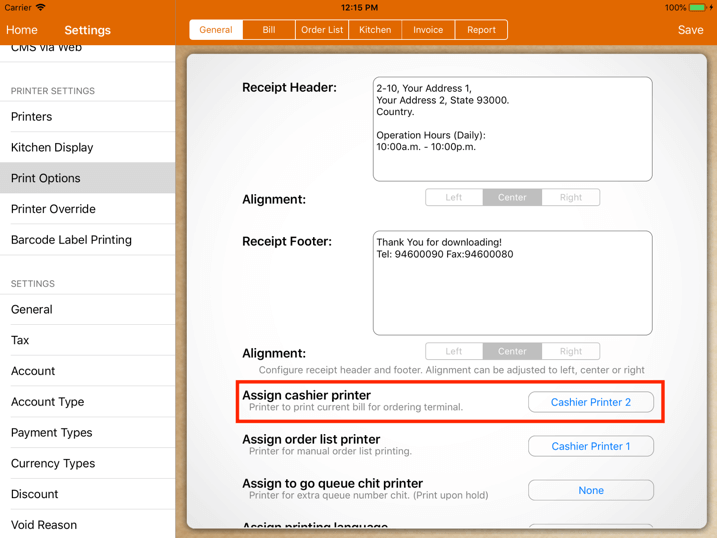
Then, tap on the button beside Assign cashier printer.
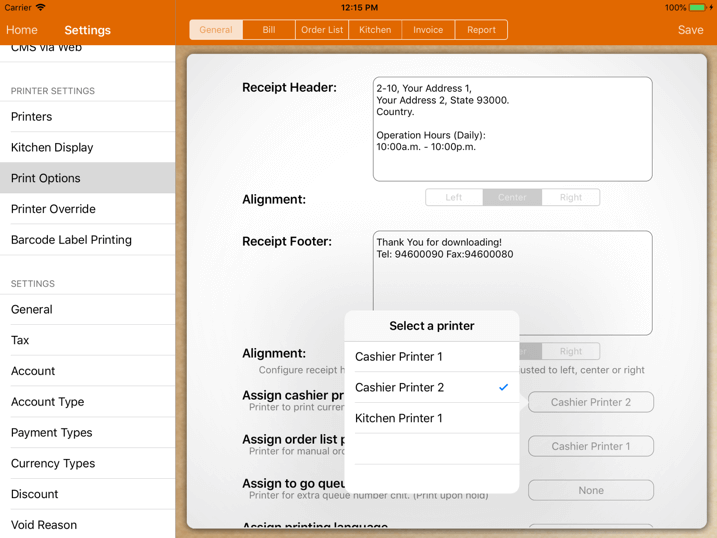
Upon tapping, there will be a list of printers that have been set up at the main POS earlier.
Next, from the list, tap the desired printer to be assigned to this desired terminal.
With this setup, when the main pos checks out, the bill will be printed at "Cashier Printer 1" and the cash drawer will be popped out at that station.
While in this iPad terminal, the bill will be printed at "Cashier Printer 2" and the connected cash drawer will pop up accordingly.
Terminal ID
The terminal ID is used as an identification of the device, users can insert any desired name.
With this terminal ID, user will be able to have a separate sales report for the terminal.
This can also be used to set up time-based menu for each individual terminal.
If the user has enabled payment in the terminal but did not insert Terminal ID,
all the sales reports from the terminal will be combined with the main POS in a single report.
To know more about time-based menu, kindly refer to our
Time Based Menu guide.
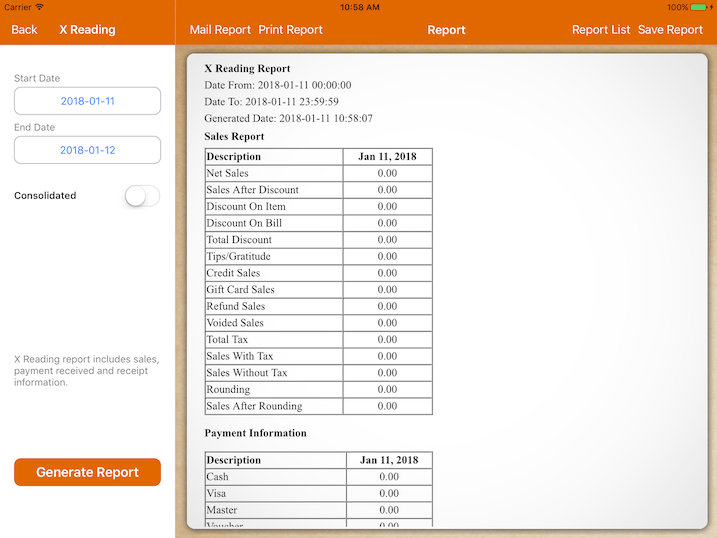
In order to obtain individual terminal reports, go to Report -> Terminal Report.
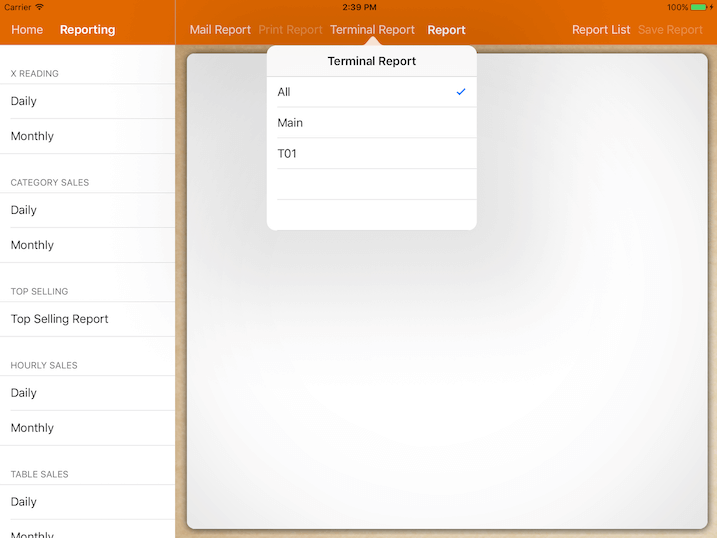
If there are sales coming from different terminals, there will be a report for each terminal,
provided that there is a terminal ID for each terminal.
For example, when there is only one secondary terminal, there will be 3 types of report.
A consolidated report, a separate report for the main terminal, and T01 (secondary terminal).
If there is no secondary terminal, the terminal report selection button will not show up.