Guide | MobiPOS > Table > Table Operations
Table Operations
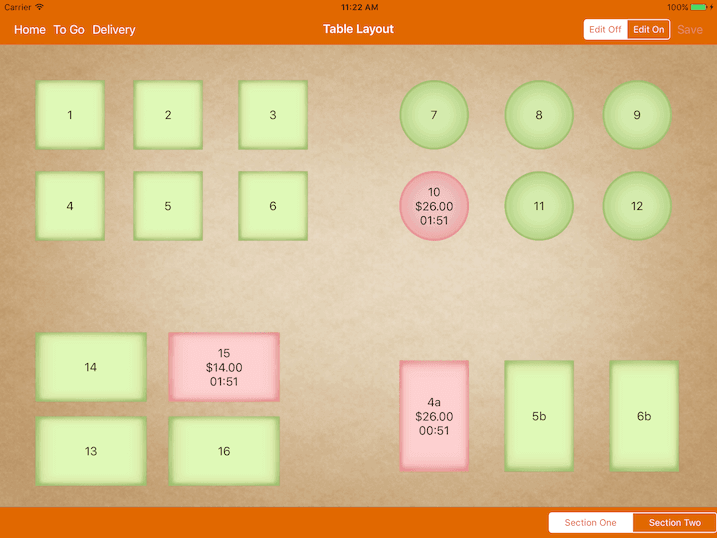
Table Overview
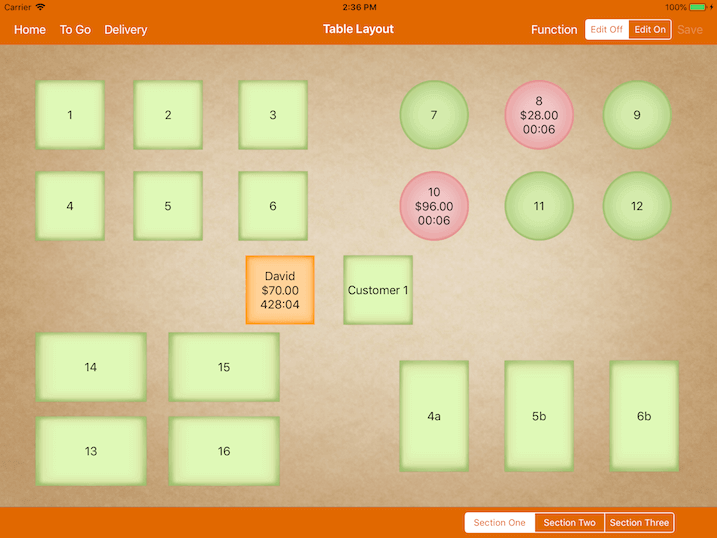
In the table layout, the status of the tables is shown with different colors:
Green - Not occupied and available.
Red- Occupied and the subtotal amount and time elapsed since
the start of the bill in iXt will be shown.
Orange Occupied but with the current bill printed for the table.
Starting a Bill for The Table
To begin a sale, simply tap on a green table.
The system will prompt you to enter the number of pax, upon selecting the number of pax, it will proceed to the cash register screen.
* Pax = The number of customers present at that table.
View Table Bill
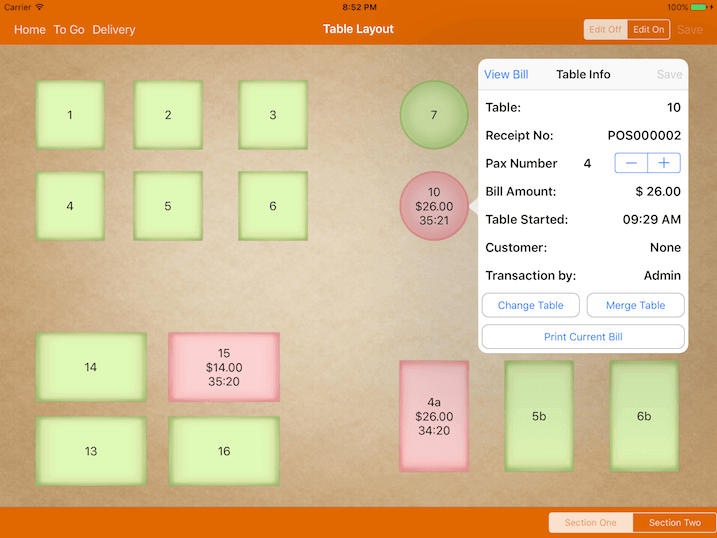
To view the bill, simply tap on the red table, then click View Bill at the top left corner of
Table Info.
The user can change the number of pax by selecting the "+" and "-" sign at the "Pax Number" category.
Print Current Bill
To print the bill, just tap on the occupied red tables.
Then, Table Info will appear. Select Print Current Bill at the bottom of the Table Info to print.
Upon printing the bill, the table color will turn from red to orange.
The user can print all current bills at one go if the table has multiple bills.
Switching Table Layout
To move between the layouts, simply swipe left or right or click on the table layout name below for quicker access.
To Go / Delivery
Although this is the table layout, there is a To Go and Delivery button as a shortcut.
Upon clicking 'To Go', cash register screen will appear with 'To Go' being set as the transaction type.
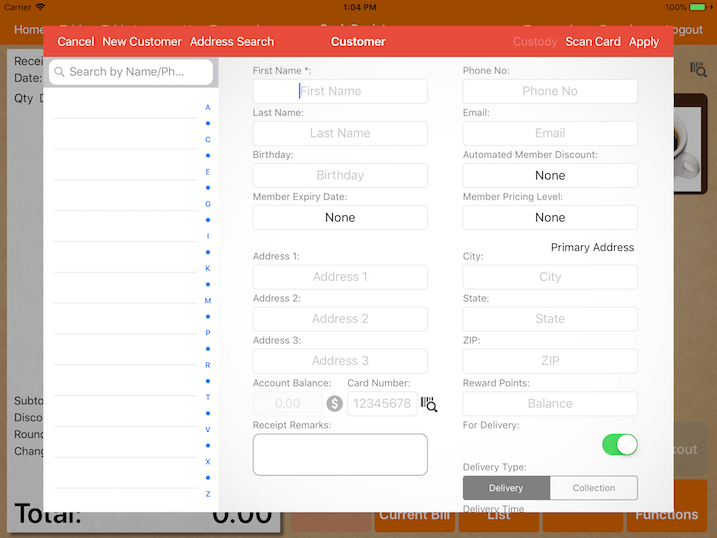
Upon clicking 'Delivery', it will prompt the user to key in customer details with delivery information.
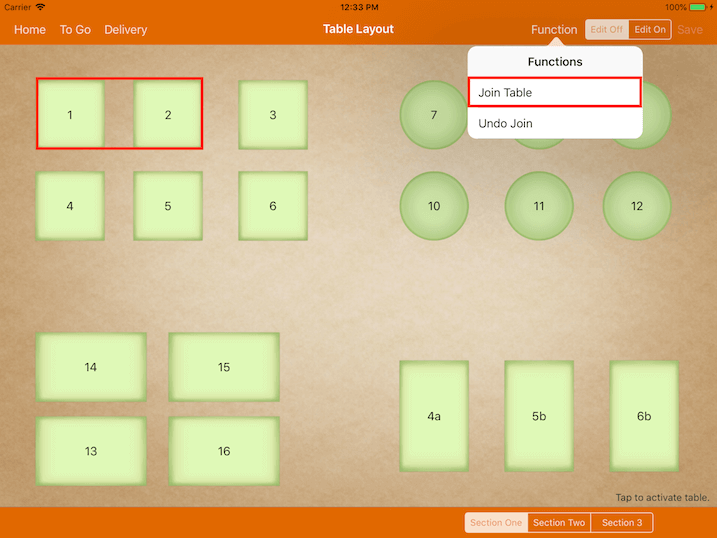
Join Table
This feature allows users to join tables when there is a big group of customers
which may require a few tables to get them seated.
To use this feature, click on Functions -> Join Table.
The user can join before or after the table is occupied, however it is advised to join the table before the start of the bill.
User can only join an empty table to a joined table but not otherwise.
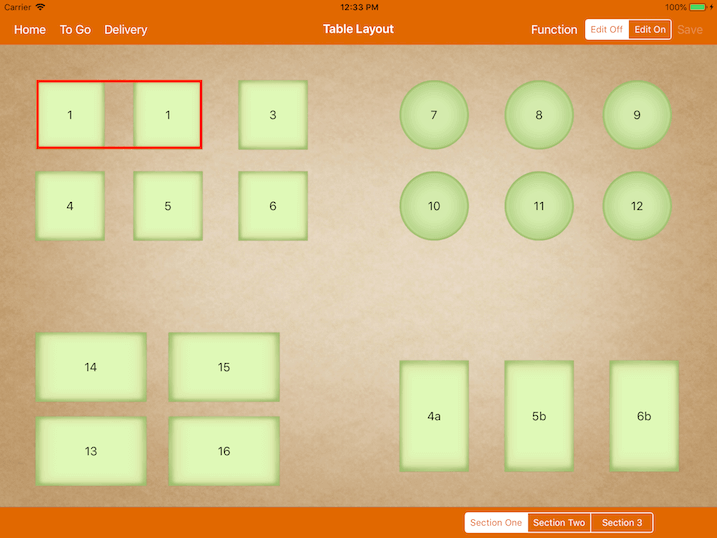
The photo below shows the tables before joining.
After joining the tables, the table that is first selected will change its name to the one selected after that.
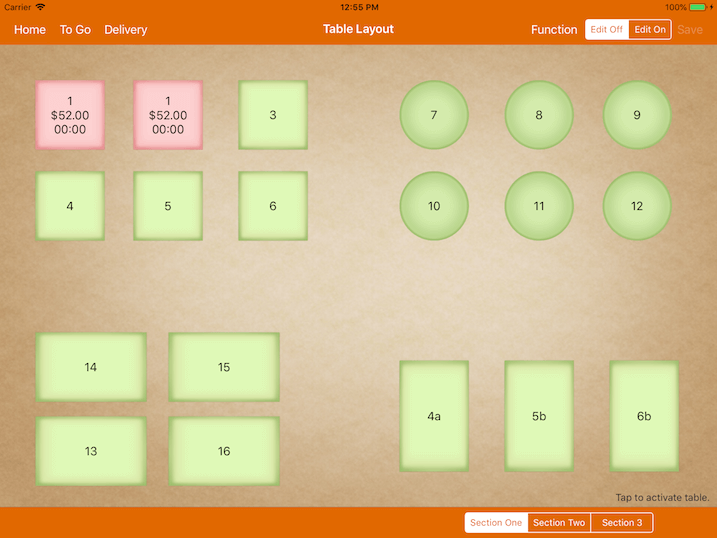
Upon ordering, all the orders will fall under one bill only as shown below.
In the current state, you won't be able to join Table 1 to any other table.
However, you will still be able to join Table 3 to Table 1.
Upon doing so, all 3 tables will be labeled as Table 1.
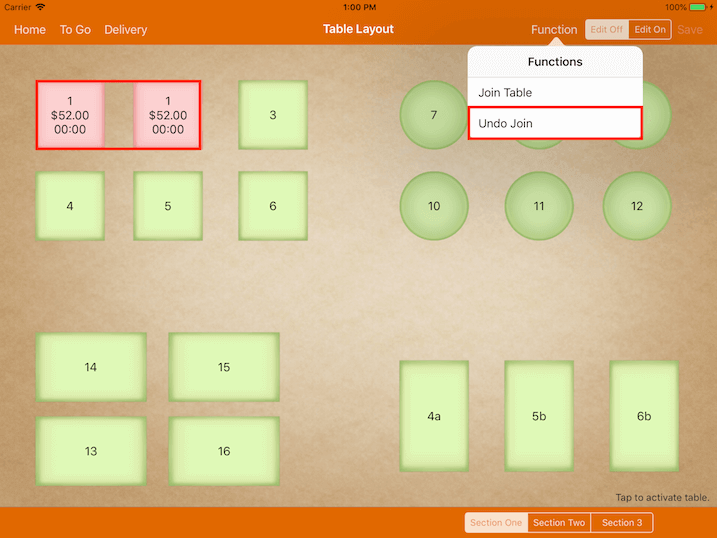
User will also be able to unjoin the tables by selecting Undo Join at the top right corner
under the Function tab as shown below.
Upon unjoining the tables, the bill will return to the original table which first started.
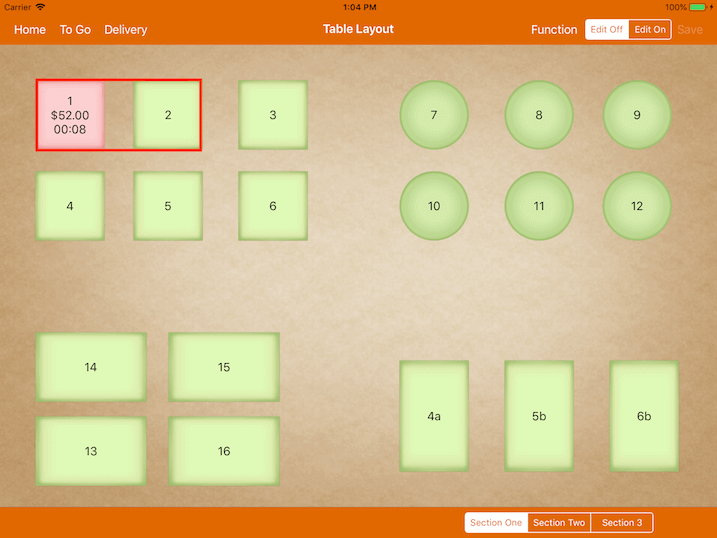
Taking the previous example, Table 2 is joined to Table 1.
Upon unjoining the tables, the bill will return to Table 1, whereas Table 2 is now unoccupied and available for new customers.
Merge Table
This feature allows users to merge bills for different tables.
By doing so, it will transfer all the orders from 1 table to another table.
This feature can be used when customers from a table is paying for both tables.
To use this feature, the user will first need to tap on the table that needs to be transferred.
Then, click on Merge Table, and select the table to be transferred to.
The user will need to merge the table one by one if there is more than one table to merge.
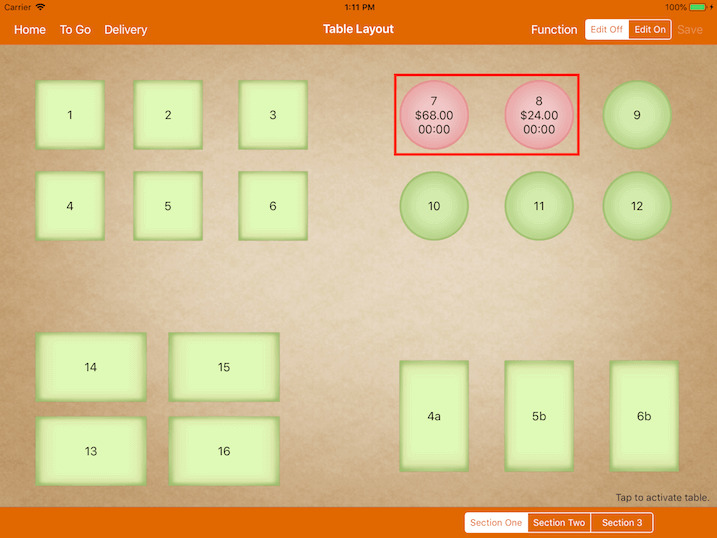
The image below is the table before the merge.
It shows that Table 7 and Table 8 are two separate bills.
Simply select the table, then click on the Merge Table as shown below.
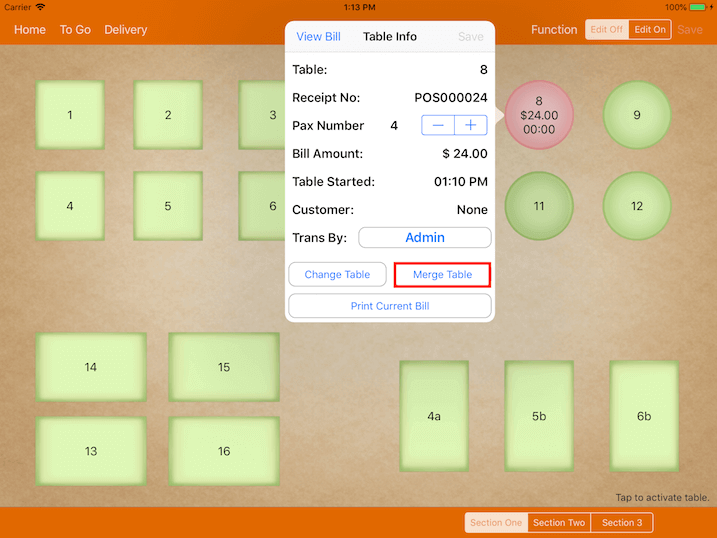
Then proceed to click on another occupied table, in this example, Table 7.
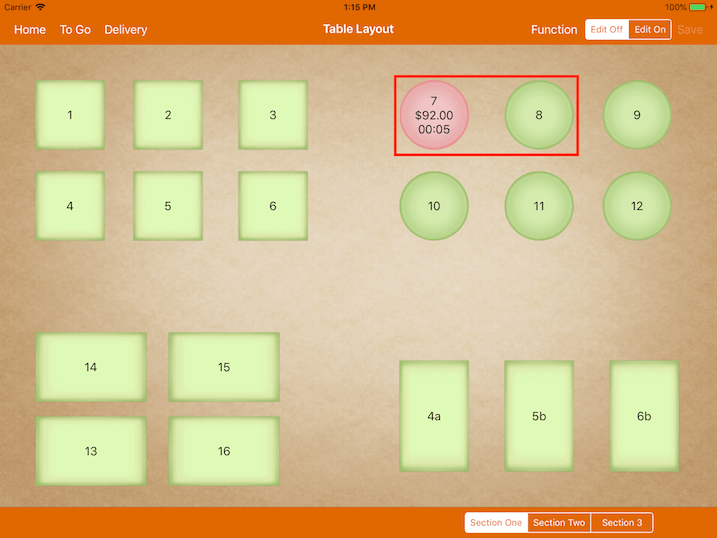
After merging the table, all the bills will be transferred under one table.
The bill from Table 8 is transferred to Table 7 after merging them both as shown below.
Table 8 will turn to green which indicates that it is now unoccupied and available for new
customers.
Comparison between "Join Table" and "Merge Table"
"Join Table" and "Merge Table" share the similarity of having just a bill in the end.
However, there are a few differences between both.
For "Join Table", it is usually done at the start of the dining session.
The reason being is that if the table was physically combined, there would be no difference to the printed order
to the kitchen marking the table as 7, 8, or 9. As they are now a big table ,7 for all.
As for "Merge Table", it would be more of a merging bill function at the end of the dining session.
It will not affect how the orders are printed to the kitchen as it is separated individually by each table.
Just by the end of the session, if the customer would like to pay in one receipt, this feature will be used.
Change Table
This feature can be used when customers are moving to another table.
Upon changing the bill, it will be transferred to another table.
To use this feature, first, tap on the occupied table and click Change Table,
then select the table that the customers wish to move to.
Example:
Table 7 has a total bill amount of $96 and would like to be changed to Table 10.
Firstly, tap on Table 7 then choose "Change Table".
Then, select Table 10.
Now, Table 7 will be unoccupied with the bill transferred over to Table 10.
Operation of the Customer Tab Table
The customer tab table requires staff to key in the customer name before keying in the orders.
Upon clicking on the table, system presents a field to enter the customer name.
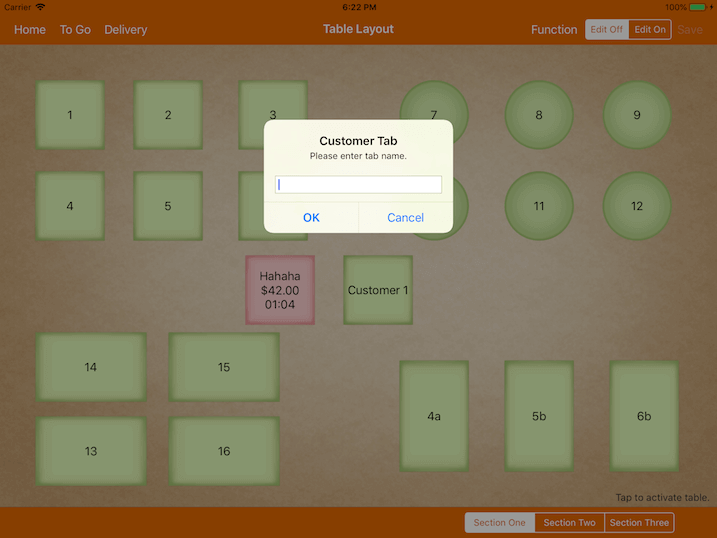
After entering the customer name, it will proceed as per the normal table.
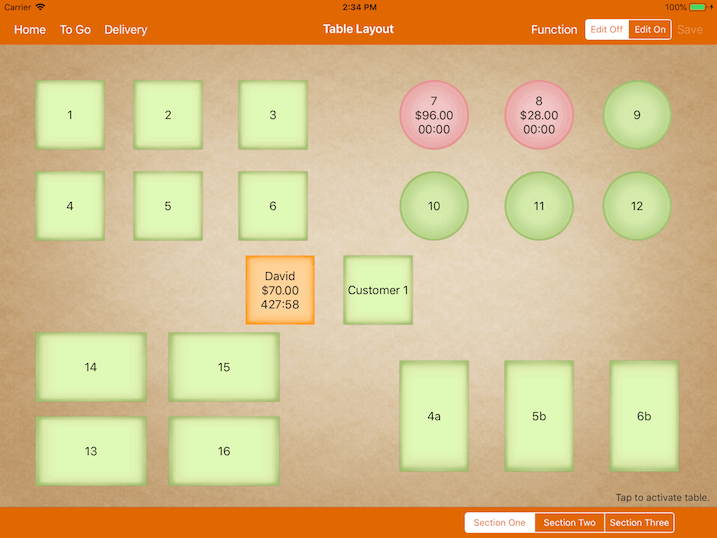
However, the table name will be changed to the customer name instead of the original table name.
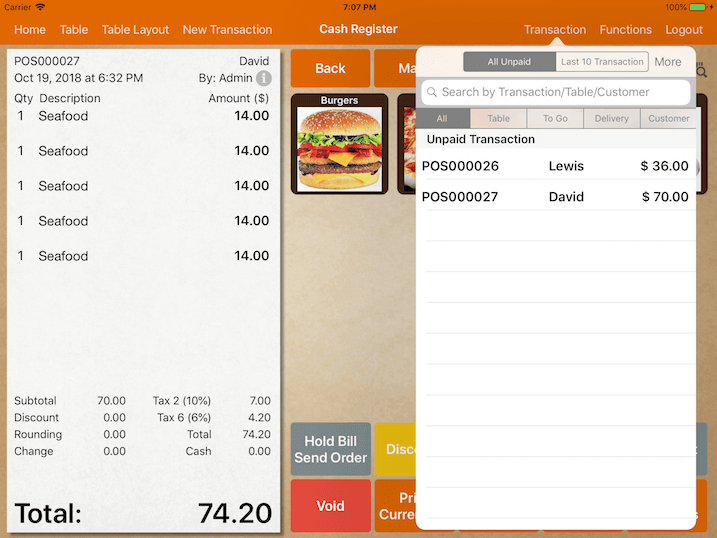
In the cash register's transaction list, instead of showing the original table name (Customer 1), it shows the customer name instead.
We are using 'Lewis' customer as an example.
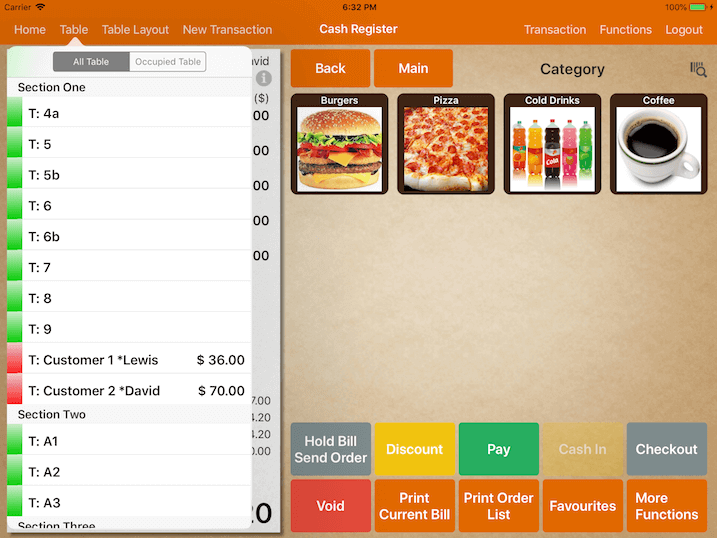
Under table listing, the table info will show both the table name (Customer 1) and
Lewis (customer name) along with the total amount of bill as shown below.
This is normally used in cases where the customers are not seated permanently in their initial table.
Hence, it would be easier to search for their bill using their name instead of assigning a table for them.