Guide | MobiPOS > Online Ordering > Online Ordering Menu Setup
Menu Setup
Default Menu Display
There are 3 different display styles for which you can select for your online store. The first display style is text only, the second is text and image and the third is text and enlarged image.
Once selected, it will be the default display style every time when the page is loads. Text only display is selected here in the example photo. Click Save at the bottom of the page then go to the online store to view the display style.

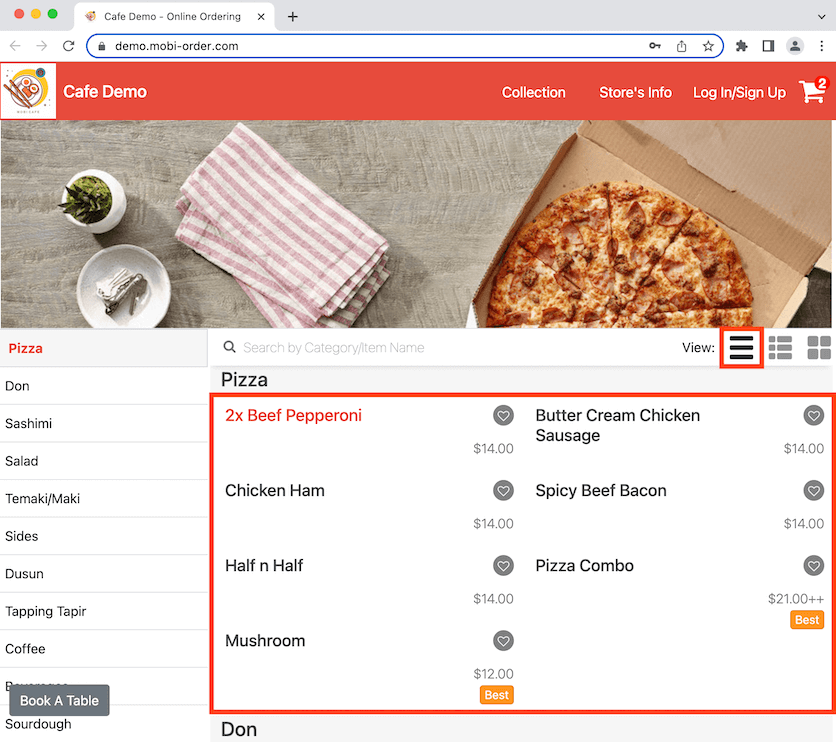
Now it shows the text-only display style, which is the default display style we have selected. You can switch to a different display style manually by clicking on it beside View.
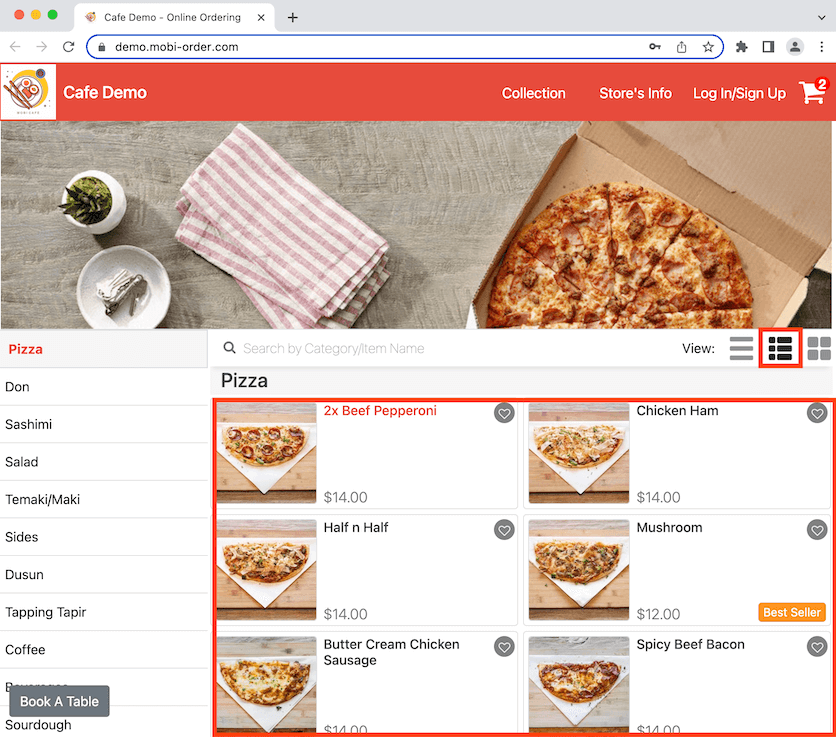
Now it shows a different display style. Once the page is exited and a new page loads, it will go back to the default display style.
Modifier's Image
You are encouraged to put in high quality product's image as it would increase customer's spending.
You can upload your menu's photo from the iPad or CloudSync's Stock section.
Turn it off if you do not wish to show product's image in the site.
Category's Image
Toggle this on if you wish to have the category's image shown on the display bar.
Display Search Bar
Toggle the search bar option for your customers.
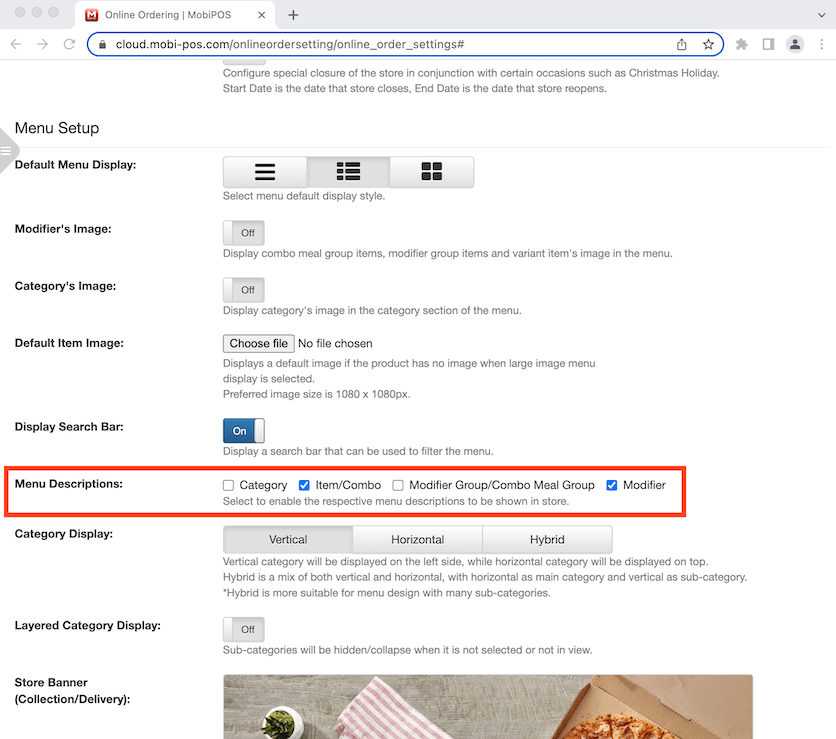
Menu Description
This allows descriptions to be shown in the menu on the online store. Click to tick the boxes for the descriptions you want to show. Item/Combo and Modifier have been ticked in the example photo.
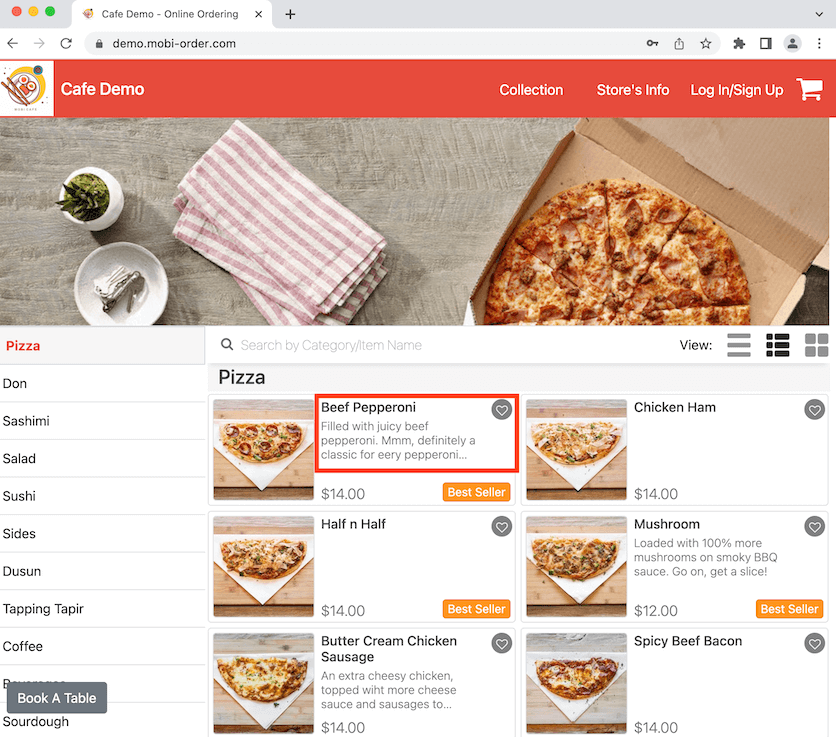
Go to the online store and you can now see the description for the items. Click on Beef Pepperoni to view the modifiers.
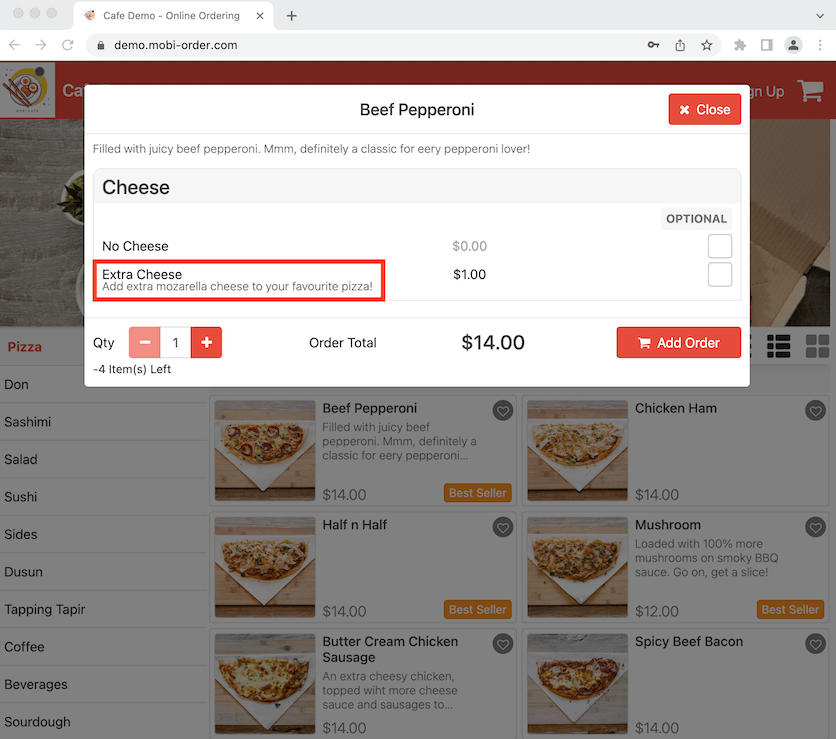
The description is shown below its modifiers.
Category Display
Toggle between vertical or horizontal display placements for your categories.
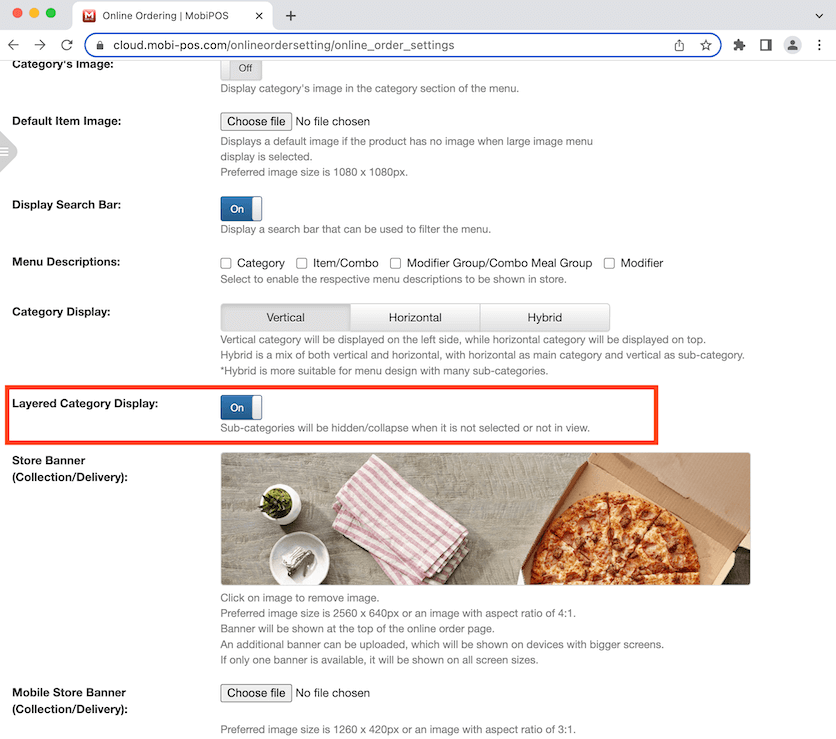
Layered Category Display
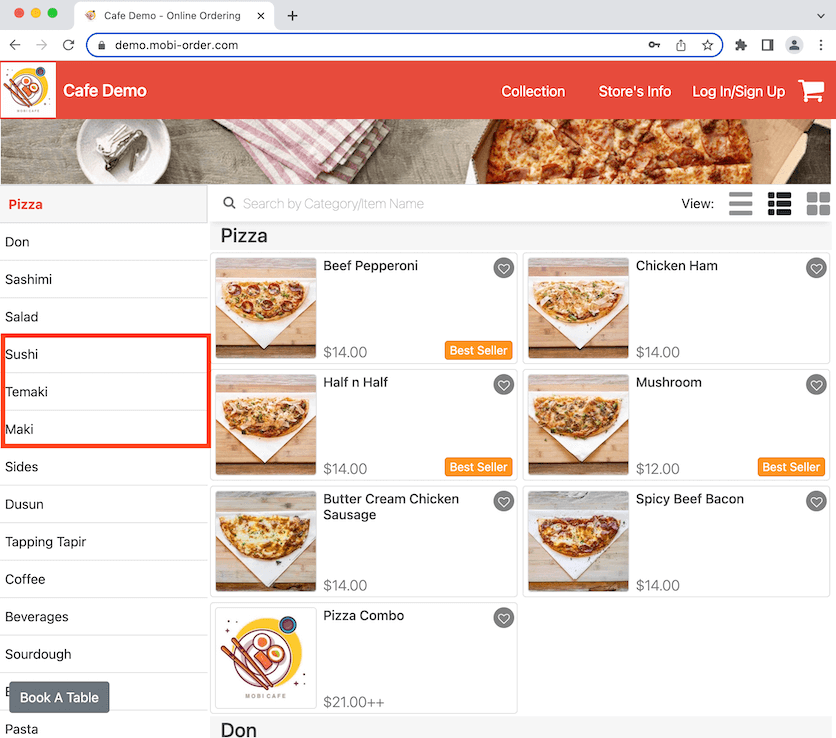
Here it shows the sub-categories being shown alongside the main categories at the side display. In this example, Sushi is the main category, Temaki and Maki are the sub-categories. To collapse or hide the sub-categories from the side display, continue reading below.
Click to toggle on Layered Category Display. Click Save at the bottom of the page after.
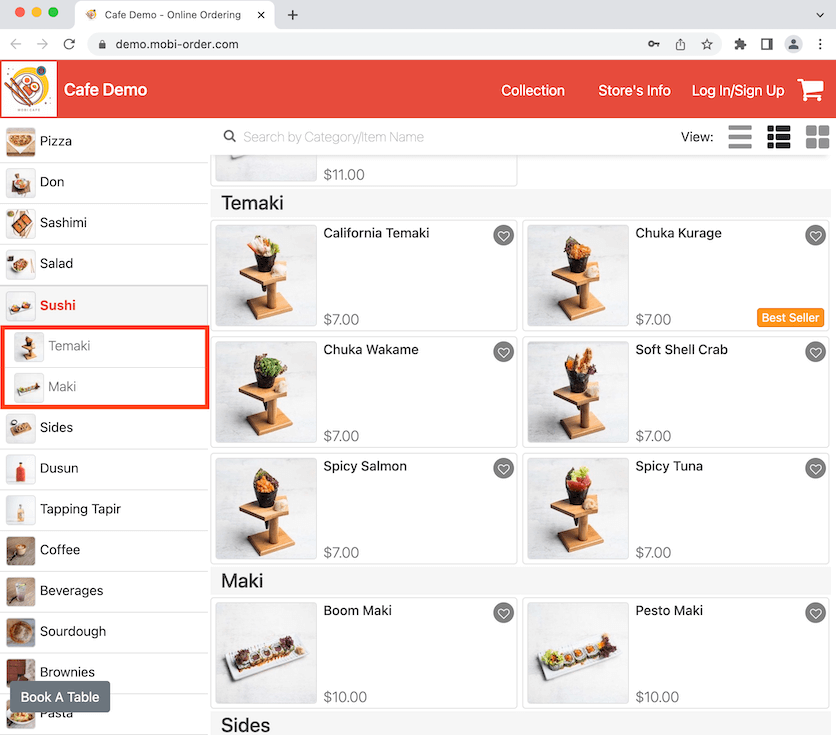
Go to the online store and you can now see the sub-categories are collapsed under its main category on the side display. In this example, Temaki and Maki can only be seen if Sushi is selected or in view.
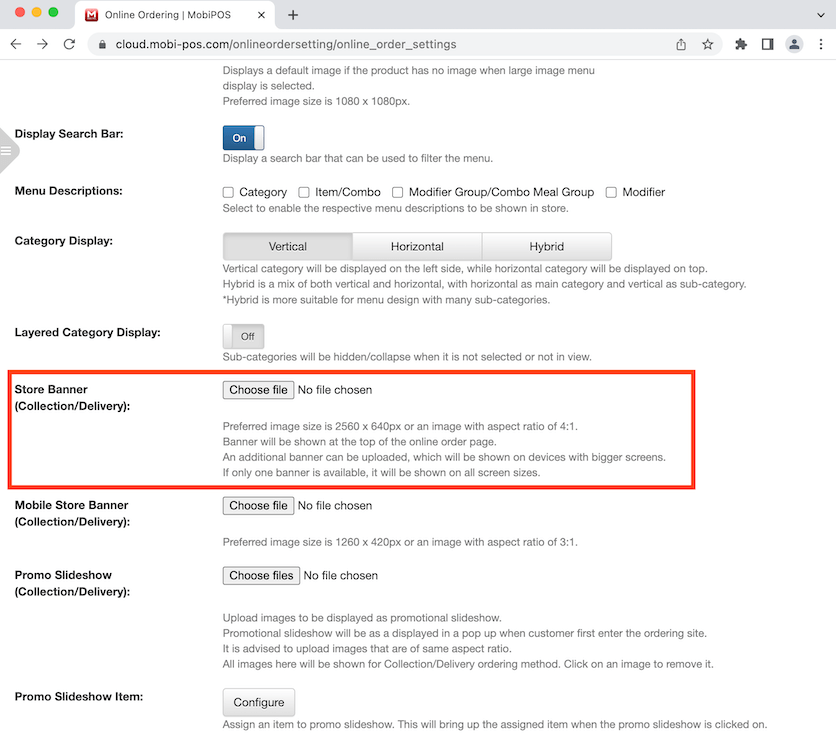
Store Banner (Collection/Delivery/Table Ordering)
You can choose to upload a store banner for the online store. Click on Choose file to select an image.
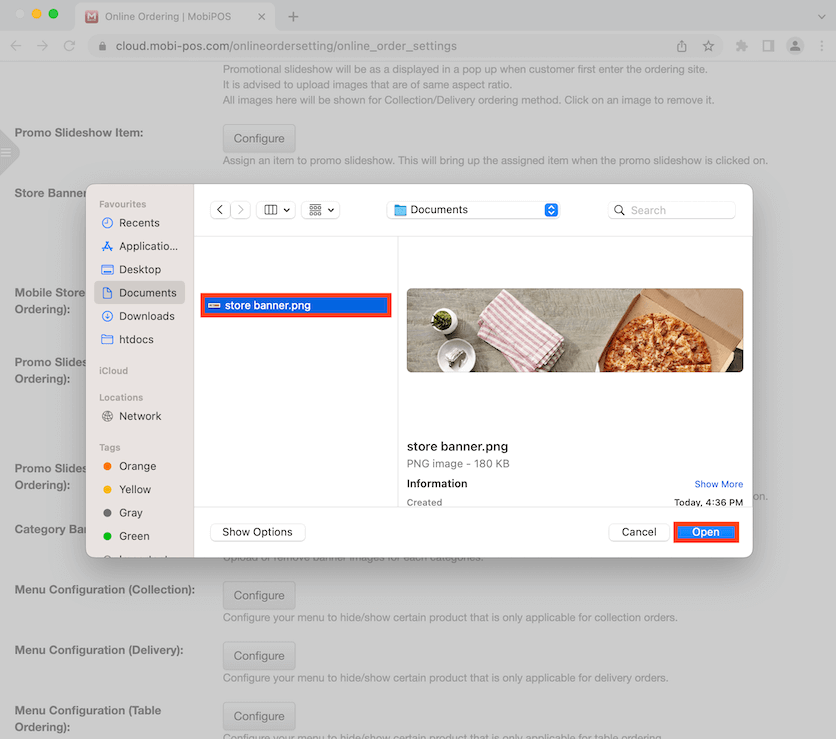
Select the image you want to use for the store banner. Click Open after.
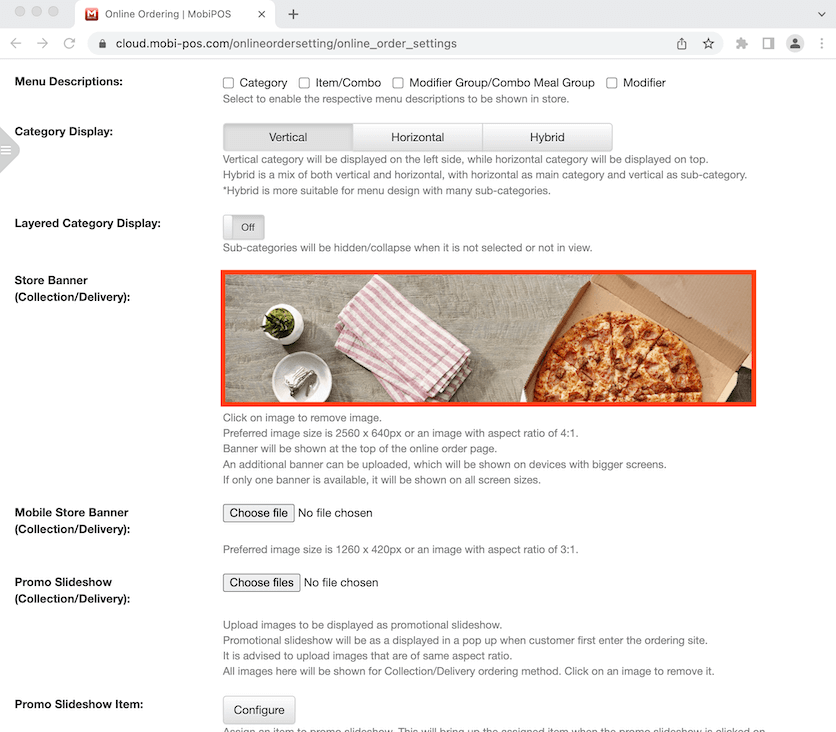
Now it shows the upload was successful. If you made a mistake and wish to change or remove the image, simply click on the image and it will be removed. Click Save at the bottom of the page after to finalise the upload.
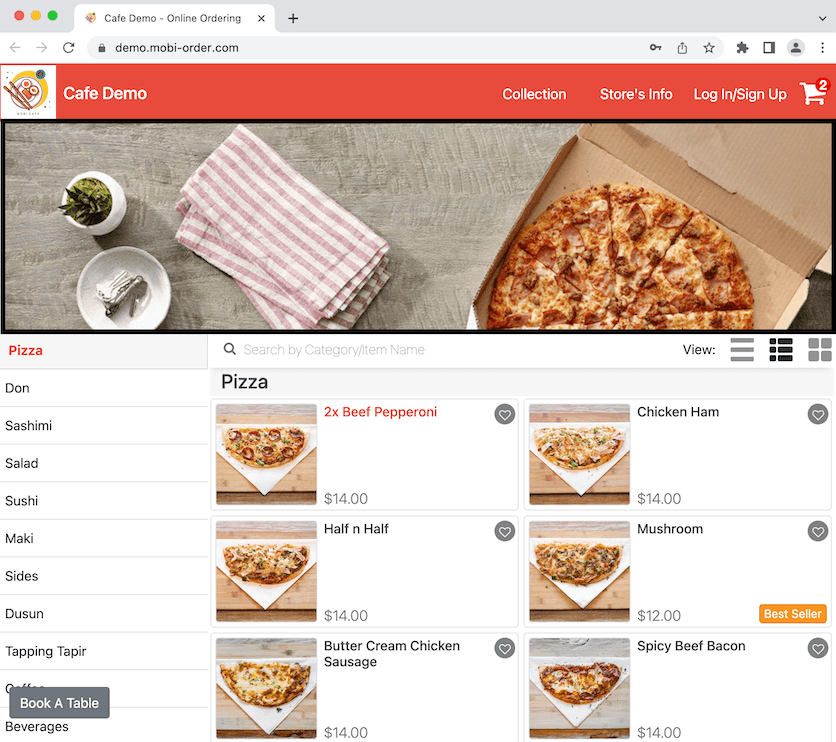
The store banner can be seen in the example photo.
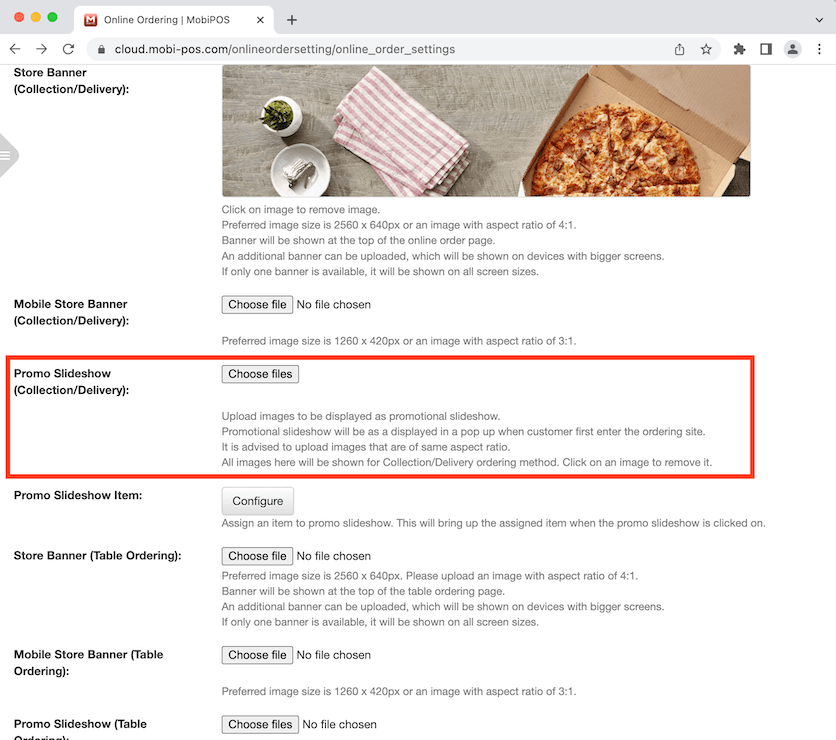
Promo Slideshow (Collection/Delivery/Table Ordering)
You can upload images to display as a promotional slideshow. Click on Choose file to select the images.
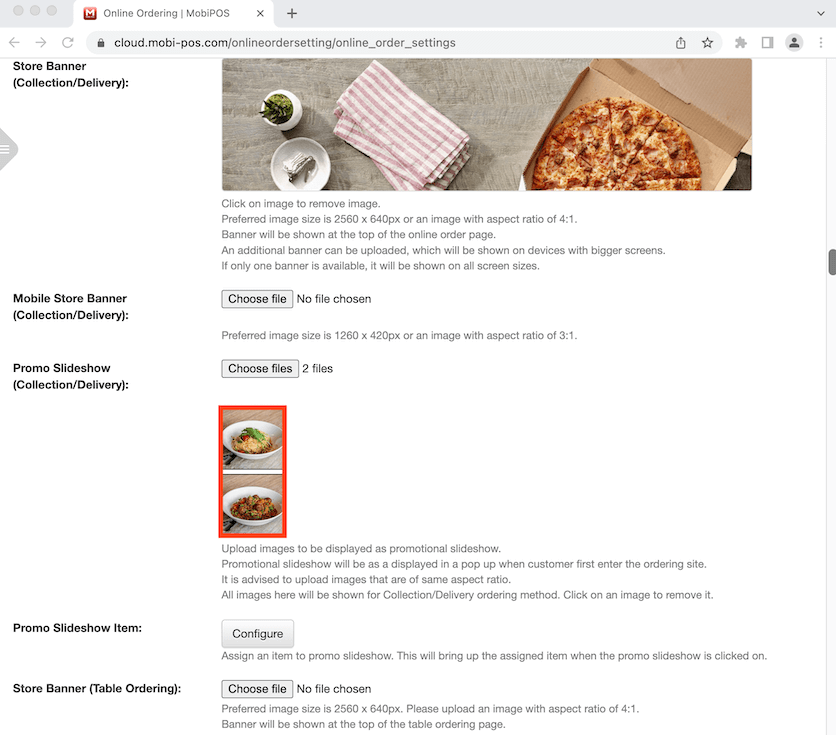
Select the images and click on Open. Note that you can upload multiple images.

It now shows that the images have been uploaded successfully. Click Save at the bottom of the page to finalise the uploads.
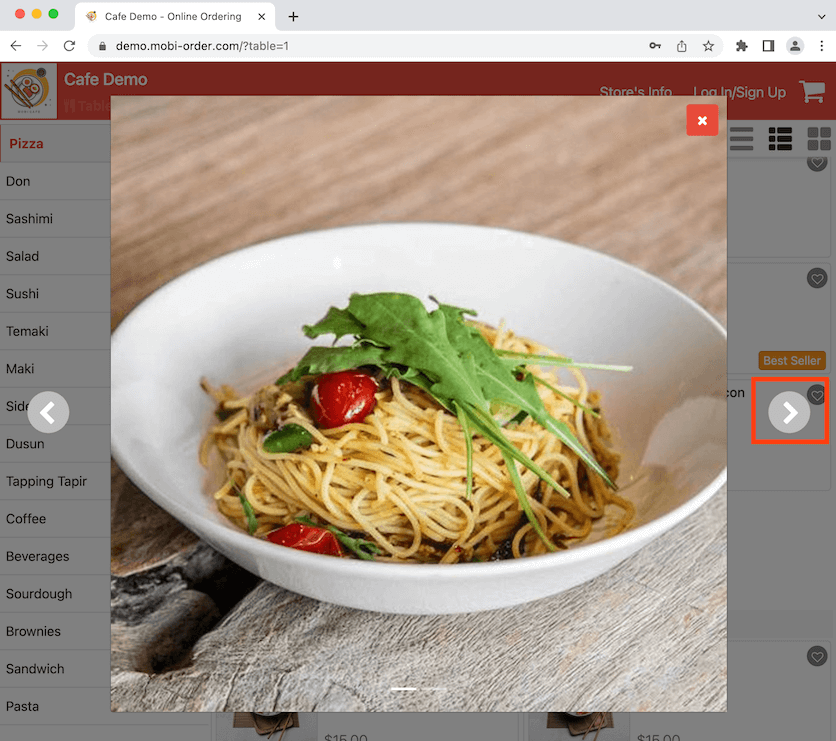
Go to the online store and the slideshow will pop up immediately when you enter the website. The next slideshow will show up automatically after a few seconds or you can click on the arrow to go to the next slideshow manually.
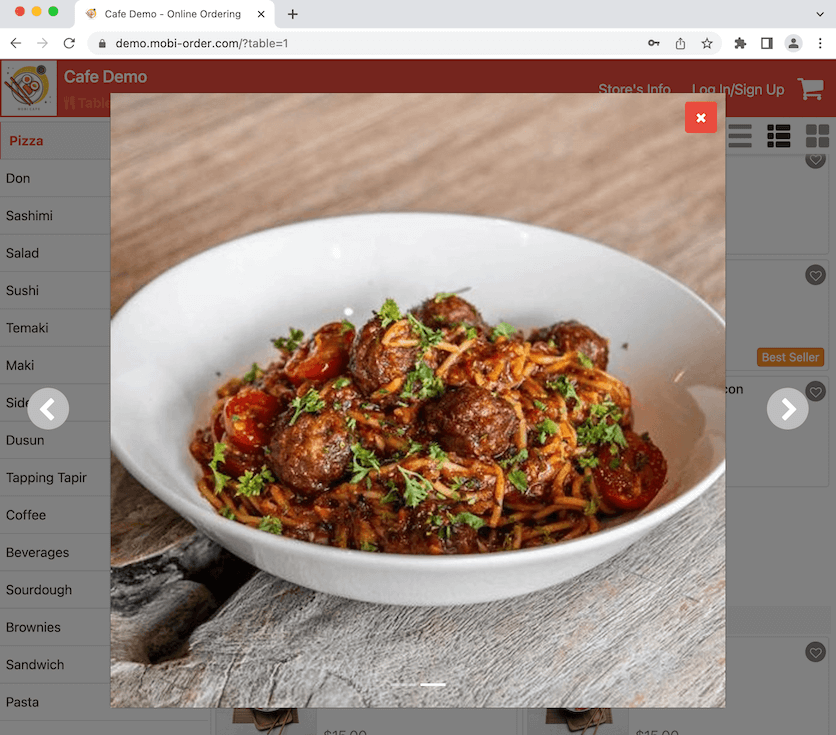
This is the second promo slideshow image.
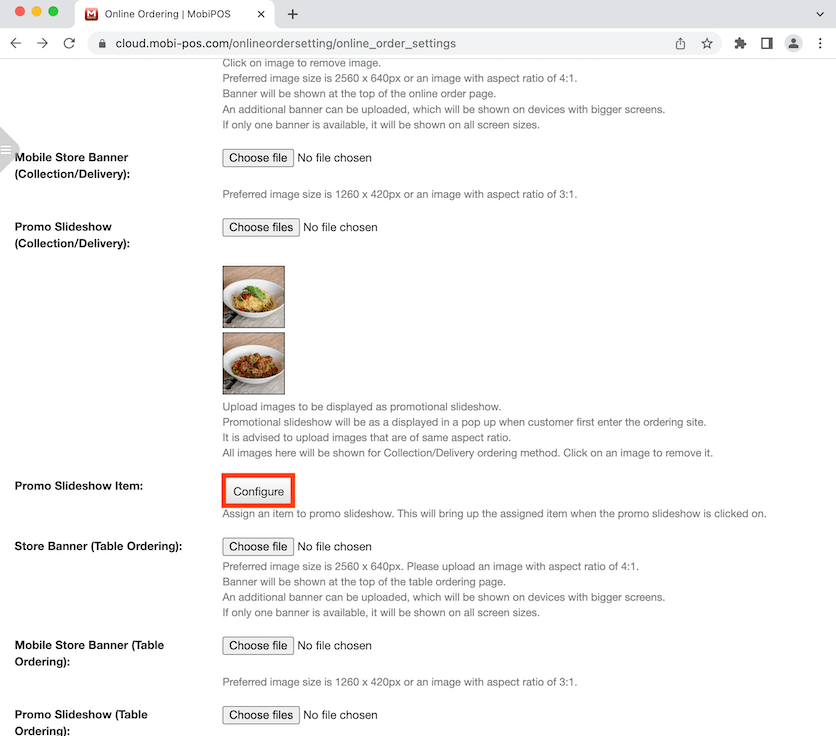
Promo Slideshow Item
If there are images uploaded for the Promo Slideshow, you have the option to assign an item to the slideshow. Click on Configure and it will bring you to a new page.
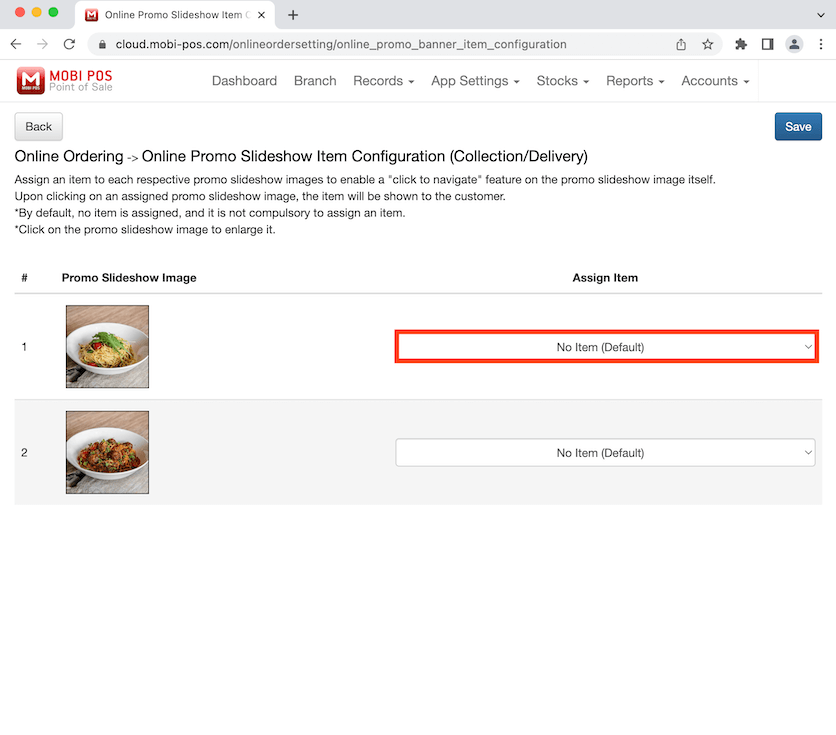
It shows the images that have been uploaded for the slideshow. Click on Default to select an item that you want to assign.
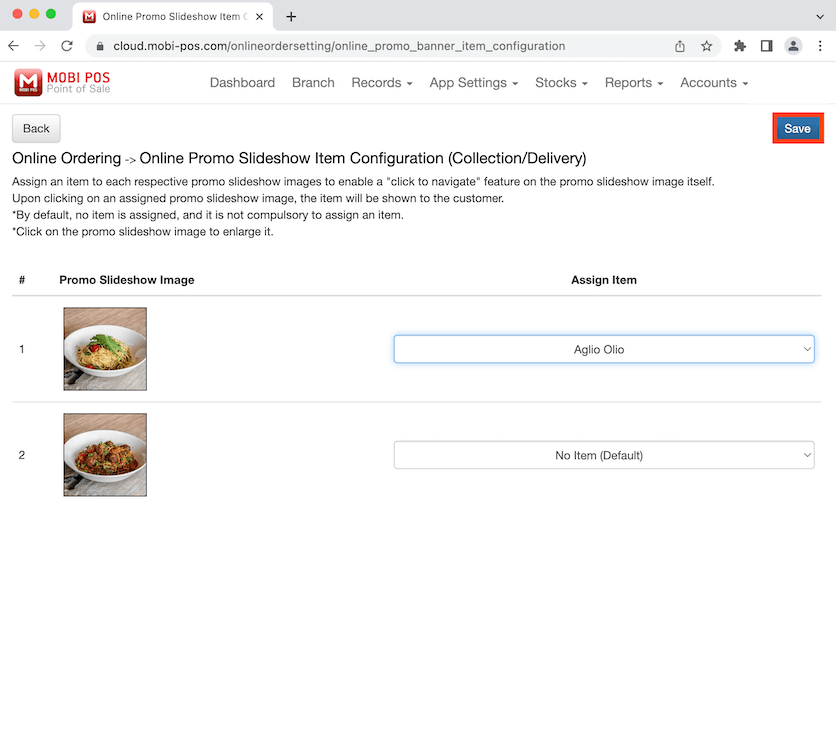
Select the item you want to assign then click anywhere on the screen to continue.

Click Save at the top right corner to finalise the changes.
Go to the online store and the promo slideshow will pop up again. Click on the slideshow.
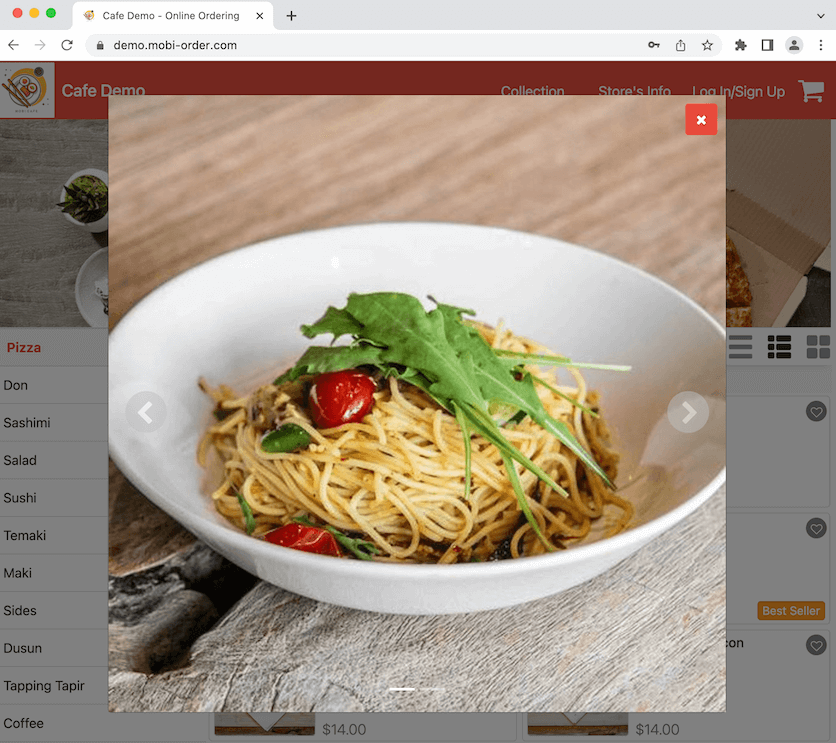
Now it links directly to the item where you are able to add it to the cart to make an order.

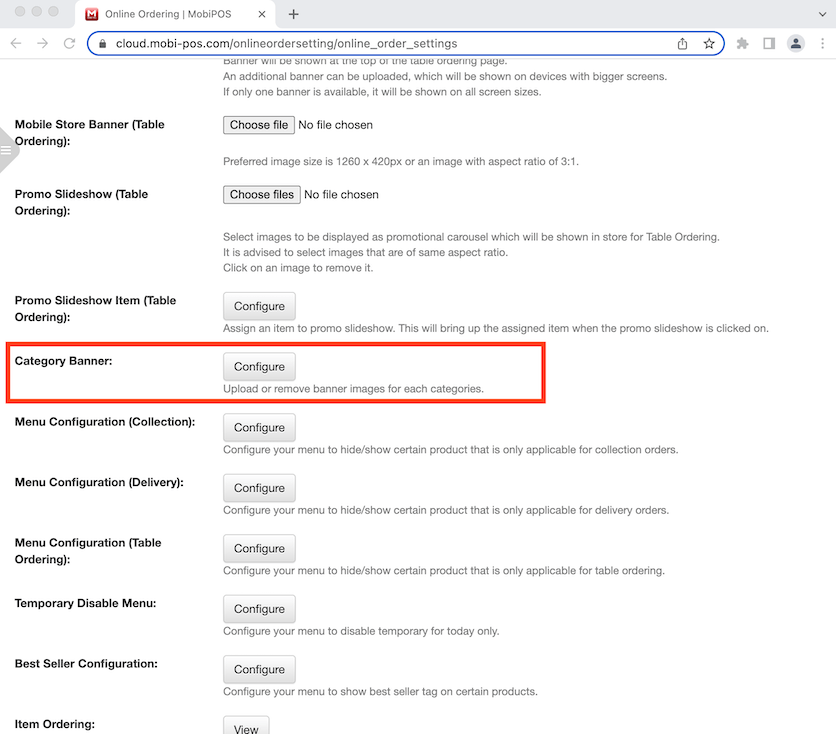
Category Banner
You can upload an image as a category banner that show up above the items under that category. Click on the Configure button.
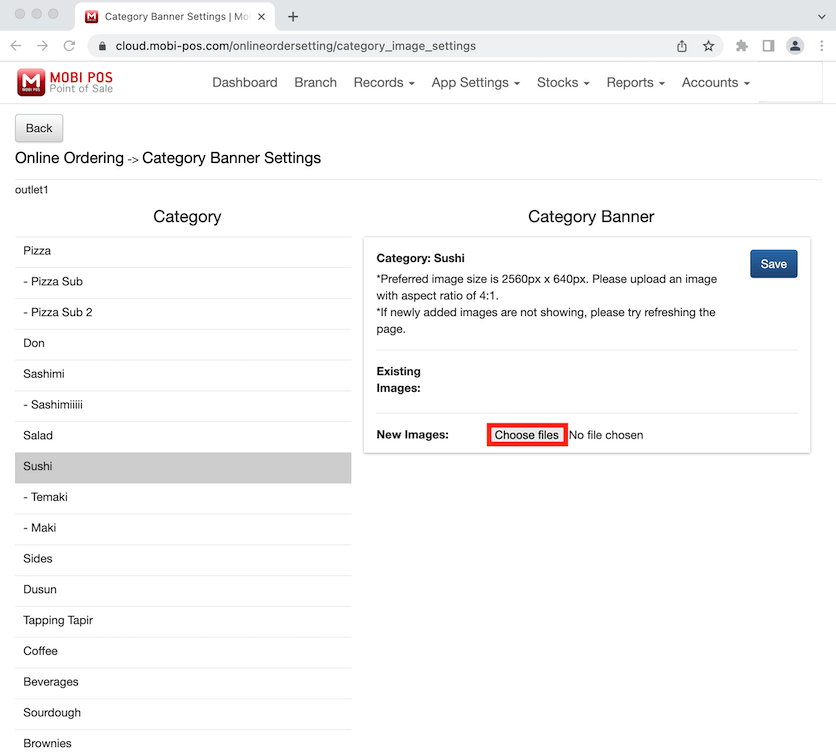
Select a category then click on Choose files to upload an image.
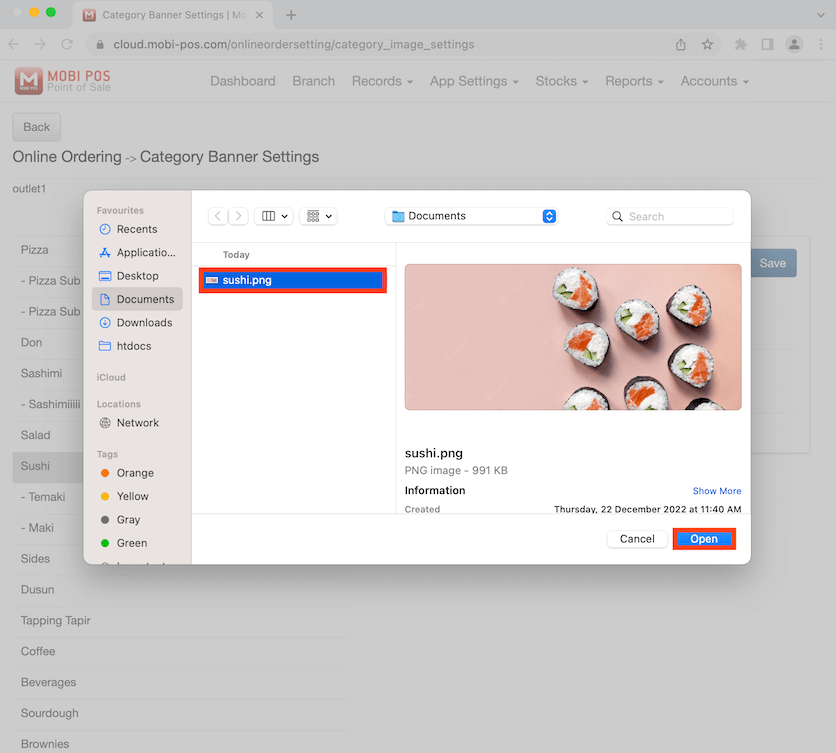
Select the image you want to upload then click on Open.
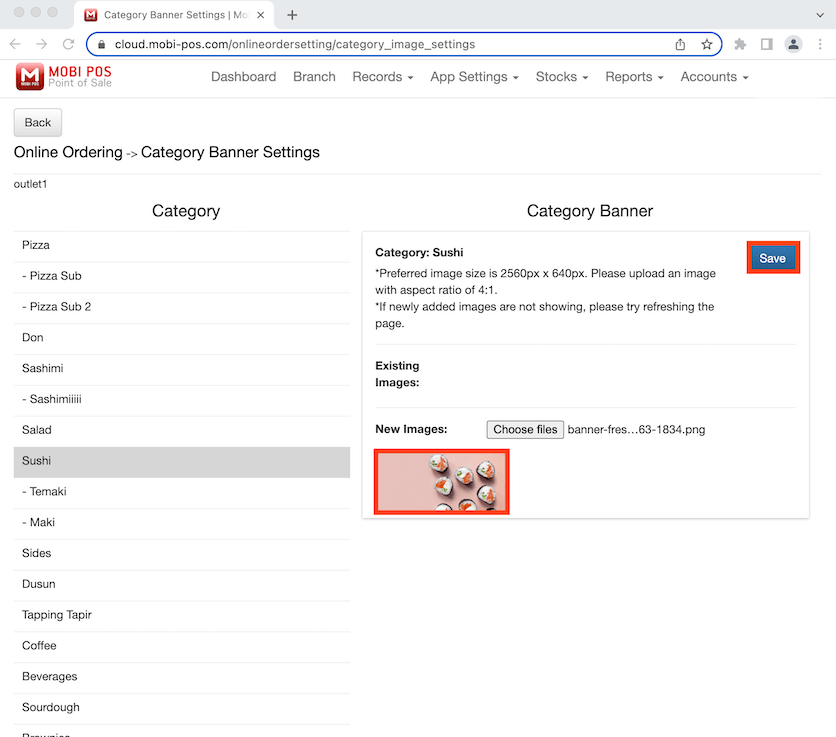
It shows a preview of the image you uploaded. Click on Save to finalise the upload.
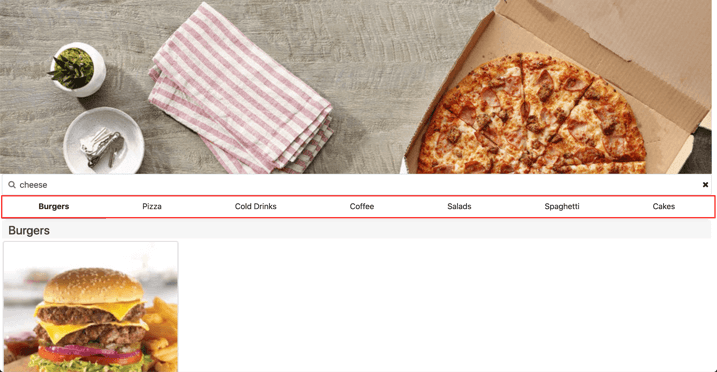
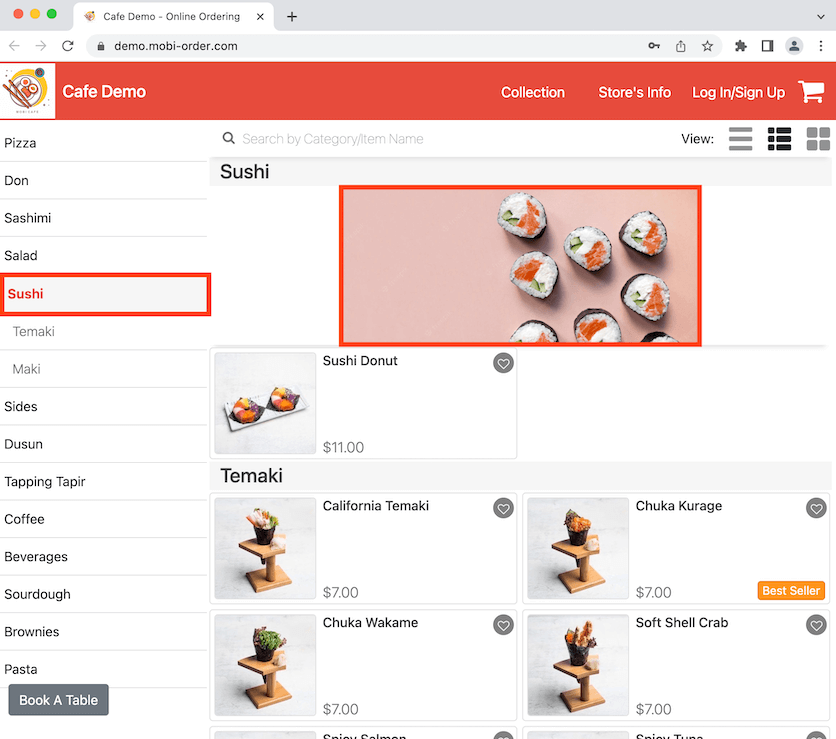
Now go to the online store and select the category which you have uploaded the photo for. Sushi was used as an example and it shows the category banner as highlighted.
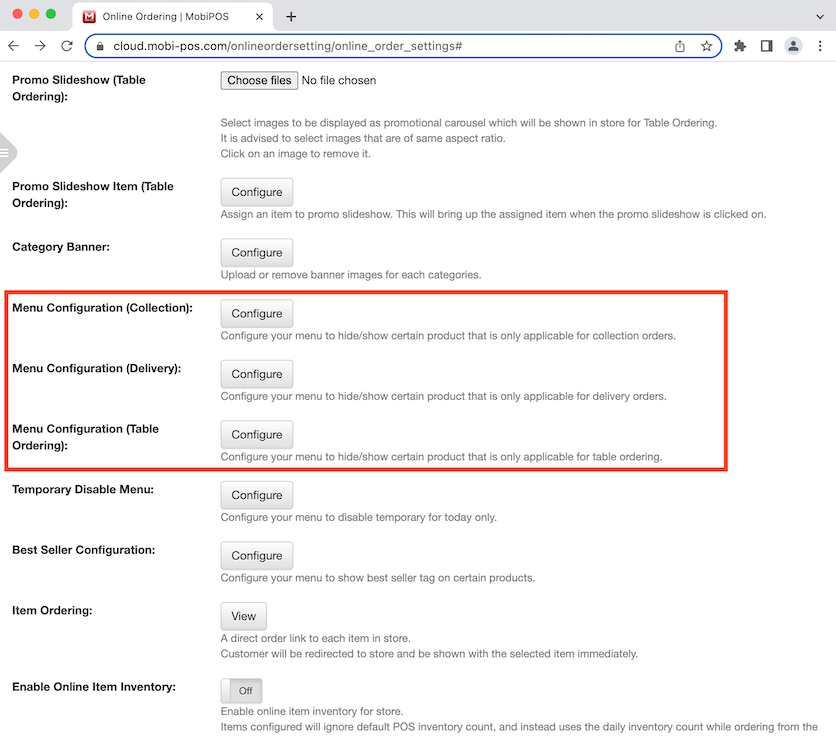
Menu Configuration (Collection/Delivery/Table Ordering)
You can choose to hide, show or disable certain items on the online store. To do this, click on the Configure button.
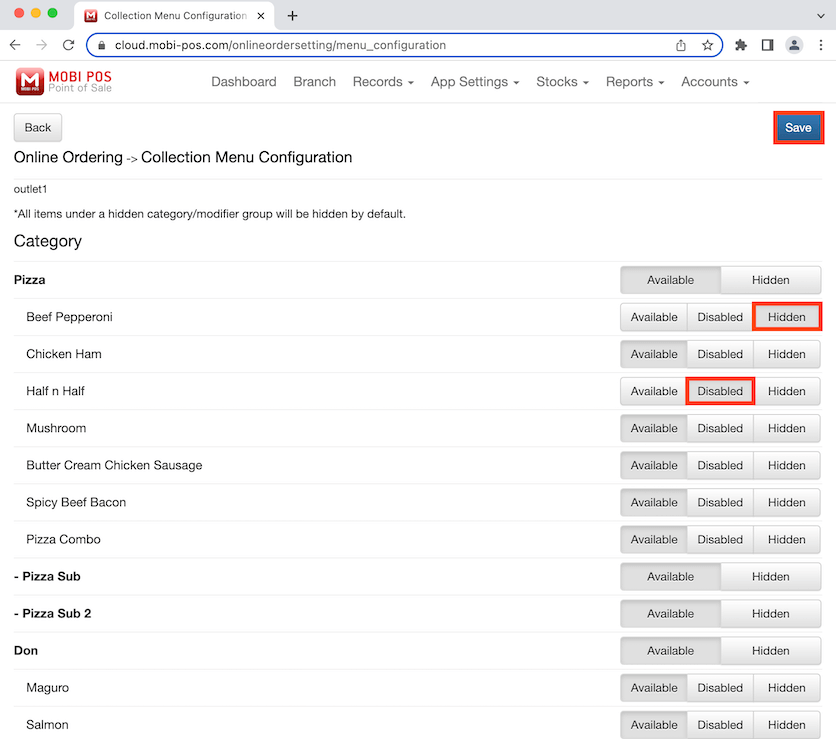
It will bring you to a new page where you can choose which items you want to hide, show or disable.
In this scenario, Beef Pepperoni is no longer in the menu so click on Hidden to hide it. Half n Half pizza is currently out of stock and we would like customers to know this so we can select Disabled, which prevents the customers from adding the item to the cart.
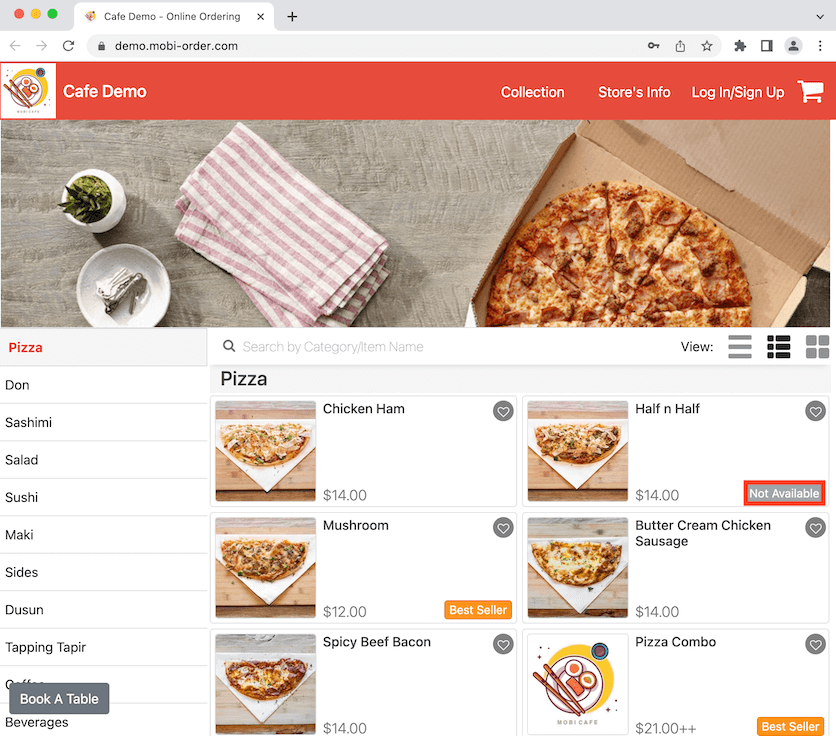
Go to the online store and you will see Beef Pepperoni is no longe present in the menu. Half n Half pizza is shown with a "Not Available" sign because it has been disabled previously.
This is useful for informing customers that certain items are out of stock and is not available for purchase.
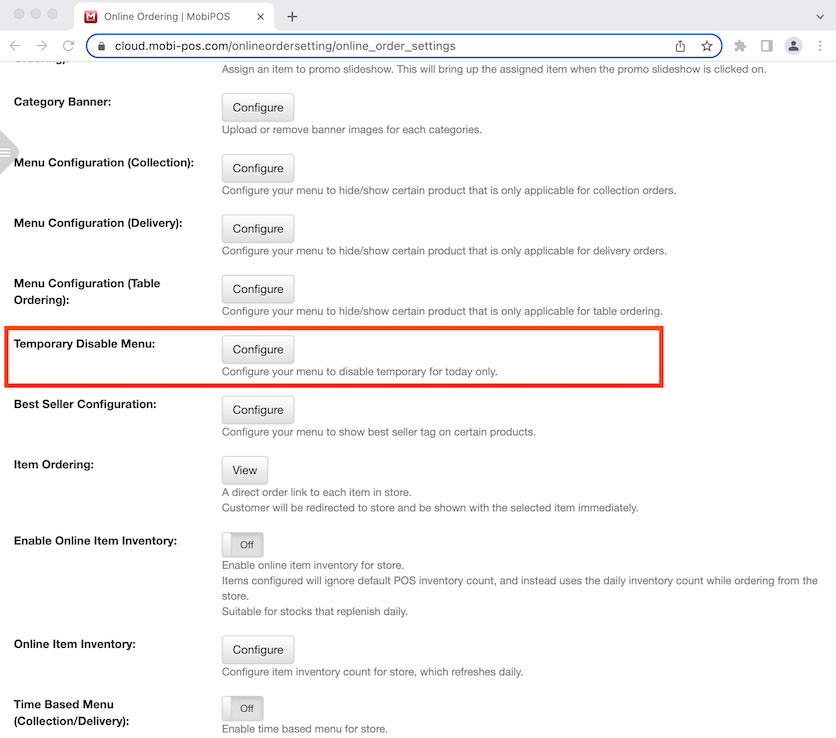
Temporary Disable Menu
This allows you to disable the categories or items temporarily for today only. Click on the Configure button.
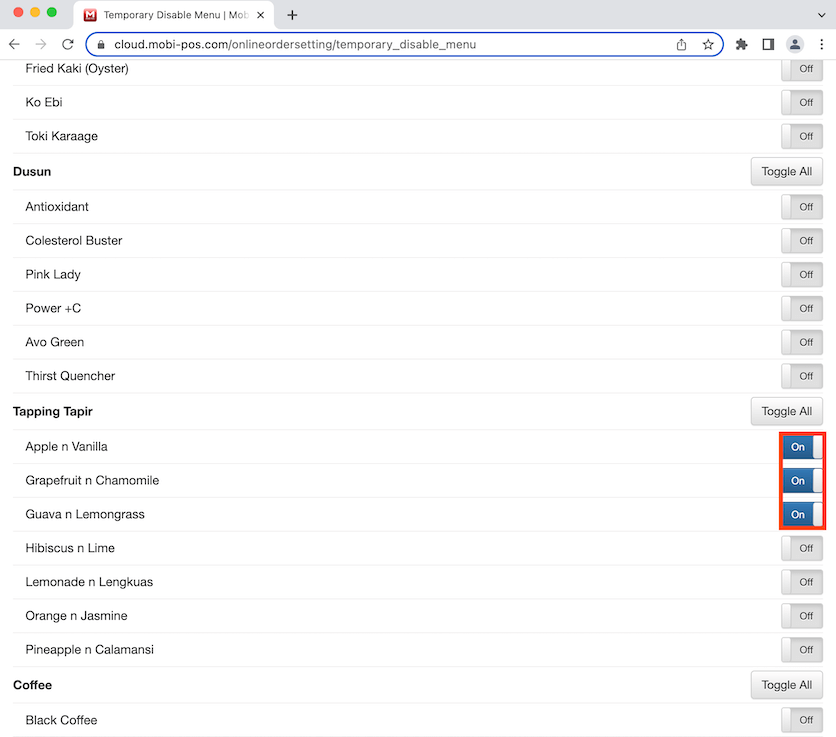
It will bring you to a new page where you have the option to disable the entire category or an individual item. To disable a category, click on Toggle All. If you want to disable one or a few items only, click to toggle on the selected items. Click Save at the bottom of the page to finalise the changes.
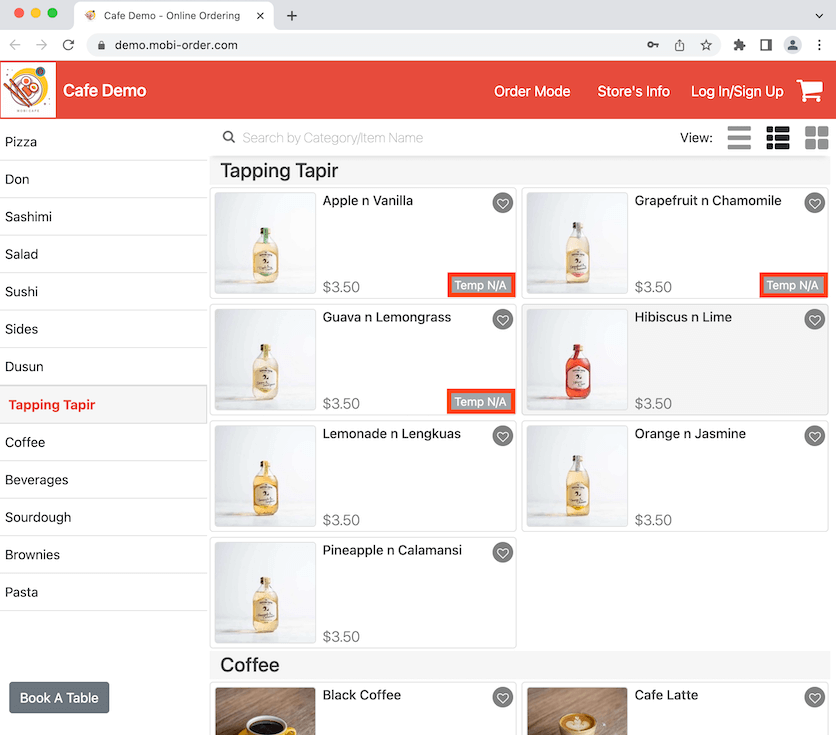
Now you can see the items are marked as temporarily unavailable on the online store. However, that is only for today if you choose to disable the items. If you want to disable items permanently, refer to Menu Configuration above.
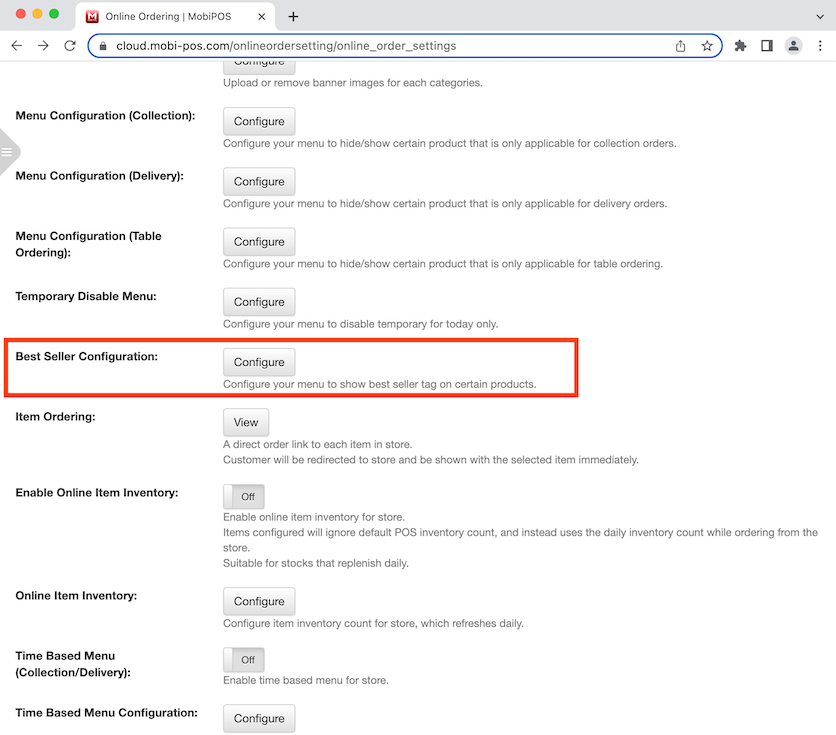
Best Seller Configuration
A best seller tag will be shown on the items you choose to configure. Click on the Configure button.
It will bring you to a new page and you have the option to choose which items you want marked as best seller. Click on Best Seller button for your selected items. In this case, Beef Pepperoni, Half n Half and Mushroom Pizza have been selected, Click Save after to finalise the changes.
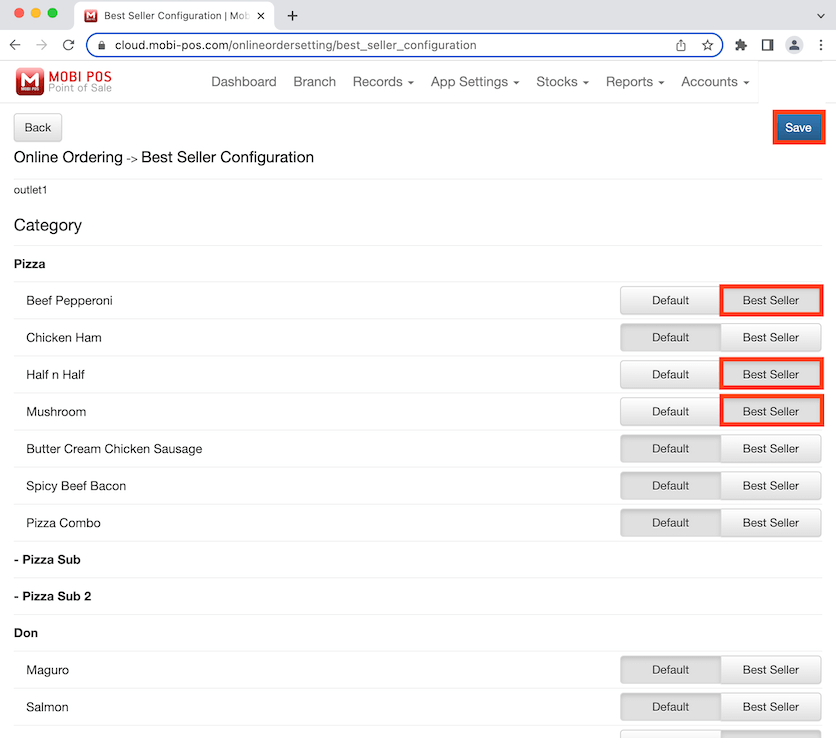
Now the selected items are marked with a Best Seller tag.

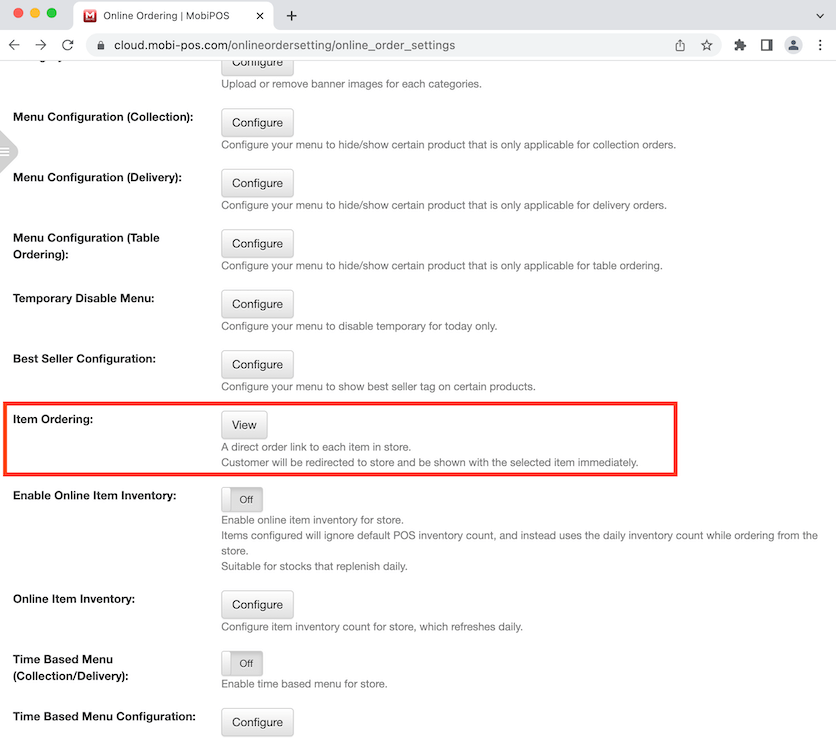
Item Ordering
By clicking on View, it will bring you to a new page where you can view all the URL links that is directly linked to the items.
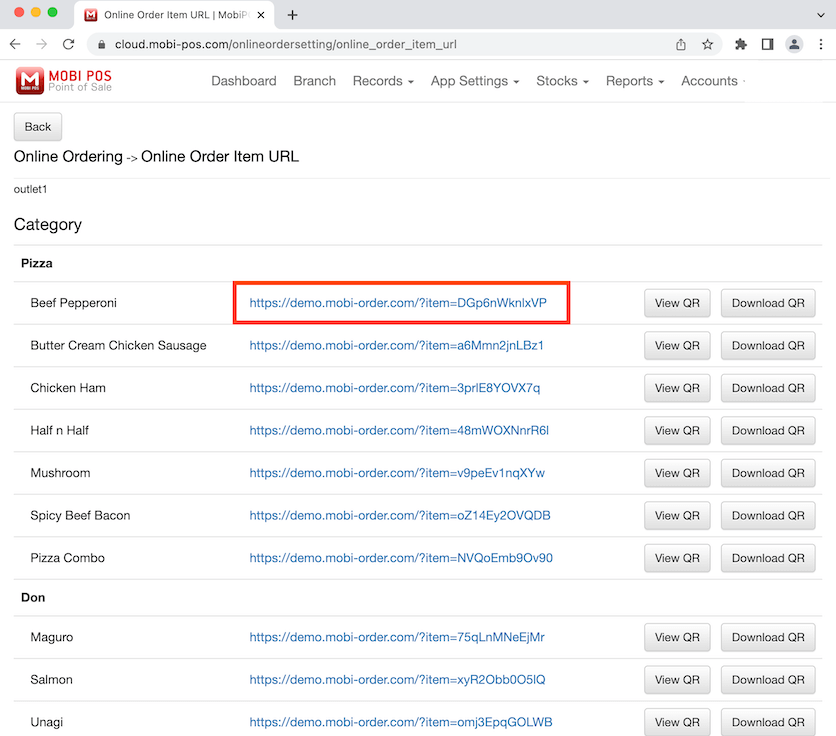
You are now in the new page. It shows the list of items you have for the online store. Click on the URL link for Beef Pepperoni
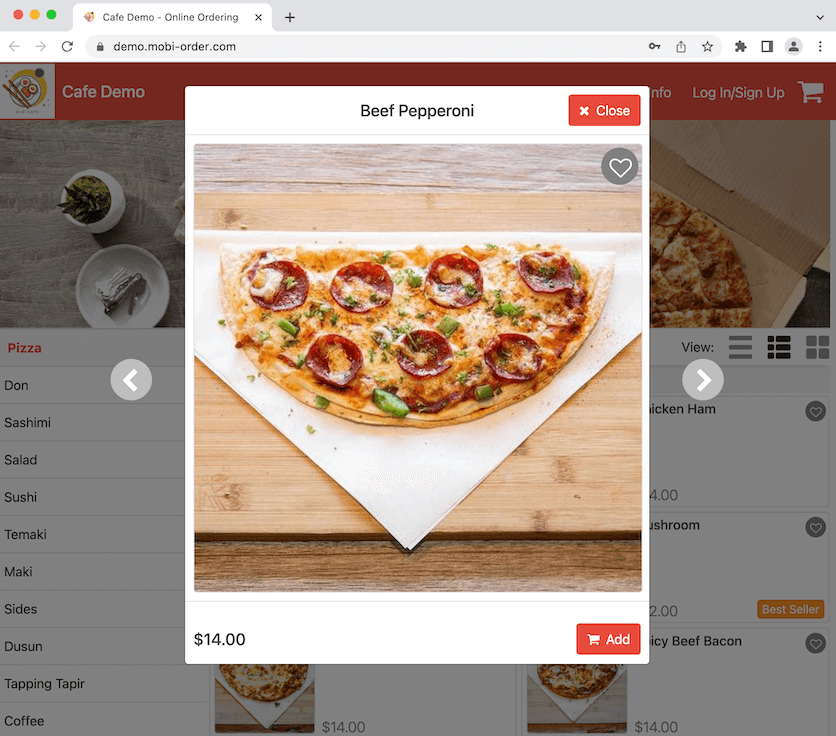
You have been directed to the item directly using the URL link and you can add it to the cart to make an order.
Enable Online Item Inventory
Enabling this allows you to manually configure the online inventory count and it will ignore the POS inventory count.
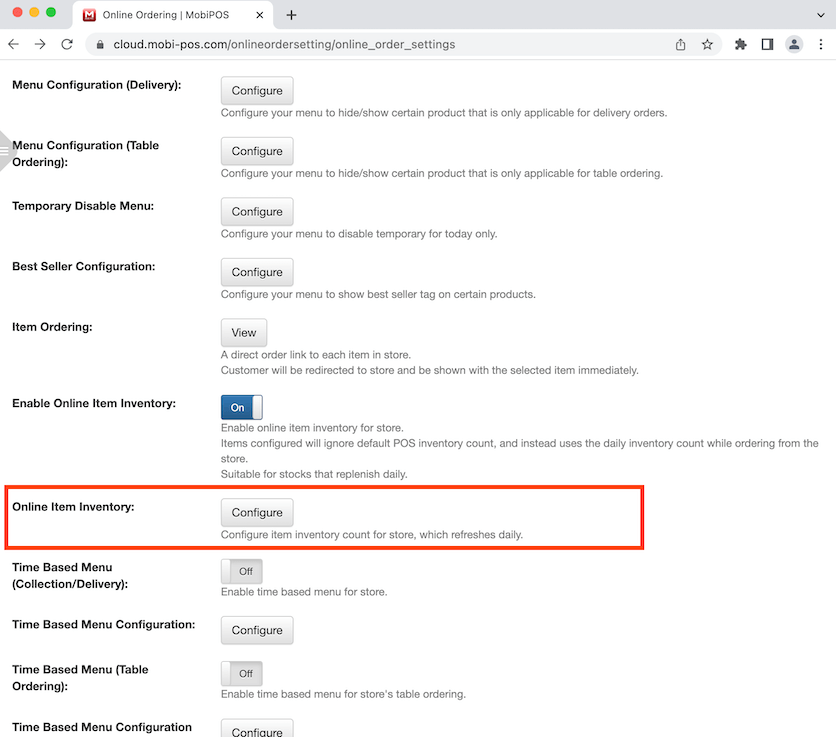
Online Item Inventory
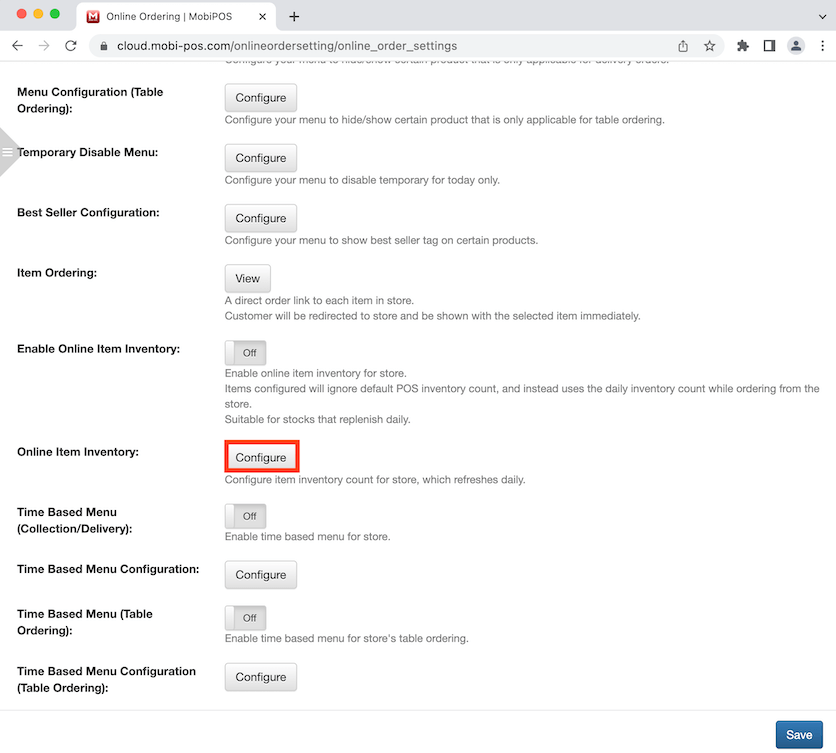
You can configure this if you have online item inventory enabled above. This allows you to change the inventory count for the online store which refreshes daily without having to enter the inventory count again. Click on Configure and it will lead you to a new page.
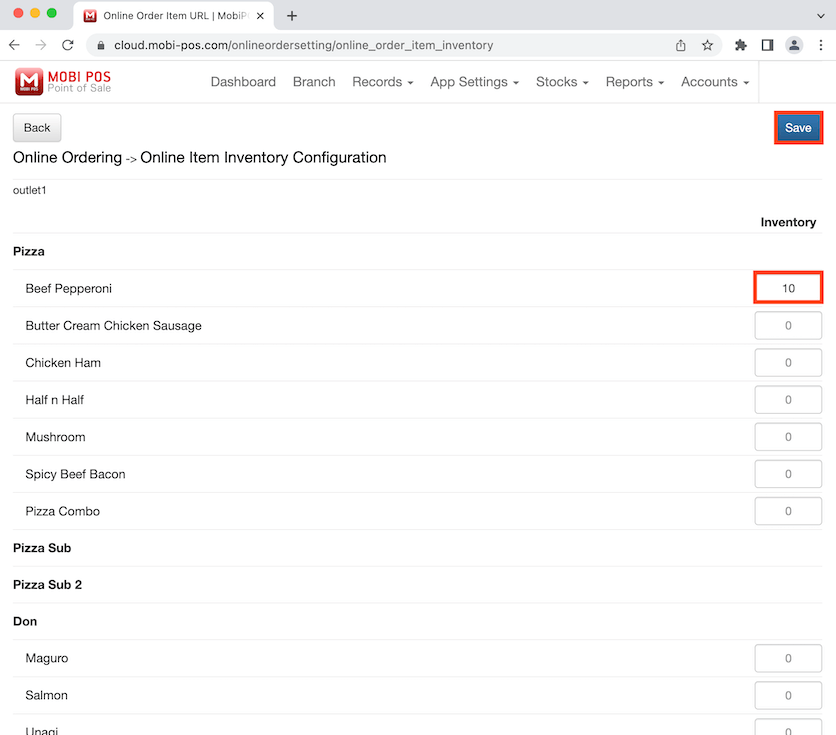
It shows the items for the online store now and you can edit the inventory count on the right. In this example, Beef Pepperoni has a new inventory count of 10 and this refreshes daily where the inventory remains at this number with the assumption that this is the amount to be replenished daily for Beef Pepperoni.
This gives you the convenience of not needing to configure the online inventory if the daily stock replenishment is the same quantity for every business day. Once the inventory count is edited, click Save at the top right of the page.
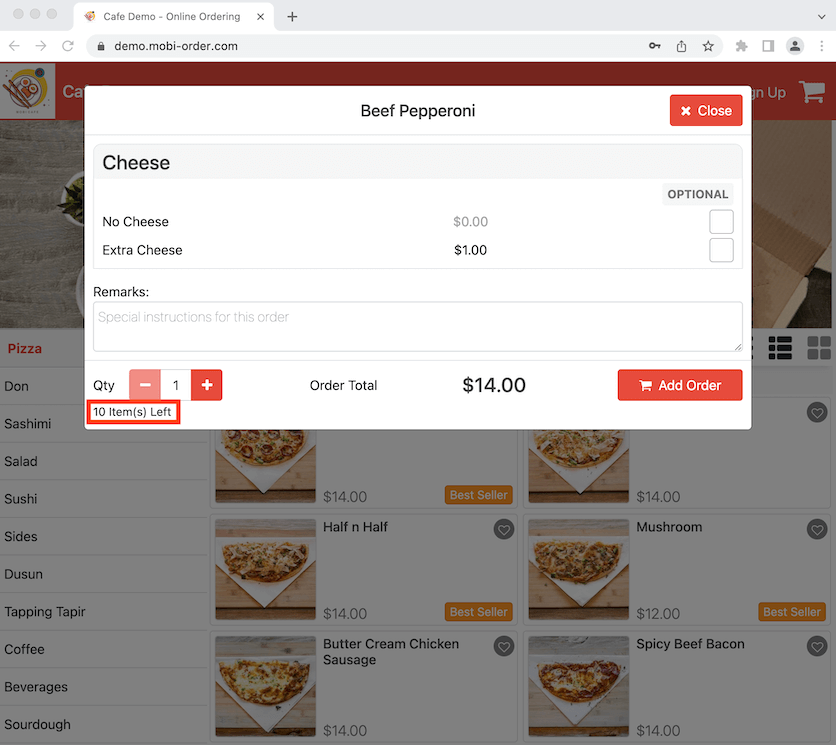
Go back to the online store and select a Beef Pepperoni. We can now see there are 10 Beef Pepperonis left when ordering.
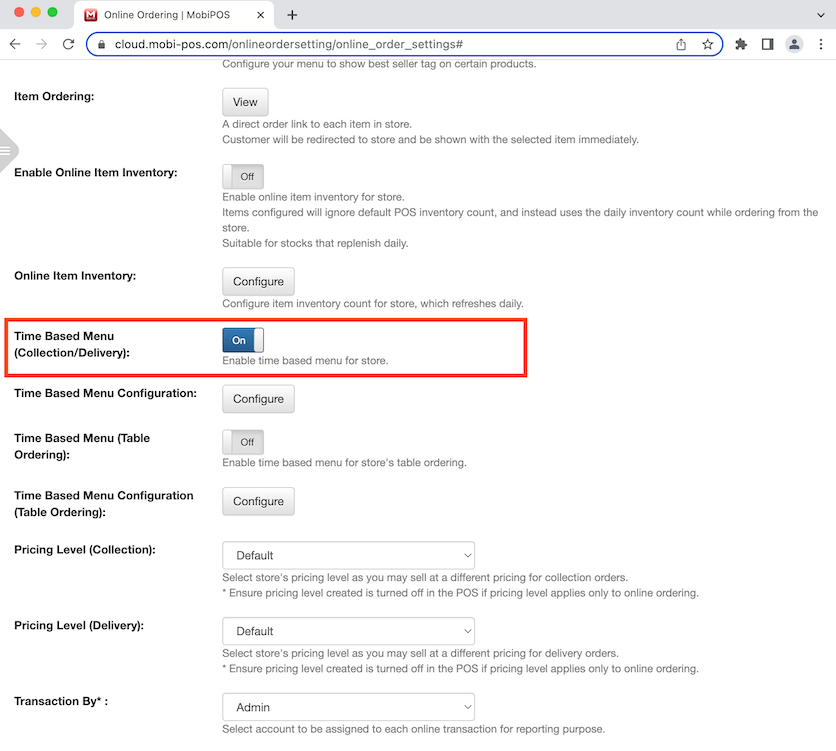
Time Based Menu (Collection/Delivery/Table Ordering)
Enabling this allows you to set a time for specific items or categories available for order delivery and collection. Click to toggle on then click Save at the bottom of the page.
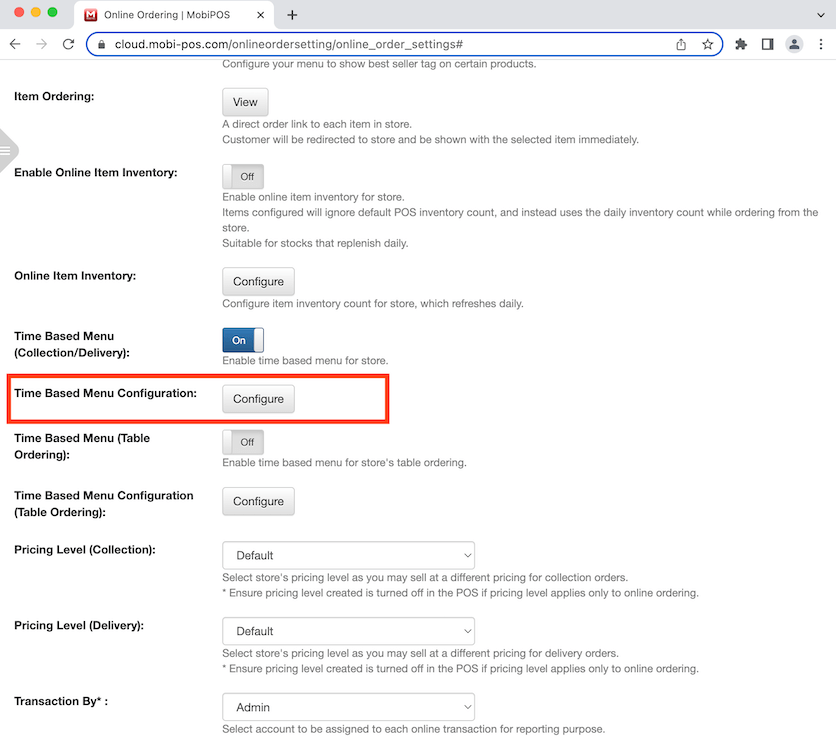
Time Based Menu Configuration
You can configure a time based menu if you have it enabled above. Click on Configure and it will lead you to a new page.
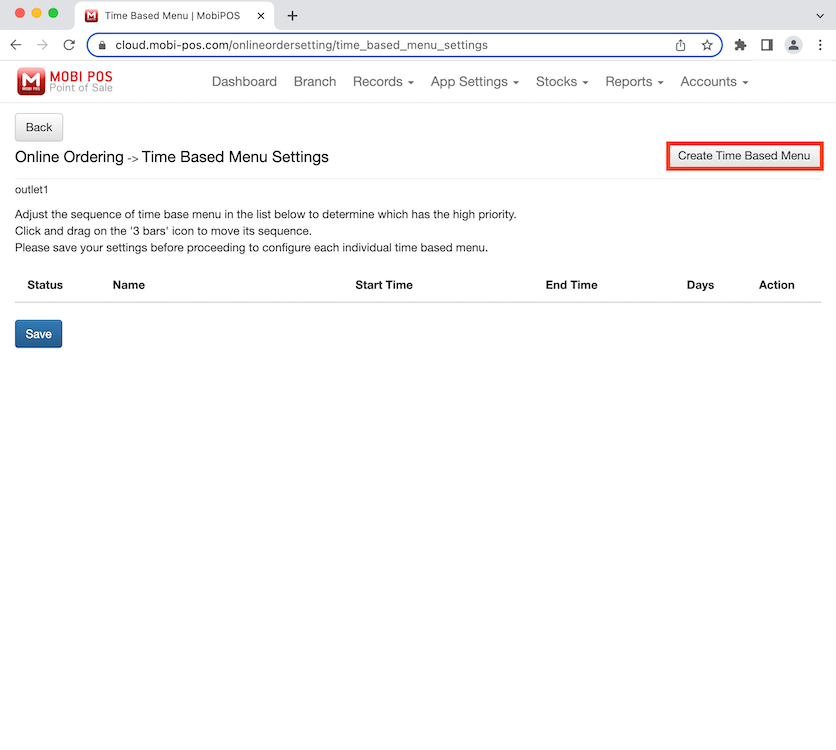
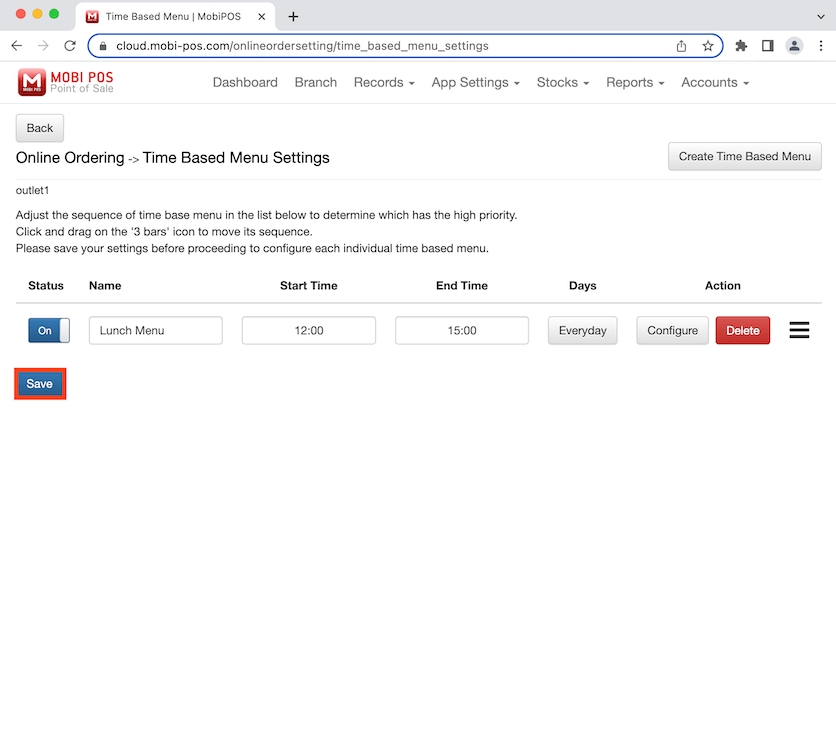
Click on Create Time Based Menu.
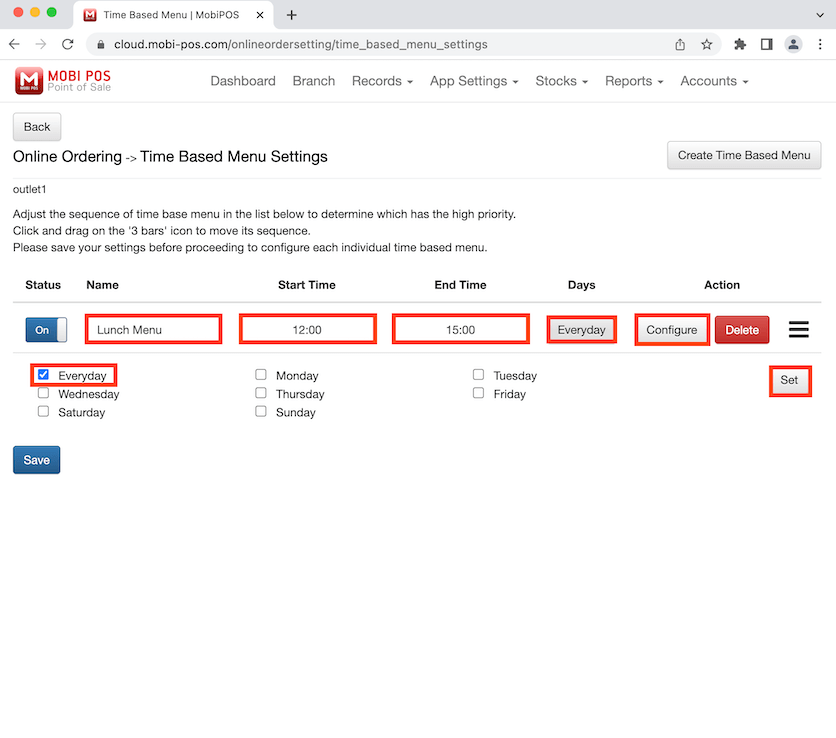
Now you can enter the details for the time based menu. Lunch Menu is entered as an example and the time for this menu is set from 12:00 to 15:00.
You can also choose the days for the menu to be available for ordering by clicking on the boxes. Multiple days can be selected for the time based menu.
Click on Set after selecting the days.
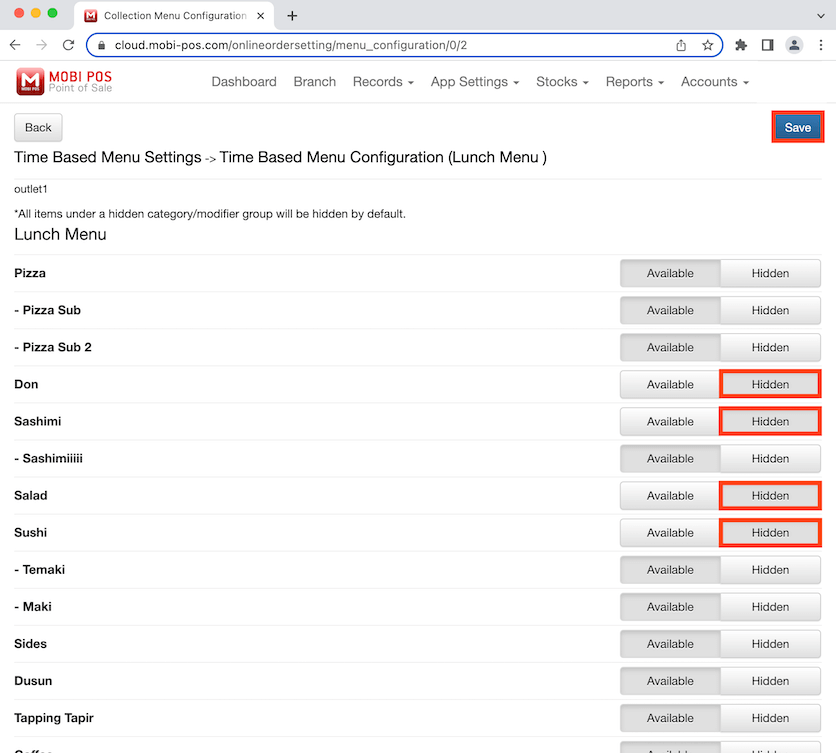
Click on Configure and it will bring you to the page where you can select the categories or items you want for this menu.
All categories and items will be configured to Available and they will show up in the online store for this time based menu.
Click on Hidden if you do not want them to be shown for this menu. Don, Sashimi, Salad and Sushi are selected as Hidden in this example photo. After that, click Save at the top right of the page to finalise the changes. Click on Back at the top left to go back to the previous page.
Click on Save to finalise all changes after configuring the menu.
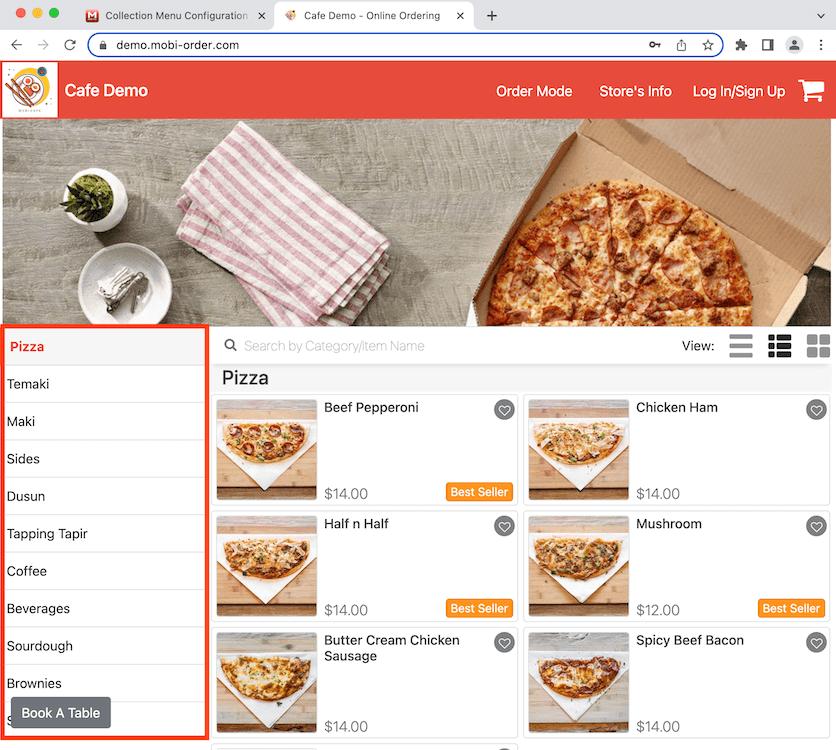
Go to the online store and you can now see Don, Sashimi, Salad and Sushi are hidden from the menu for the time you have set from 12:00PM to 3:00PM (Delivery/Collection).
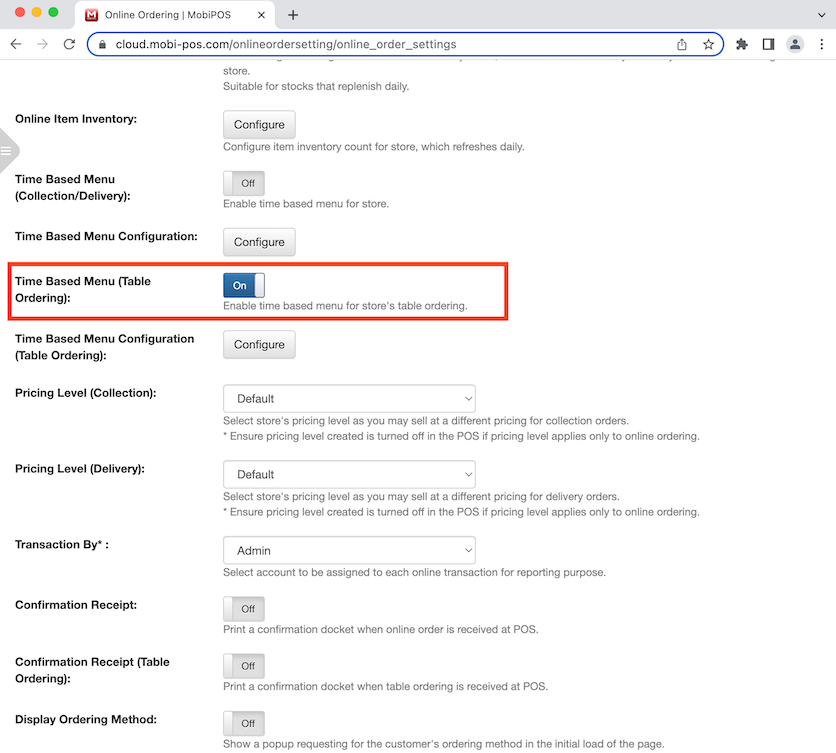
Time Based Menu (Table Ordering)
Enabling this allows you to set a time for specific items or categories available for Table Ordering. Click to toggle on then click Save at the bottom of the page.
Pricing Level (Collection/Delivery)
To sell at a different pricing for online order, select a different pricing level.
You will need to setup pricing level in the app, Settings -> Pricing Level before changing it here.
Transaction By
For each online transaction, it will be automatically assigned to the account you selected here.
At the end of the day, you could generate an employee sales report to see how much sales were from online ordering.
Confirmation Receipt (Collection/Delivery/Table Ordering)
Enabling this prints a confirmation docket when an online order is received at POS.
Display Ordering Method
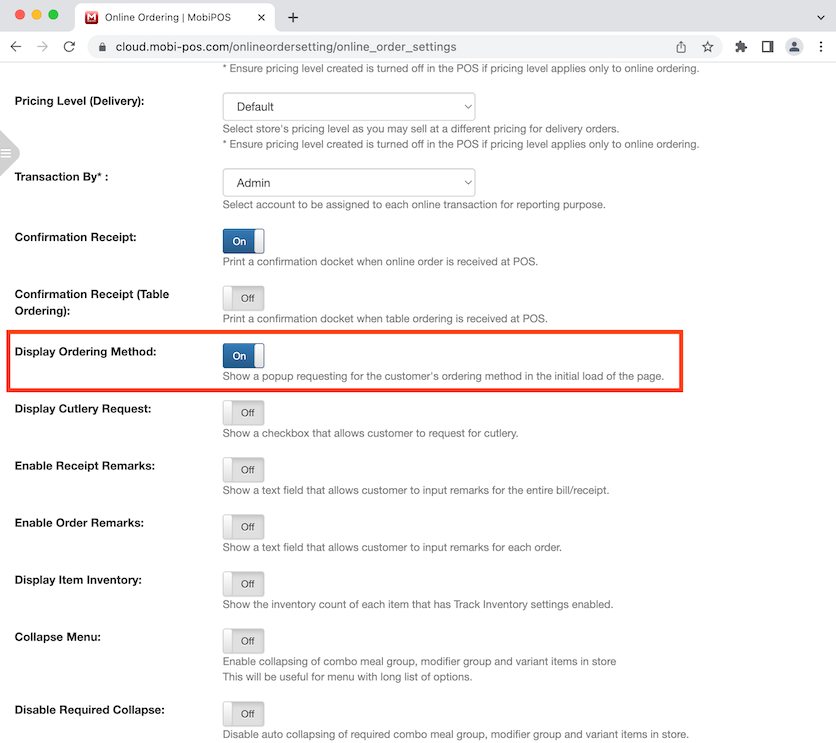
Enabling this allows a pop up during the initial load of the page where the customer is requested to choose their ordering method. Click to toggle on then click Save at the bottom of the page. Note that if Time Based Menu is enabled, Display Ordering Method will be enabled automatically as it is compulsory.
Now go to the online store and the pop up will show up, requesting for the customers to select their ordering method.

Display Cutlery Request
By enabling this, a cutlery request will show up in Order Details which gives customer the option to request for cutlery for their order. Click to toggle on then click Save at the bottom of the page.

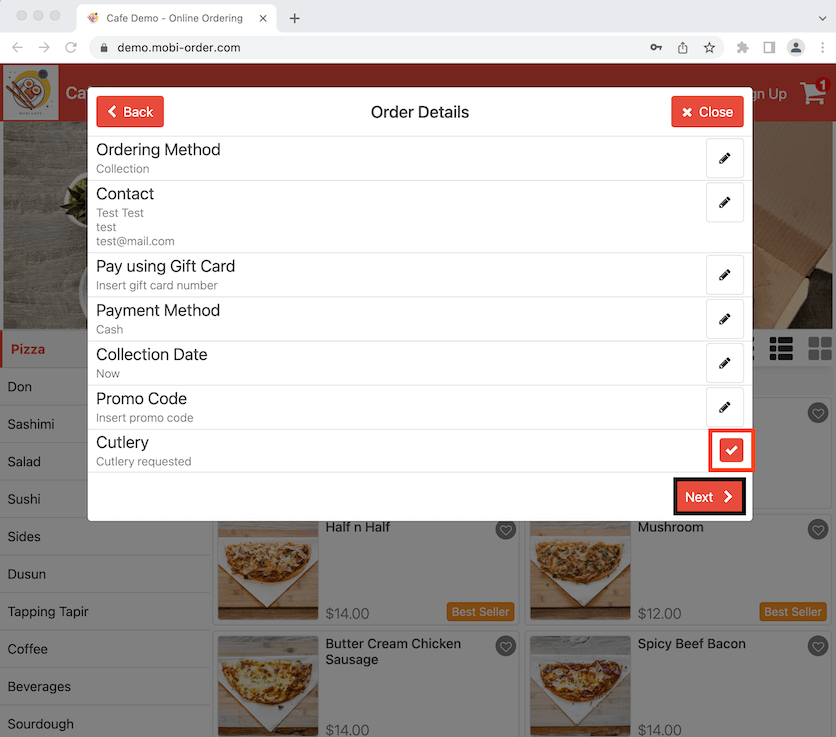
Go the online store and add an item to the cart. Click on the cart to checkout and it will bring you to Order Details. You can now see the option to request for cutlery for the order. Click on the box and it will show that you have requested for cutlery. Click on Next to proceed.
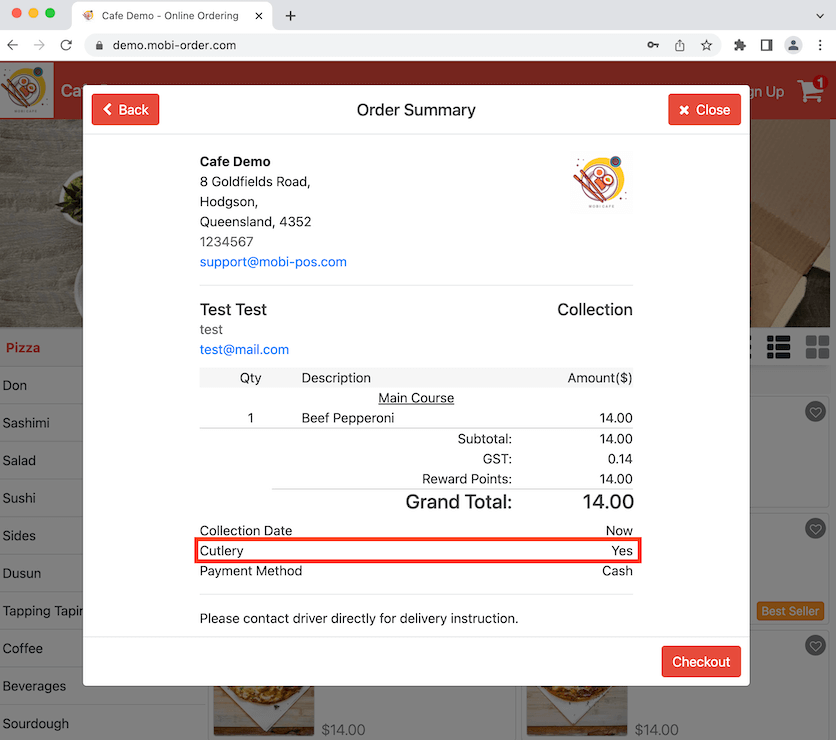
It will show in the bill that cutlery has been requested noting with a "Yes". Click on Checkout to finalise the order.
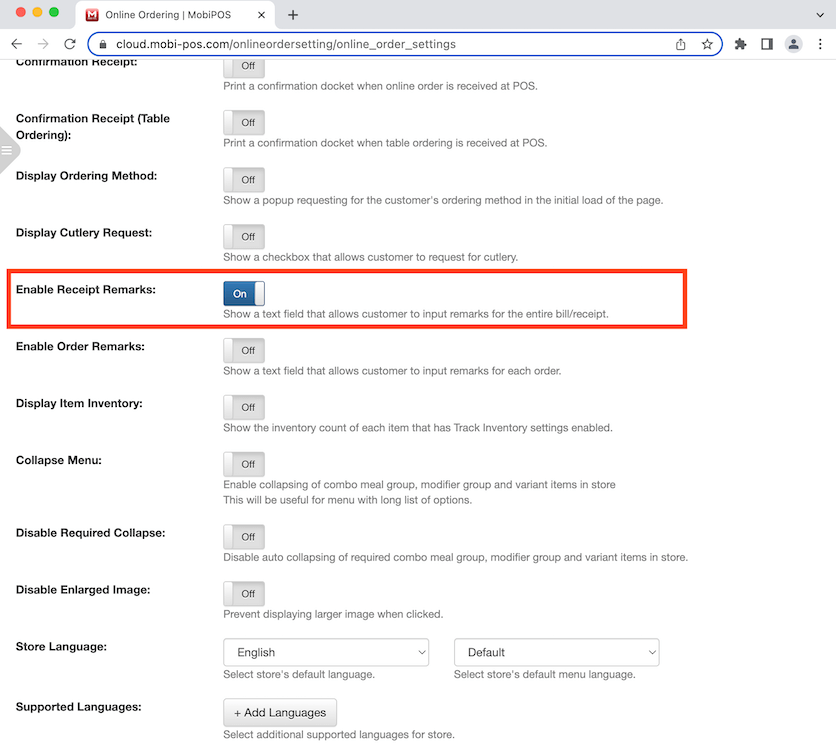
Enable Receipt Remarks
Enabling this gives customer the option to enter a receipt remark during checkout for their order. Some business owners choose to disable this because they want avoid disappointing customers if they are not able to fulfil certain remarks.
If you want to enable Receipt Remarks, click to toggle on then click Save at the bottom of the page.
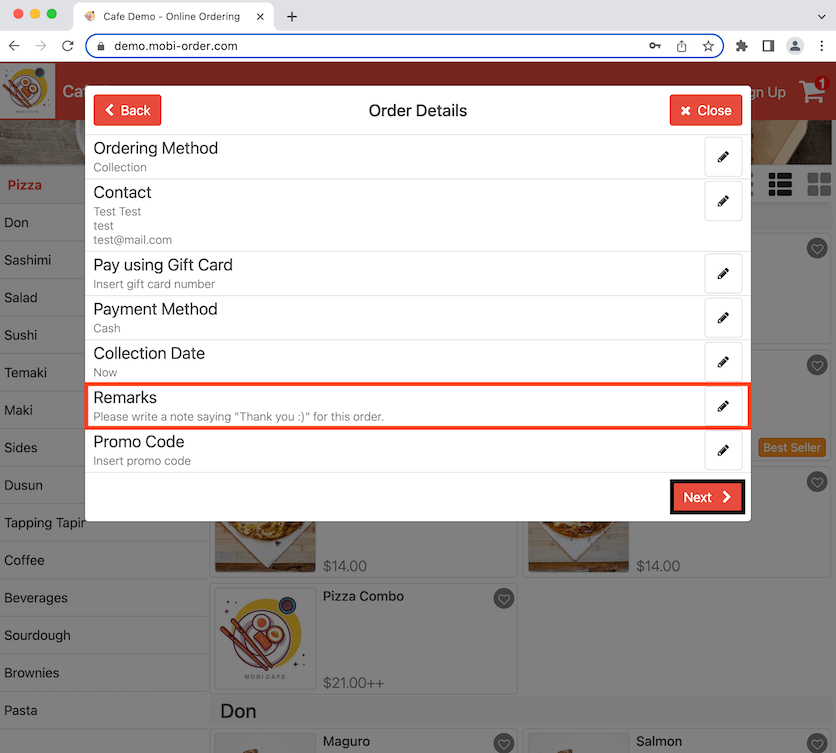
Go the online store and add an item to the cart. Click on the cart to checkout and it will bring you to Order Details. You can now see the option to insert a remark for the order. Click on the pencil icon on the right.

Insert the remarks for the order then click on Save after.

Click on Next to proceed.
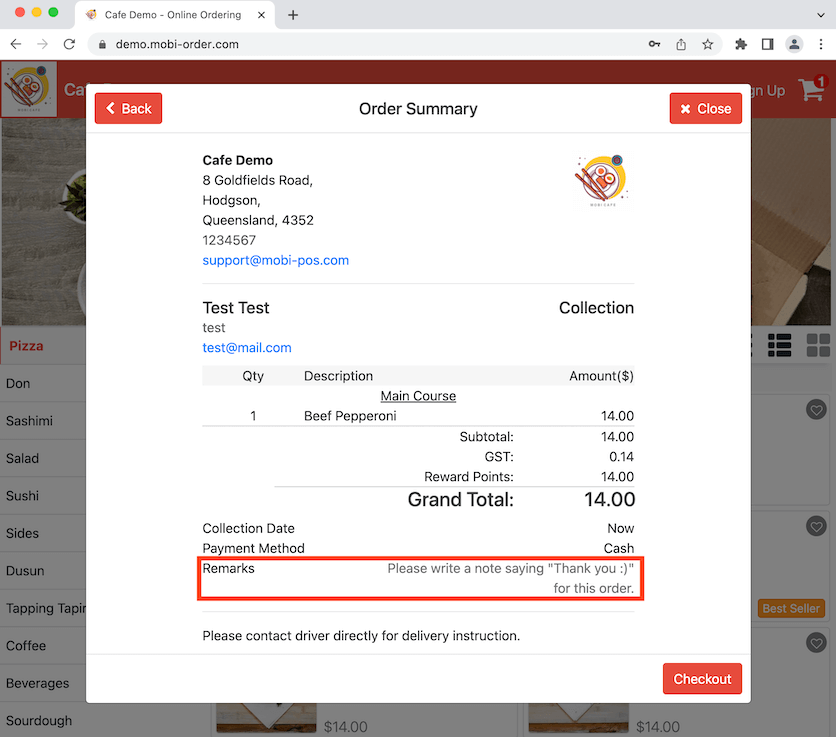
It shows the remarks you have written for the order in the bill. Click on Checkout to finalise the order.
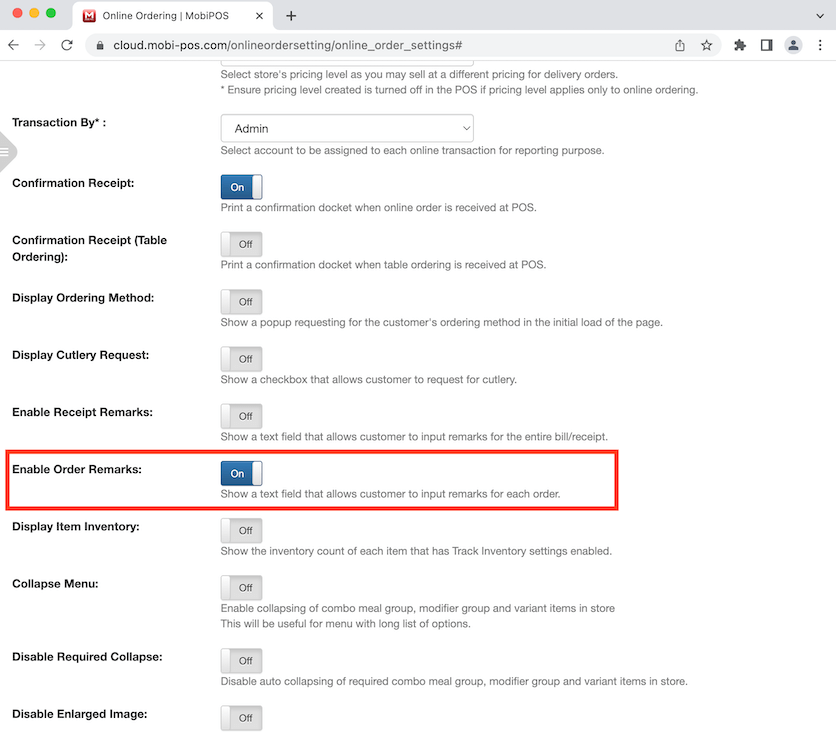
Enable Order Remarks
By enabling this allows the customers to enter a remark for the items they are ordering. Click to toggle on then click Save at the bottom of the page.
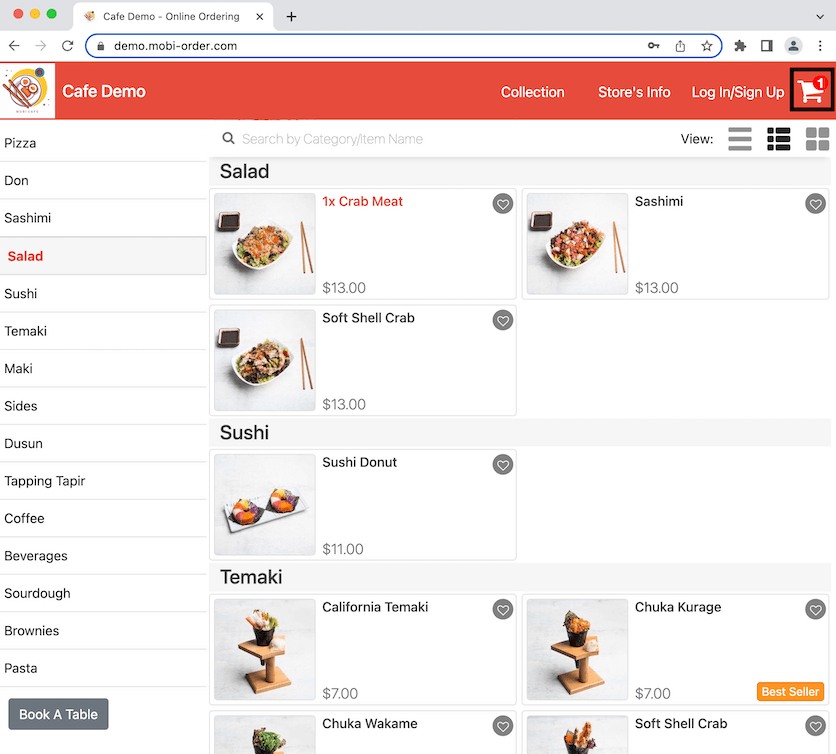
Now go to the online store and select an item. We will select Crab Meat Salad as an example. Click on Crab Meat.
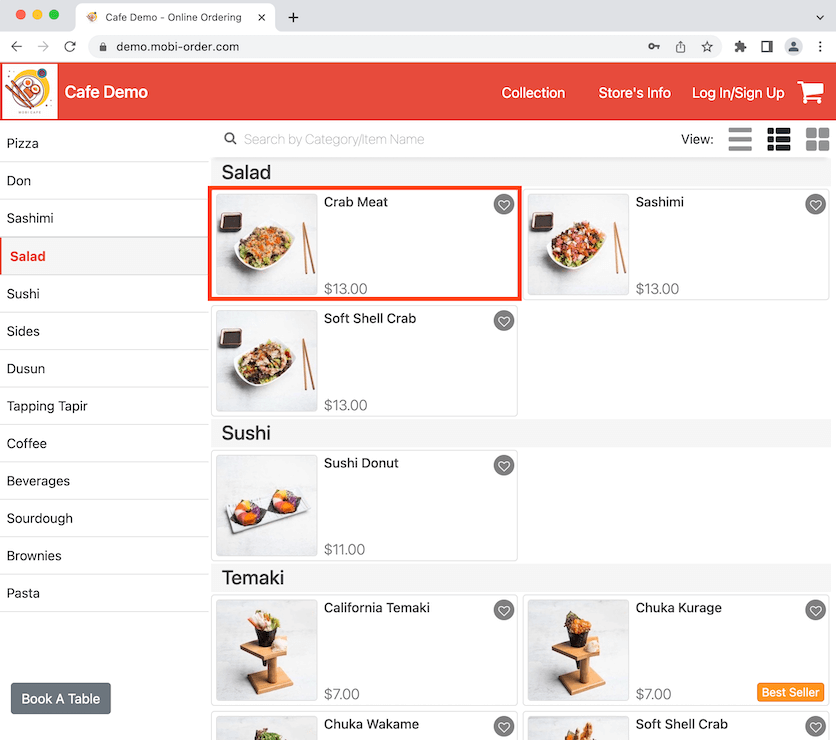
A popup will show and you can now enter the remarks for this item. In this case, "No tomatoes" is entered. Click on Add Order after entering the remarks.

Click on the cart to checkout.
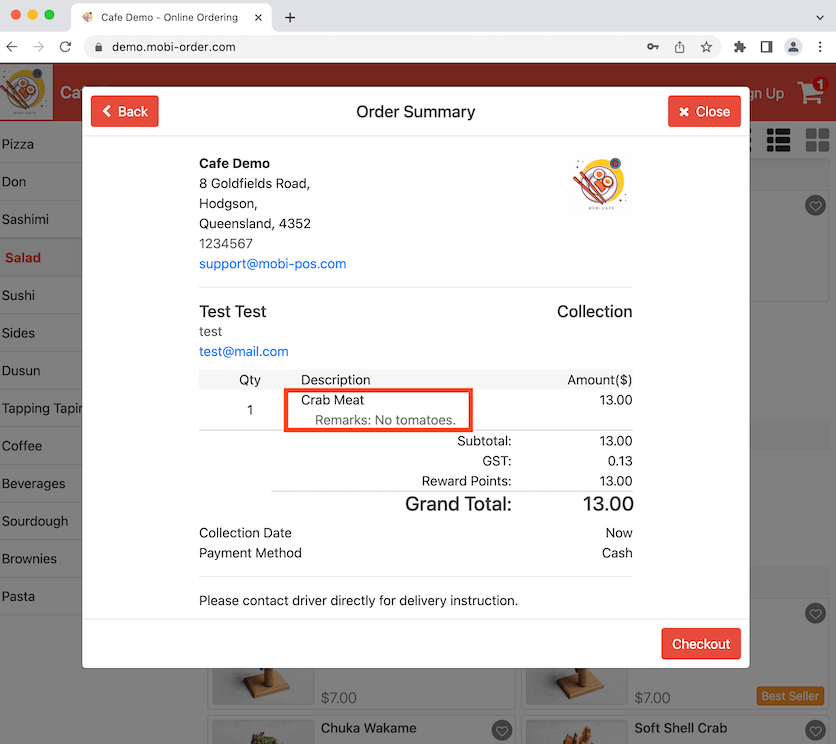
After entering all the information required for this order, click on Next and it will bring you to Order Summary. You can now see the remarks under the item you have ordered. Click on Checkout to finalise the order.
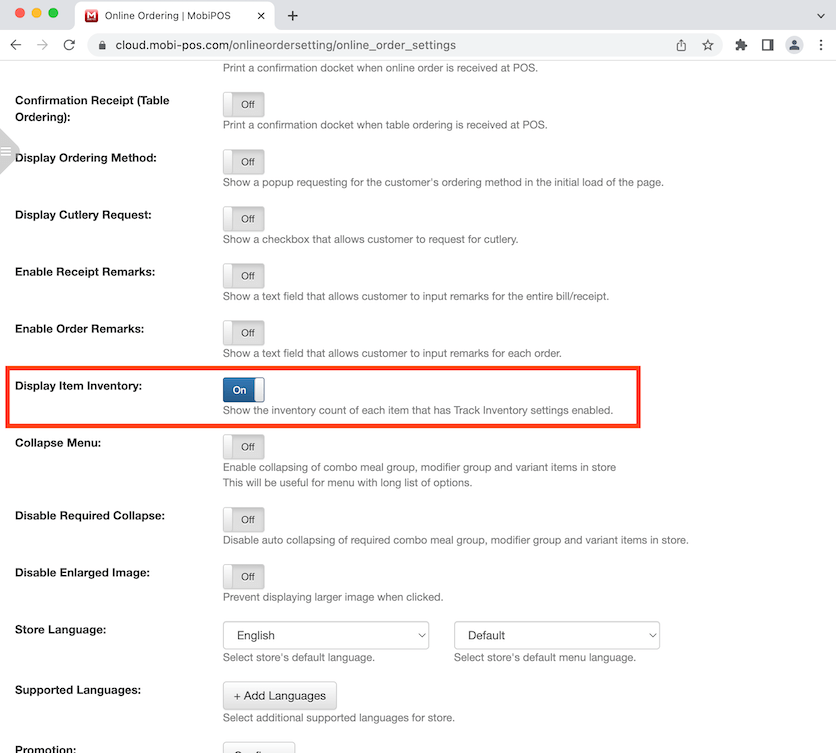
Display Item Inventory
By enabling, the online store will follow the Track Inventory Count from the POS system. But if both Display Item Inventory and Enable Online Item Inventory are enabled, online item inventory will overwrite item inventory from POS. Track Inventory will be ignored. Click to toggle on then click on Save at the bottom of the page after.
Go to the online store and select an item, In this case, Beef Pepperoni is selected as an example and it shows that there are 10 of items left from the Track Inventory.

Collapse Menu
Enabling this allows the collapsing of modifier groups when ordering an item on the online store. Click to toggle on then click Save at the bottom of the page.

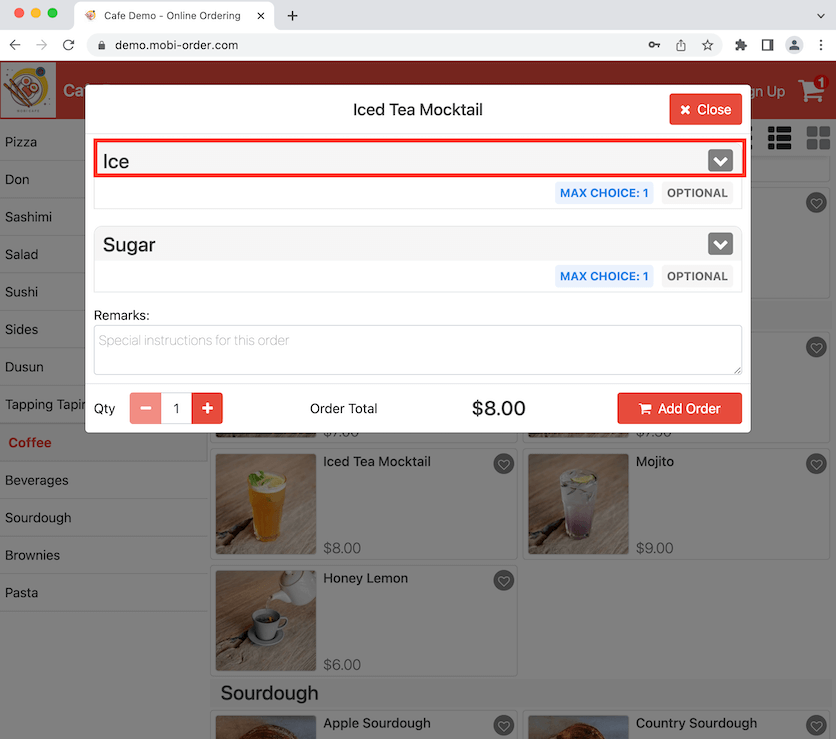
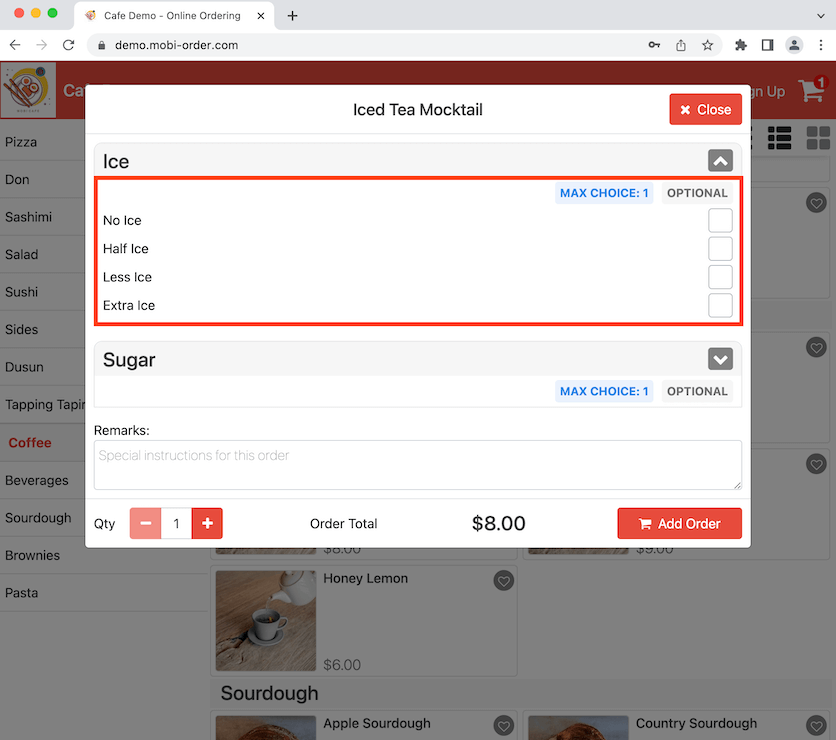
Go to the online store and select an item that has modifier groups. Iced Tea Mocktail is selected as an example and you can see Ice and Sugar are the modifier groups which have been collapsed. Click on the downwards arrow button to expand the modifier group.
It now shows the modifiers for Ice. Click on the upwards arrow button to collapse the modifier group.
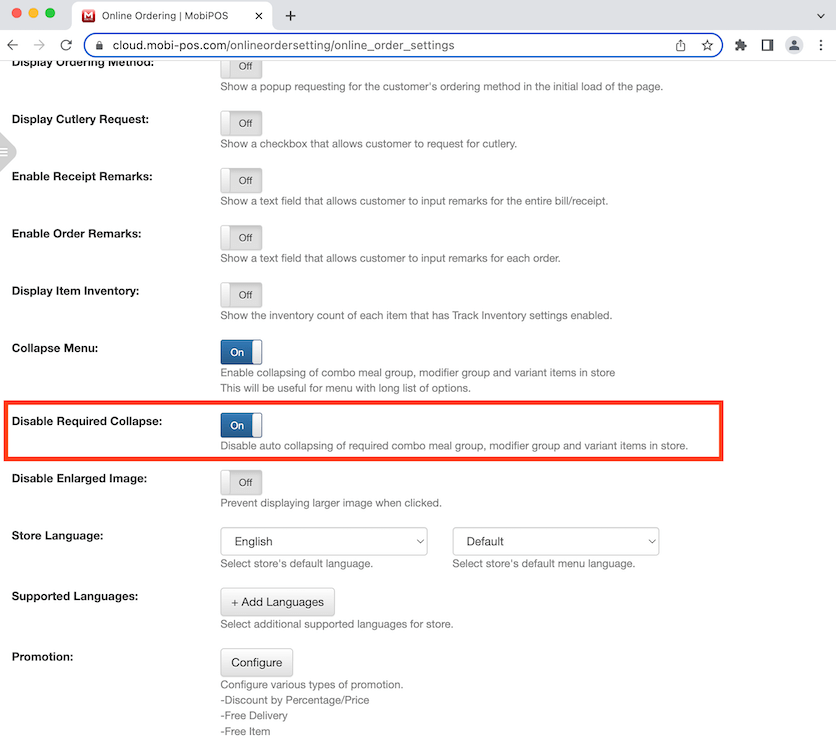
Disable Required Collapse
Enabling this disables collapsing of modifier groups that is required upon ordering an item. Click to toggle on then click Save at the bottom of the page after.
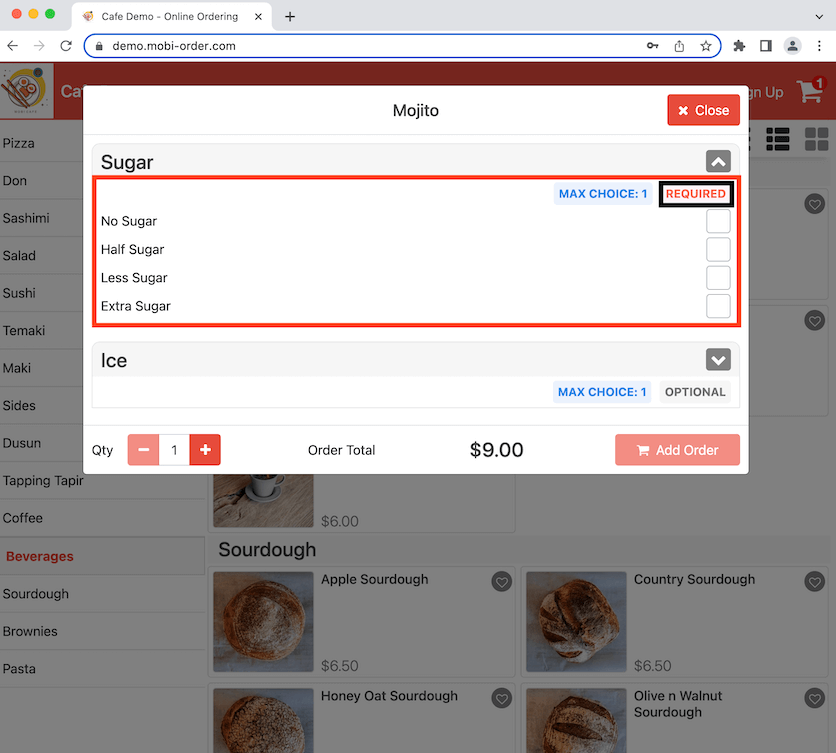
Go to the online store and select an item that has modifier groups. Mojito is selected as an example and you can see the modifiers for Sugar are not collapse because a sugar level is required for selection upon ordering.
Ice is not required, thus the modifiers have been collapsed.
Disable Enlarged Image
Enabling this will disable enlarged image of item when ordering in the online store. Click to toggle on then click Save at the bottom of the page.

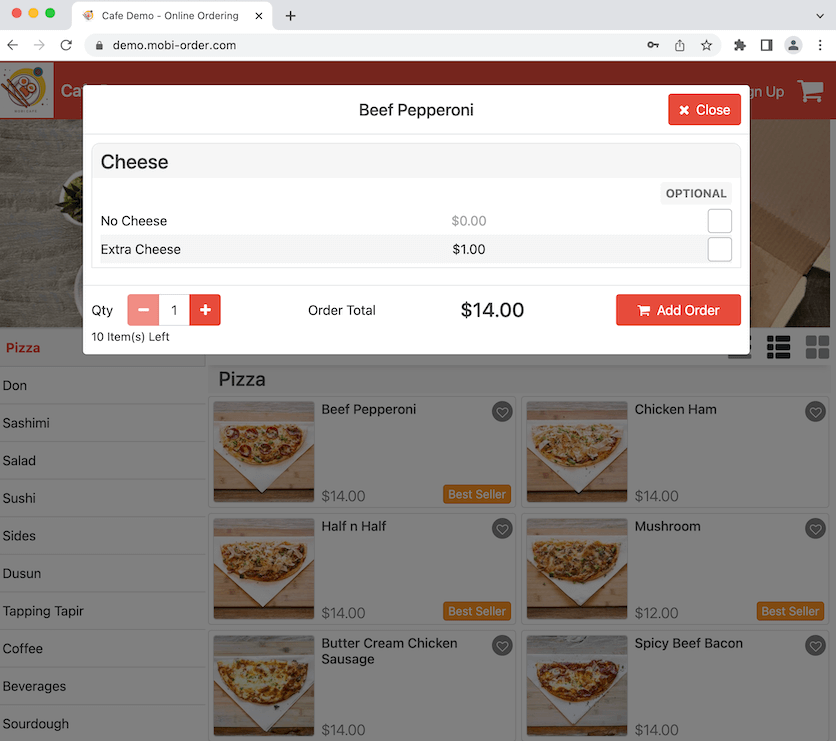
Go to the online store and select an item. Beef Pepperoni is selected as an example and a popup will show when clicking on the item. An image of the item will usually show up but since it has been disabled, there will not be any image shown during the popup.
Store Language
You have the option to set a default language for the online store buttons and the menu. Click on the arrow to select a language.

Japanese is selected for the store language and English (Default) for the menu's language in this example. Click anywhere on the screen to continue then click Save at the bottom of the page.

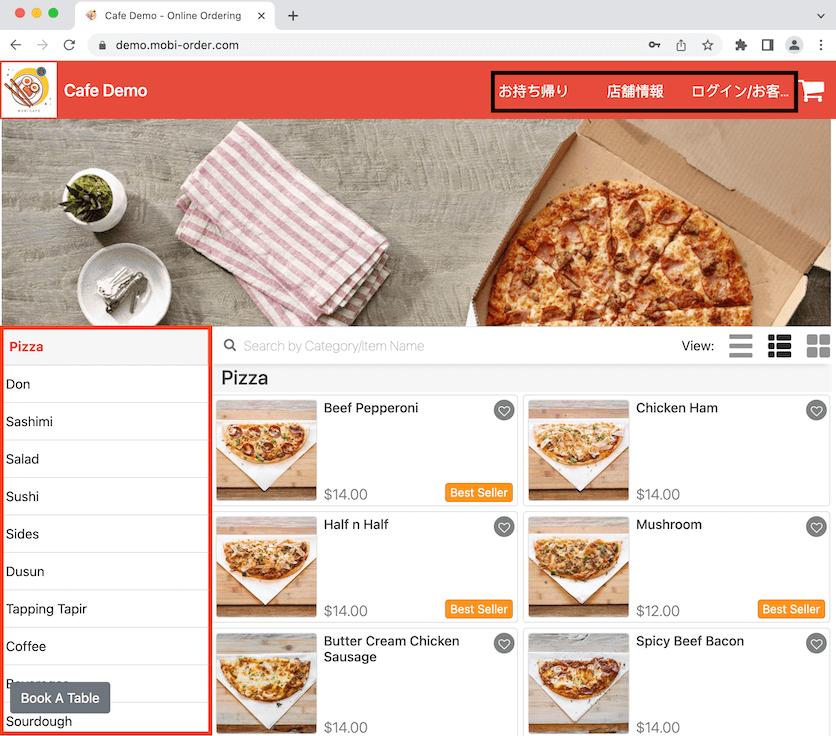
Now go to the online store and you can see the buttons of the online store is set to Japanese and English for the menu.
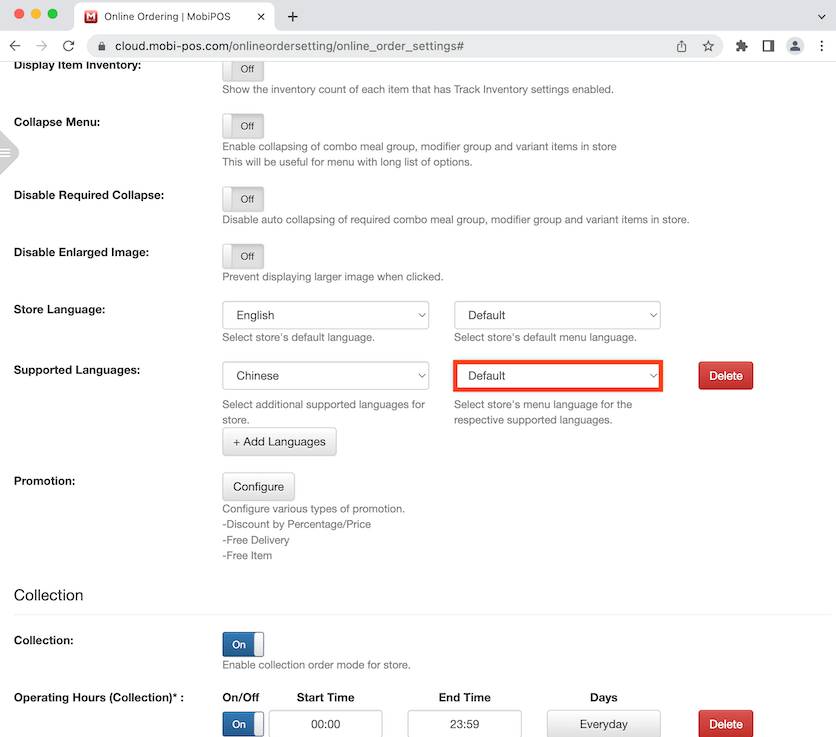
Supported Languages
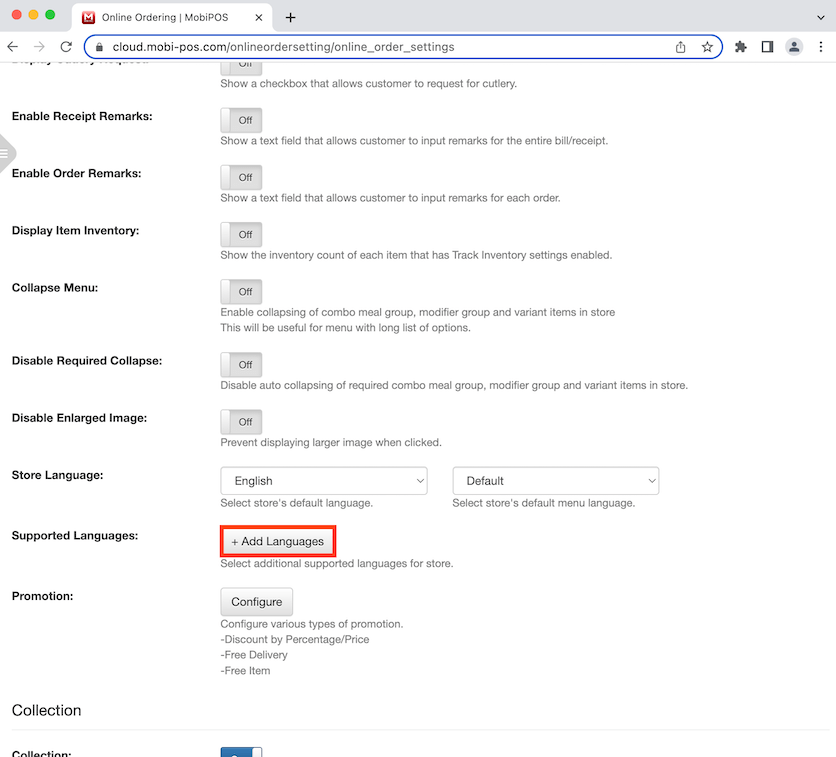
This allows you to select an additional language to support the online store and the store menu. Click on +Add Languages.
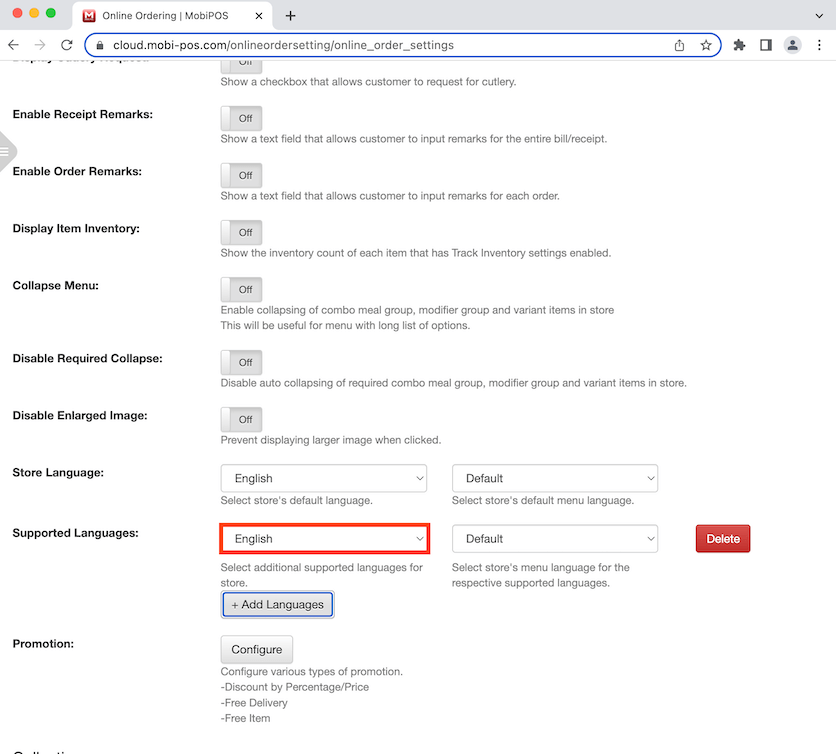
The default language is English. Click on the downward arrow to select an additional language.
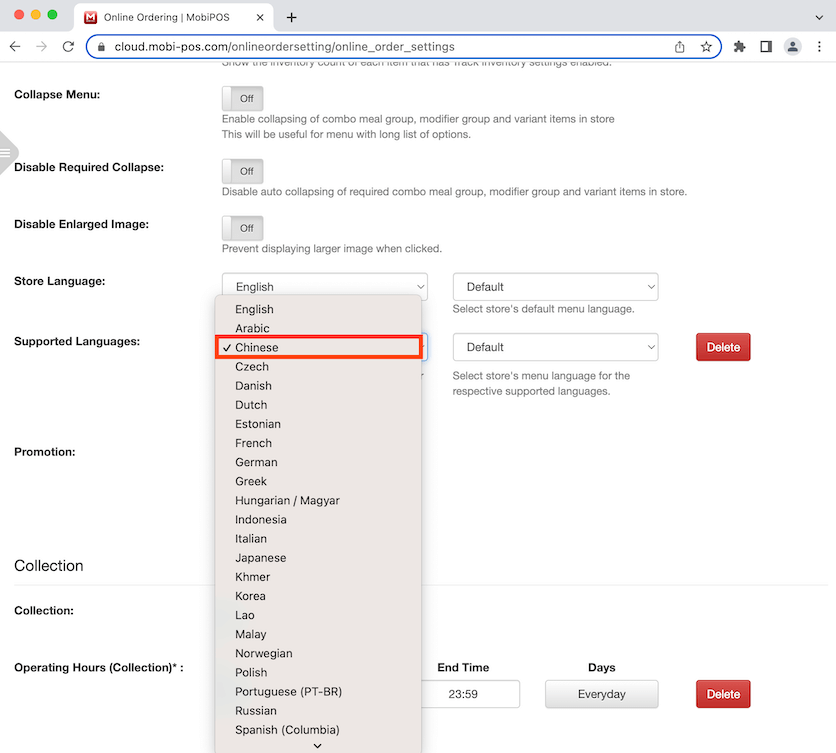
Chinese is selected as an example. Click anywhere on the screen to continue.
The store's menu language is set to Default as an example. After setting the additional language for the store and the menu, click Save at the bottom of the page to finalise the changes.
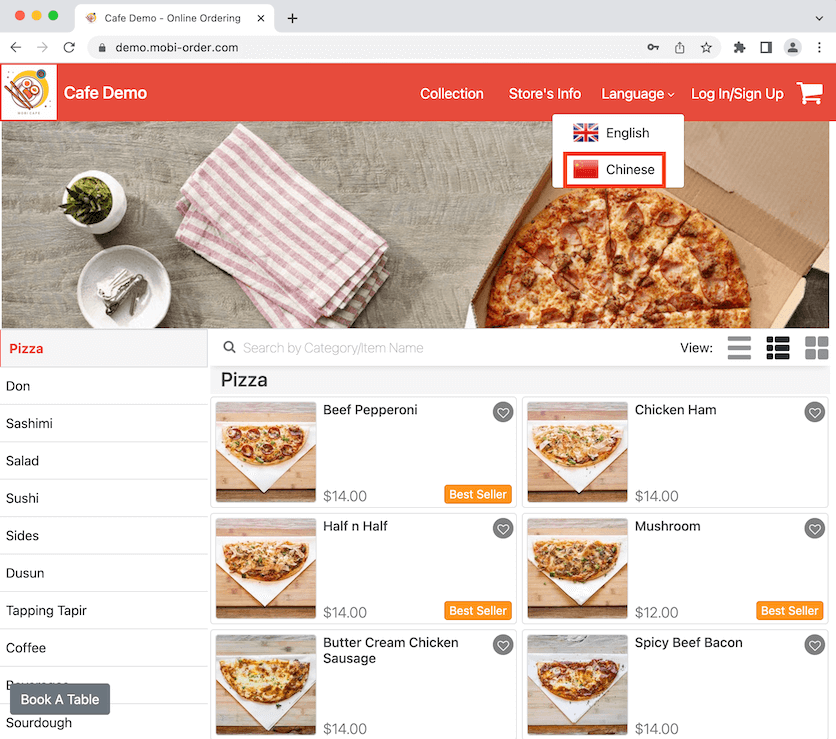
Now go to the online store and click on Language on the top.

It shows the additional language you can choose for the store. Click on Chinese.
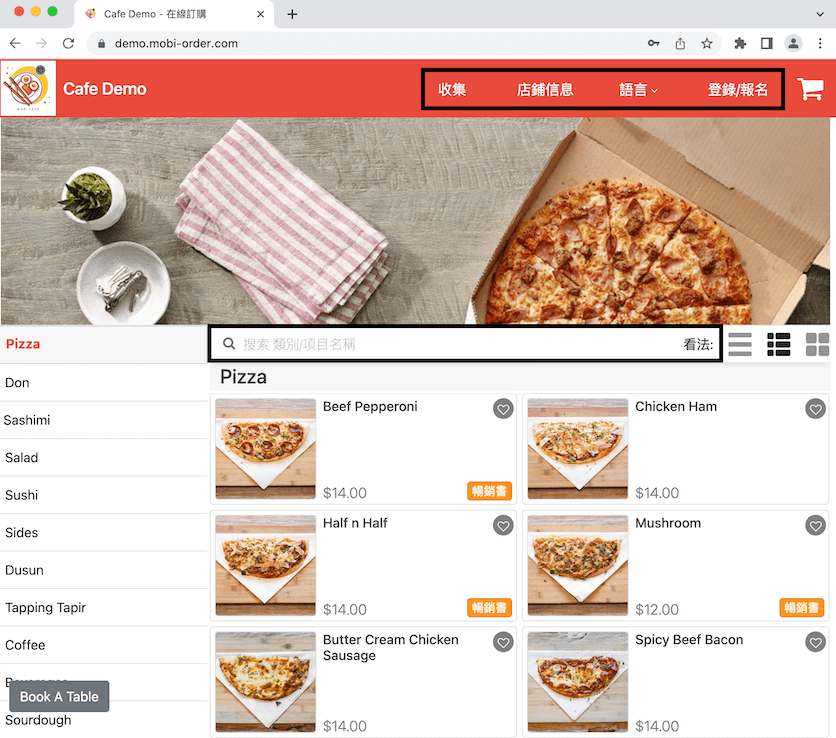
Now the buttons for the store is changed to Chinese and the menu language remained as English since it was set to the default language.
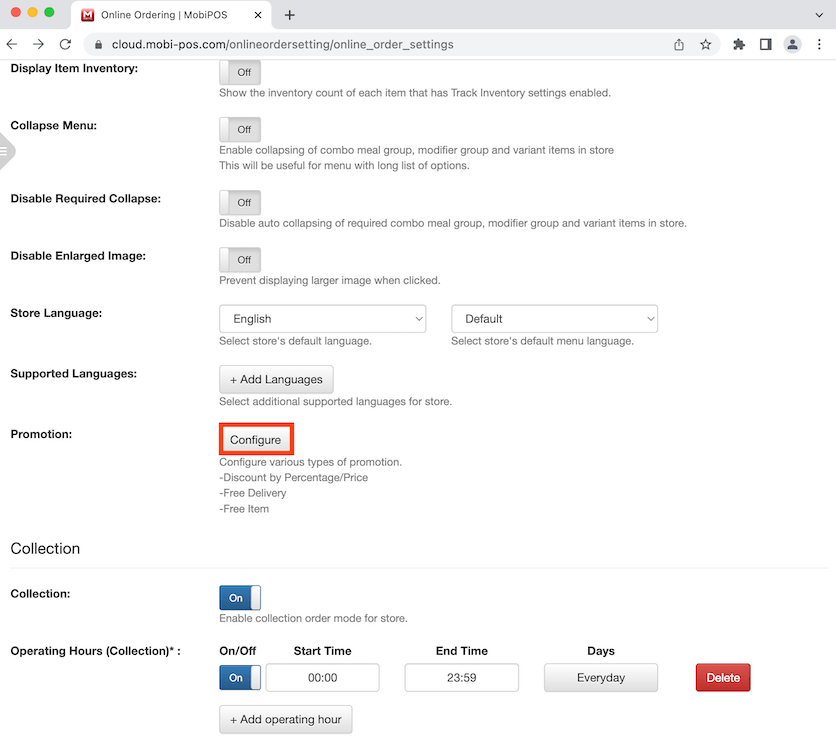
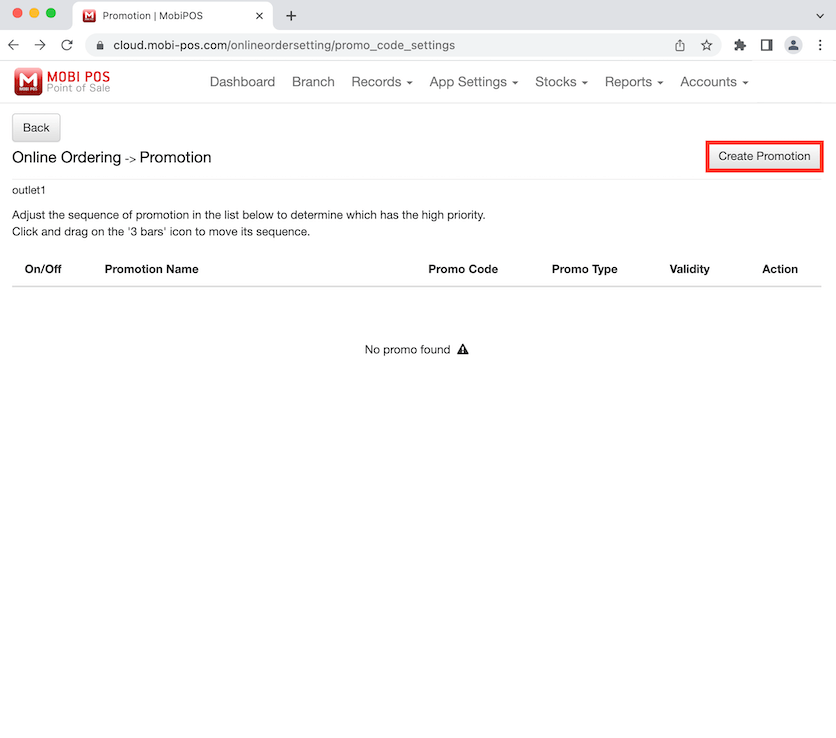
Promotion
Click on Configure and it will lead you to a new page where you can configure 3 different types of promotion for the online store.
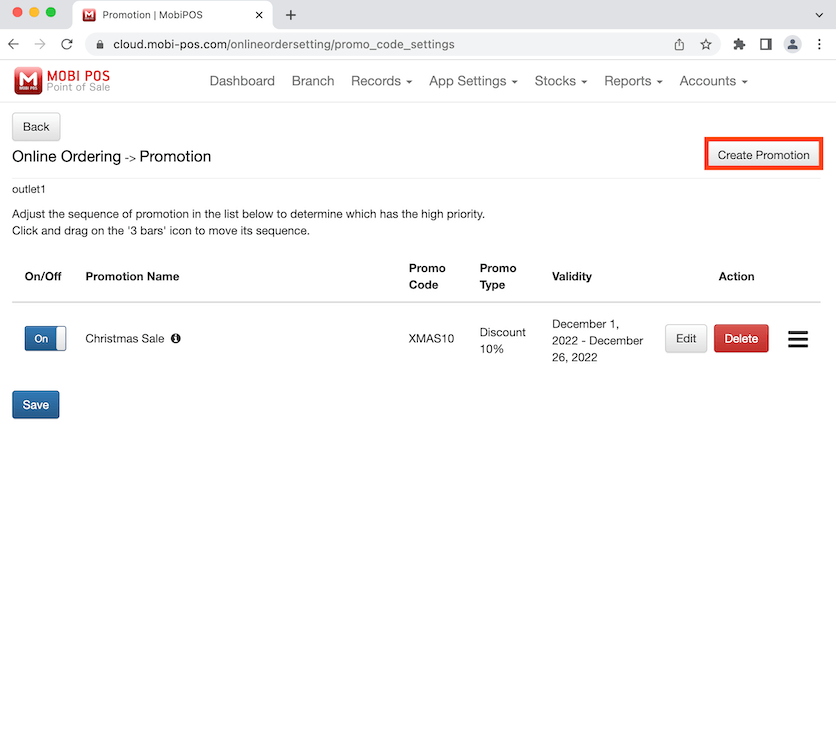
Click on Create Promotion at the top right.
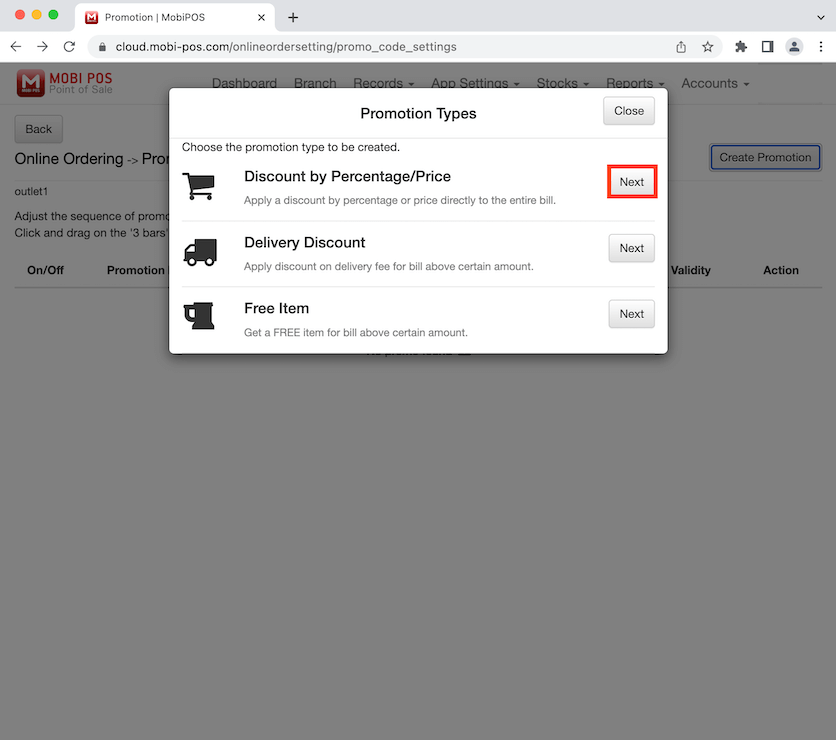
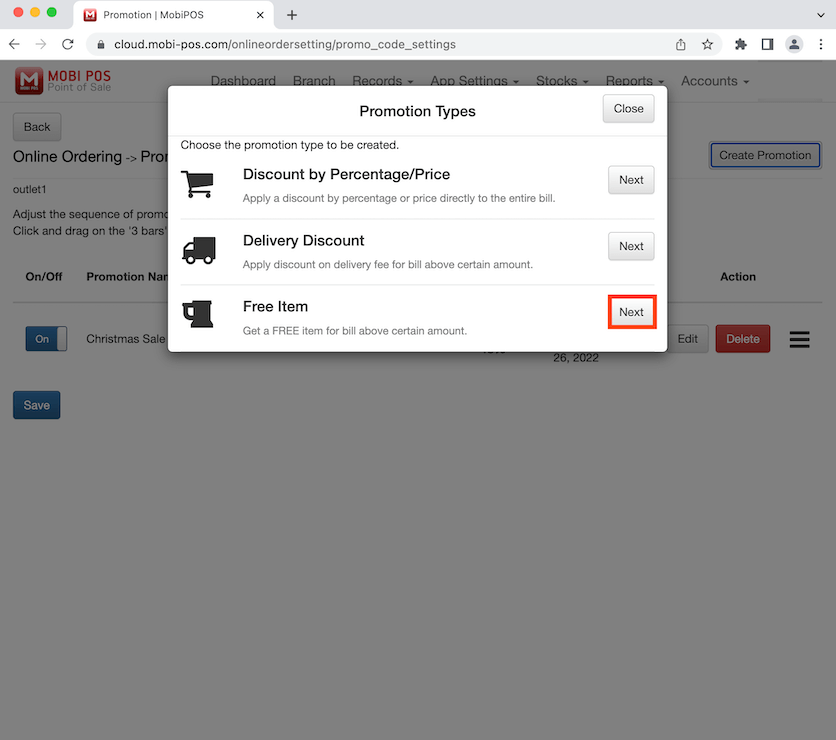
Choose the type of promotion you want to create by clicking on the Next button and it will lead you to a new page. We will select Discount by Percentage/Price as an example.
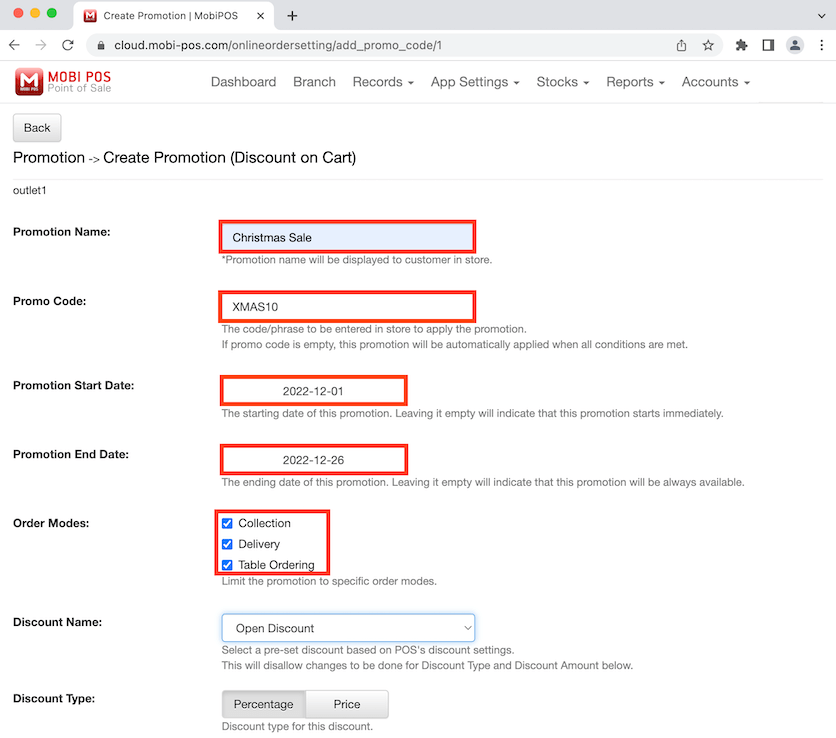
Enter the promotion name and the promo code. In this case, we are creating a Christmas Sale promotion. You can also set the promotion start and end date.
Click to set the dates. If no starting date is set, the promotion will start immediately. If no end date is set, the promotion will go on indefinitely. Click on the boxes to select the types of order modes which the promotion is applicable. We have selected all order modes as an example.
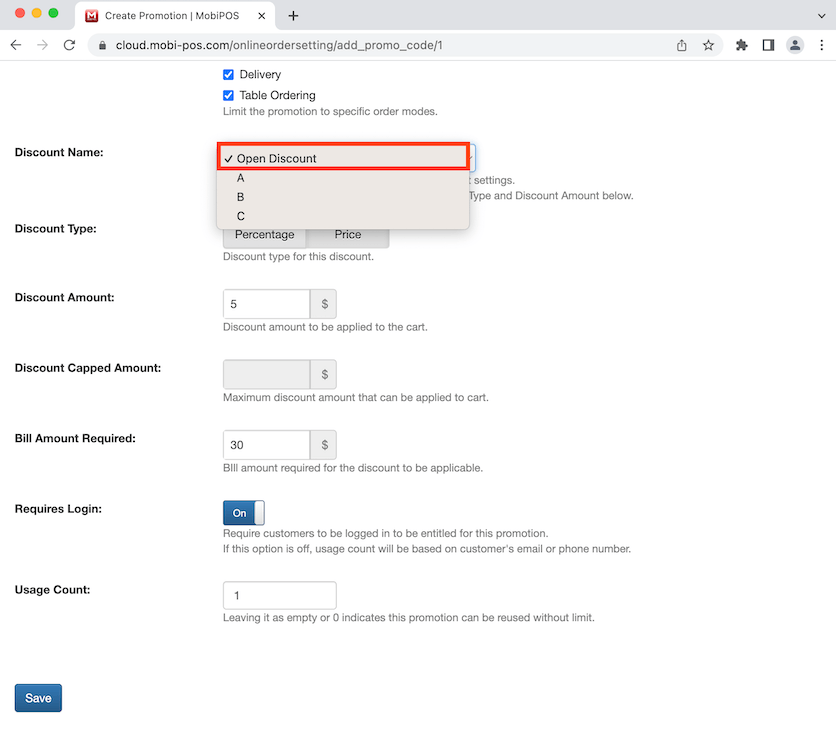
Moving onto Discount Name, click to select the discount you want.
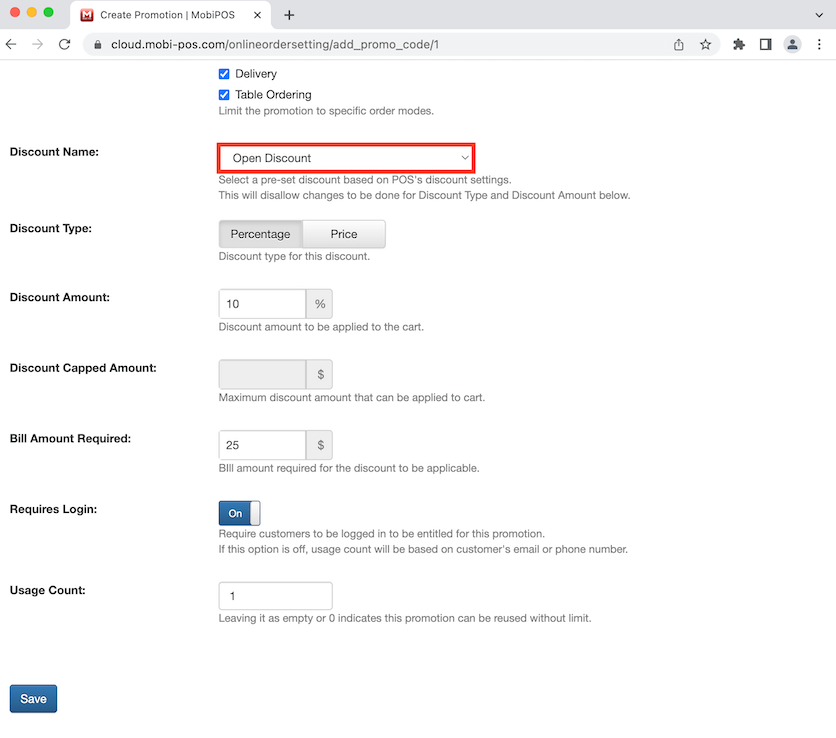
You can select the types of discount name for this promotion. Open Discount is the default where you have the option to set the discount type and discount amount. Click to select Open Discount.
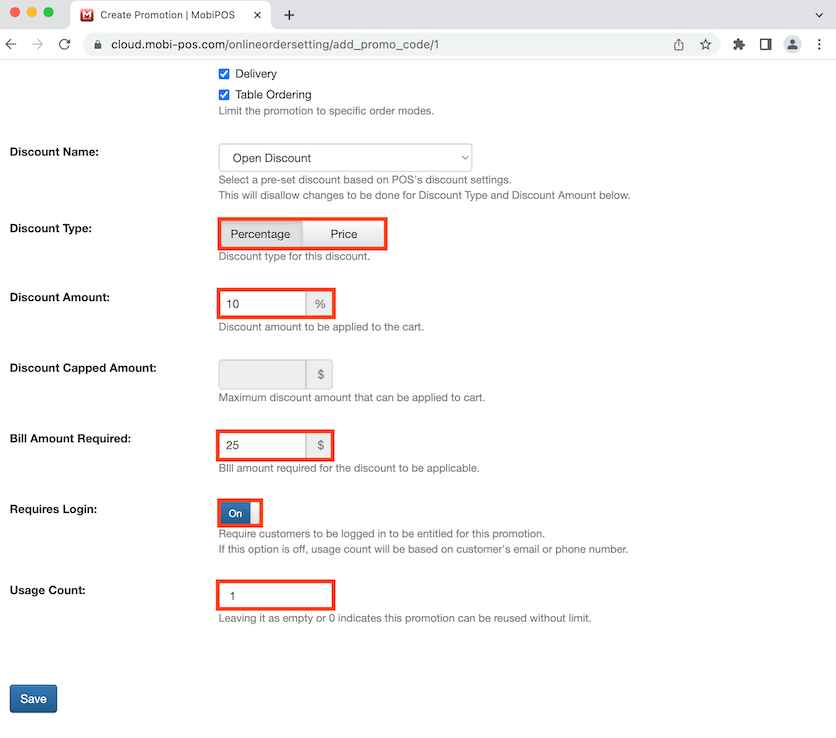
You can select percentage or price as the discount type for this promotion. We have selected Percentage in this example where 10% is entered as the discount amount and $25 is the minimum bill amount for the promotion to be applicable.
You also have the option to toggle on Requires Login where customers need to login to be entitled for this promotion. Enter an amount for the Usage Count. 1 is entered here so it means the discount code can only be used once for each customer.
Leaving it empty or 0 means the discount code can be used again without limits. After entering all the details, click Save at the bottom of the page to finalise all changes and it will bring you back to the previous page.
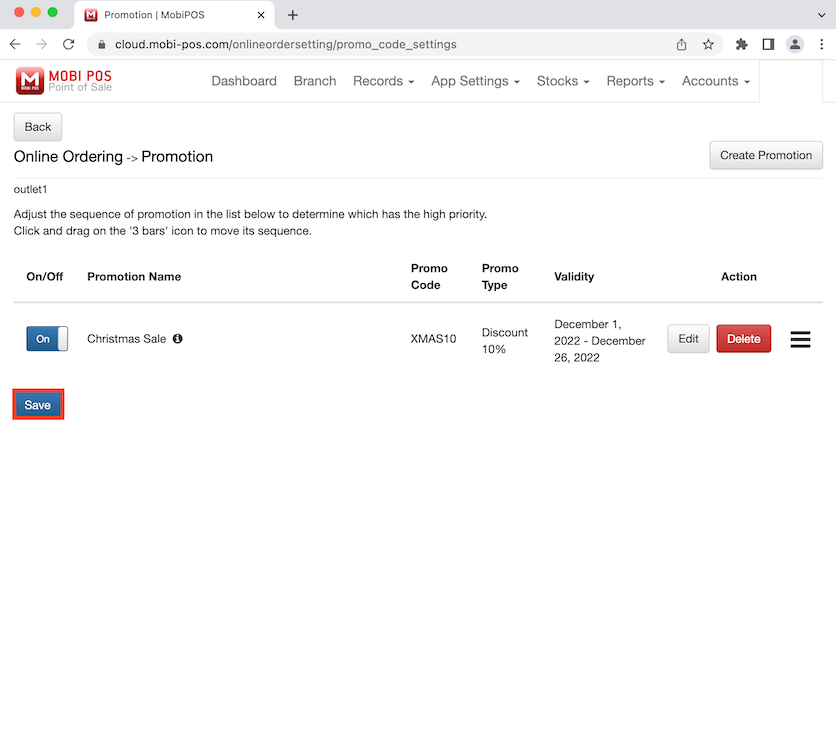
Click on Save to finalise this promotion.
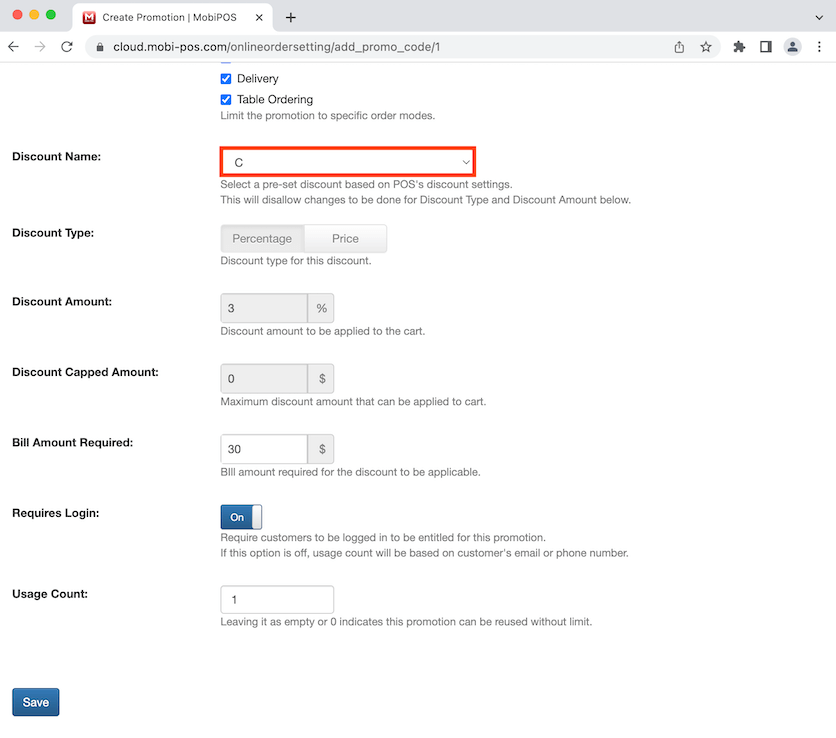
Note that if your Discount Name is set a pre-set discount, you cannot change the discount type and amount. You can only change the amount for Bill Amount Required.
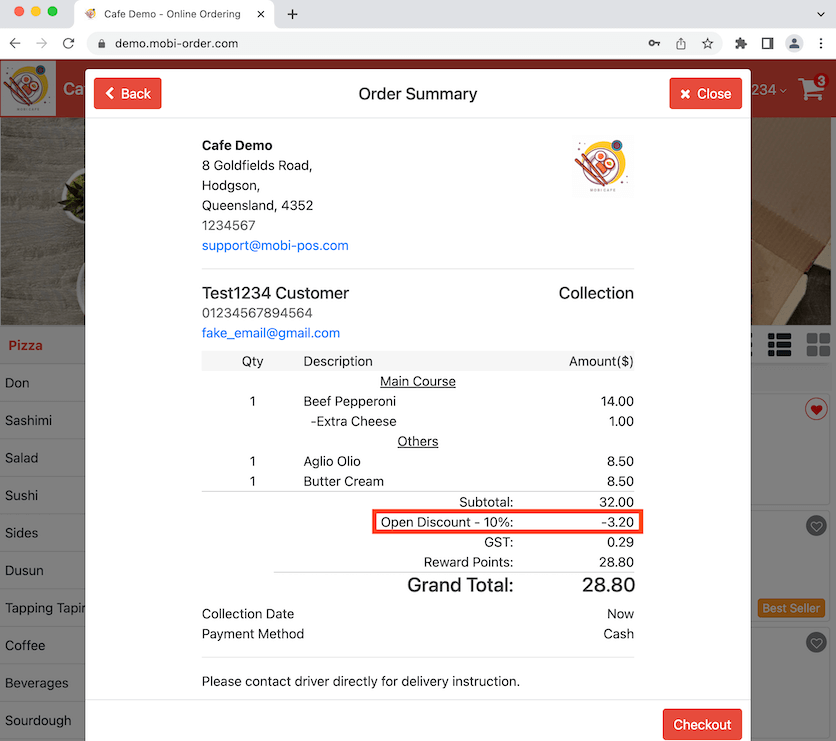
Now we will check if the Christmas Sale promotion works. To be entitled for this promotion, you need to login and the minimum amount for the bill has to $25 to get a 10% discount.
Go to the online store and order the items you want. A few items have been selected in this example photo and the total bill is more than $25. Click on Next to continue.
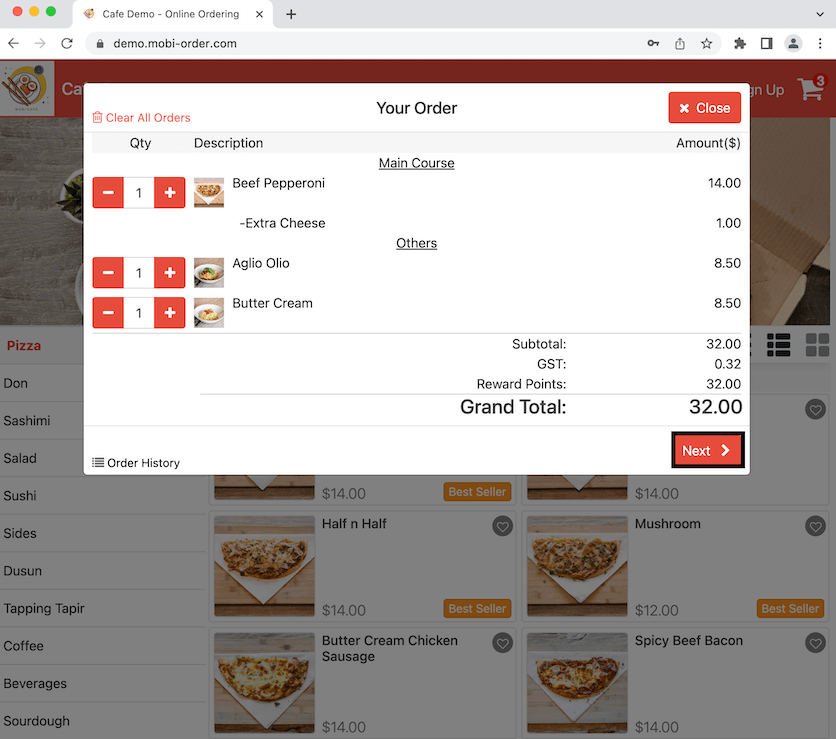
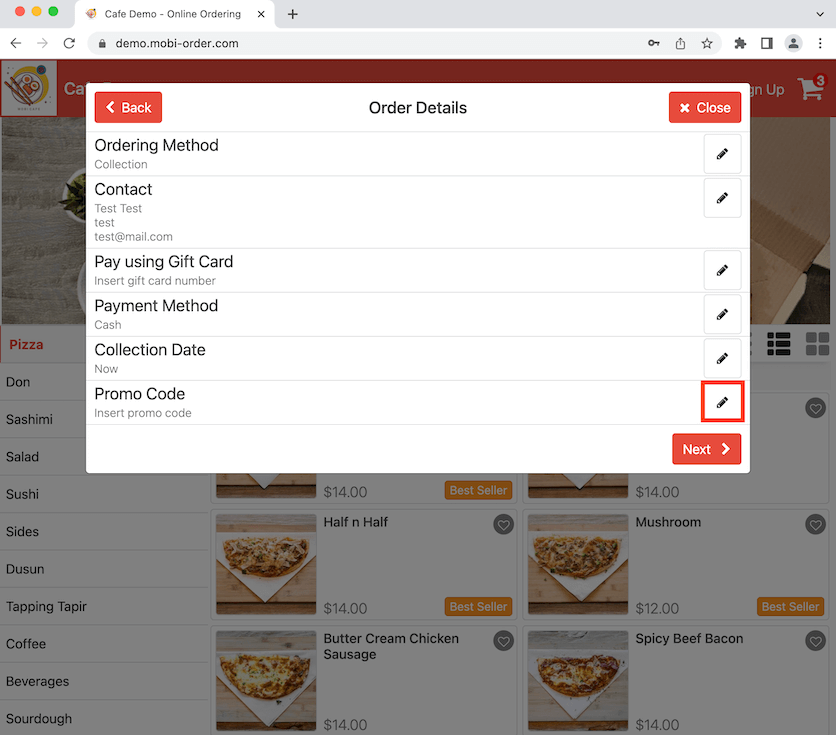
Click on the pencil icon to insert the promo code.
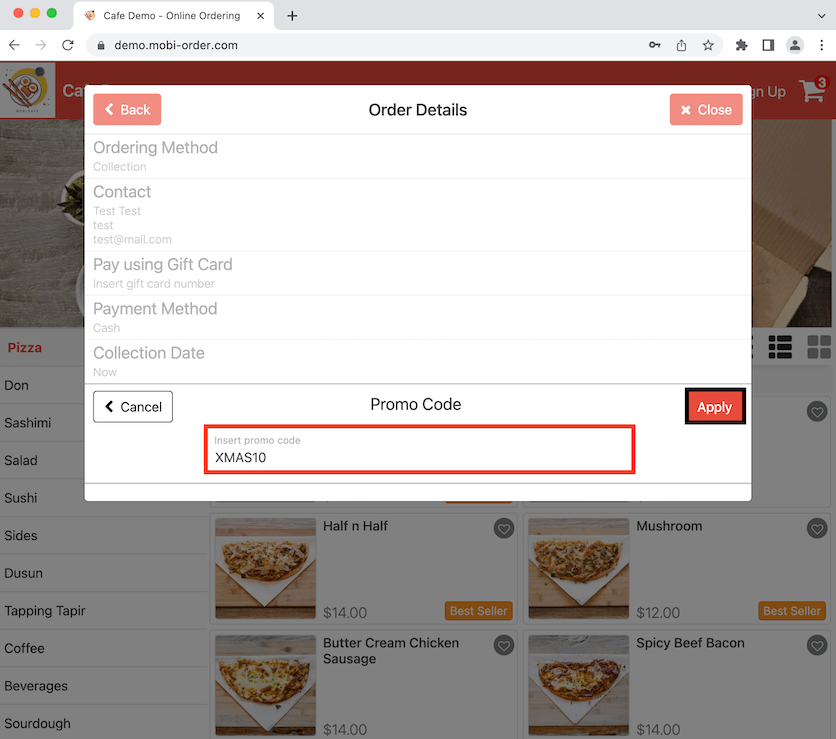
XMAS10 is the code for this promotion. Click on Apply after inserting the promo code.
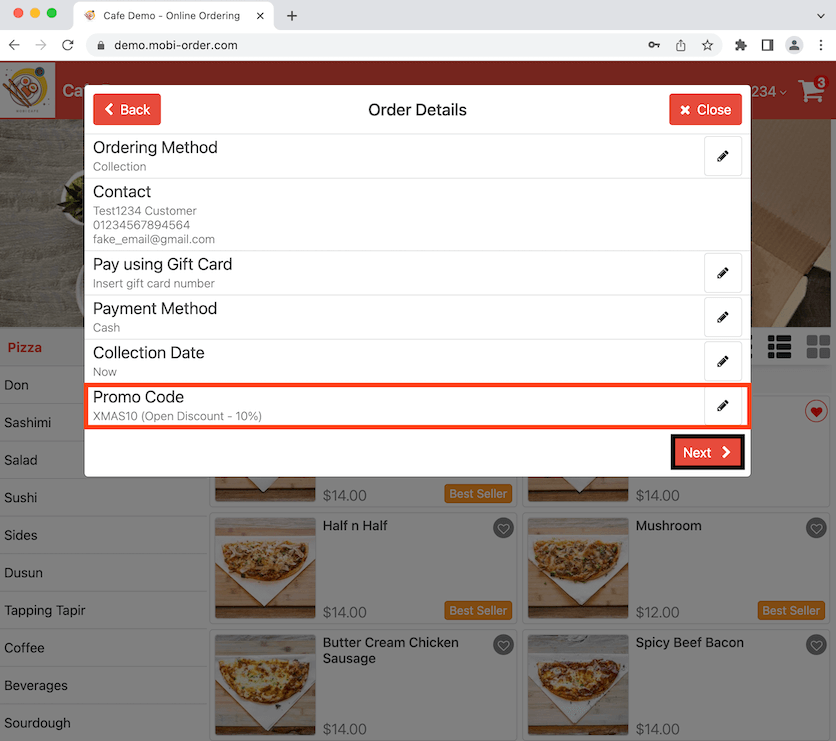
It shows the promo code is applied. Click Next to proceed.
Now it shows the 10% discount applied to the total bill. Click on Checkout to finalise the order. We will show you how to create a Free Item promotion below.
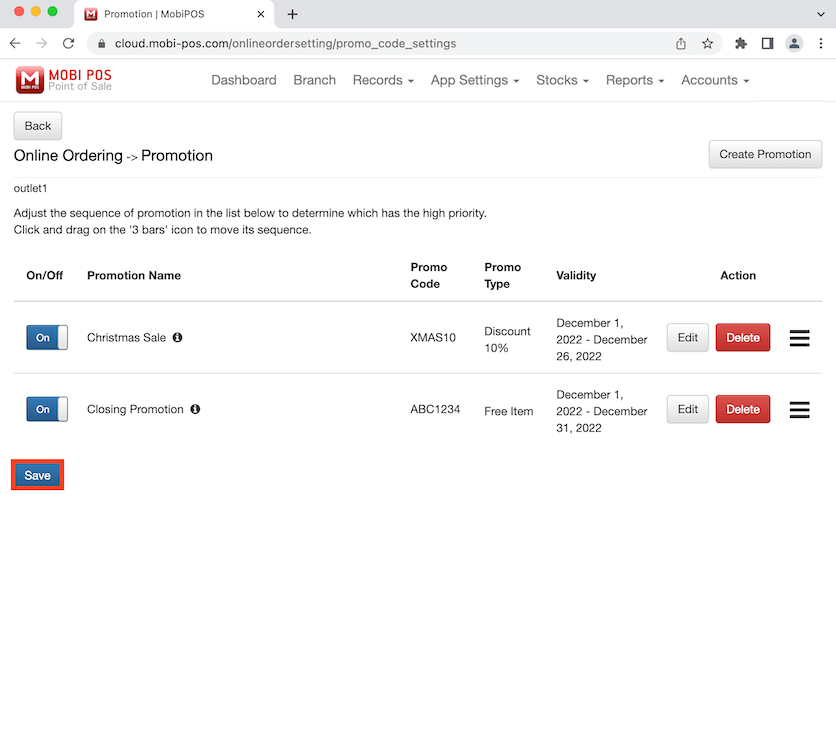
Go to online order settings and click on Configure for promotions. It will bring you to this page. Create on Create Promotion on the top right.
Click on the Next button beside Free Item.
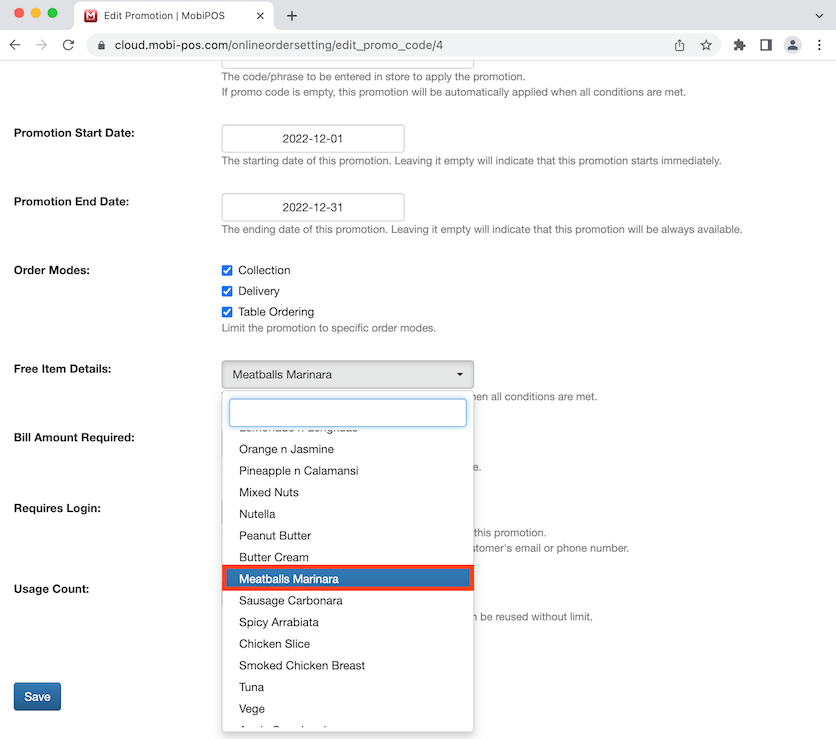
Insert the Promotion Name and Promo Code. You can also select the start and end date. Click to set the dates. If no starting date is set, the promotion will start immediately. If no end date is set, the promotion will go on indefinitely.
Click on the boxes to select the types of order modes which the promotion is applicable. We have selected all order modes as an example. Moving onto Free Item Details, you can select the item you want to give for free if the bill is above a certain amount. Click to select an item.

Meatballs Marinara is selected in this example. Click anywhere on the screen to continue.
Enter the minimum bill amount for promotion to be applicable. $30 is entered as an example. You can also choose to toggle on Requires Login if you want the customer to login to be able to use the promo code.
We decide to have Usage Count as 0, this means the promotion can be used without any limits for each customer. After making all changes, click on Save at the bottom of the page and it will bring you back to the previous page.
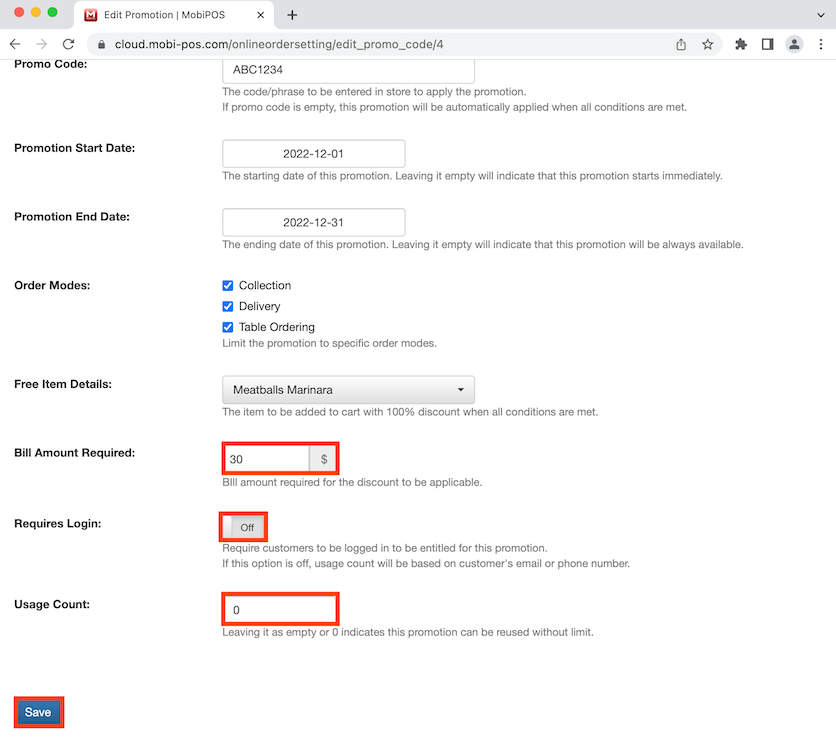
Click on Save at the bottom of the page to finalise all changes.
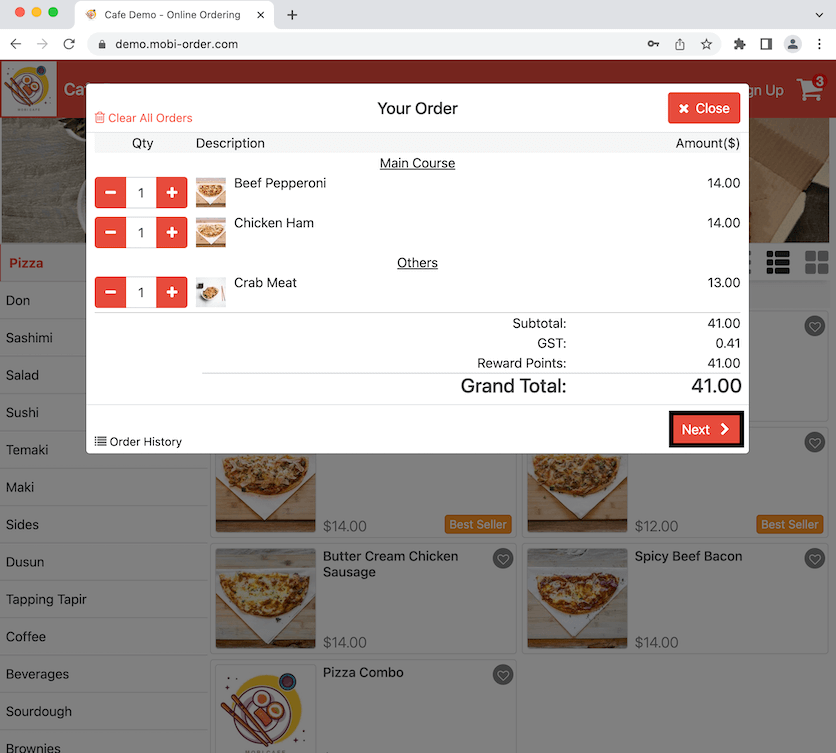
Now we want to check if the promotion works. Go to the online store and select the items. For this promotion to work, the minimum bill amount needs to be at least $30. In this scenario, we have added a few items into the cart and it totals up to $41. Click on Next to continue.
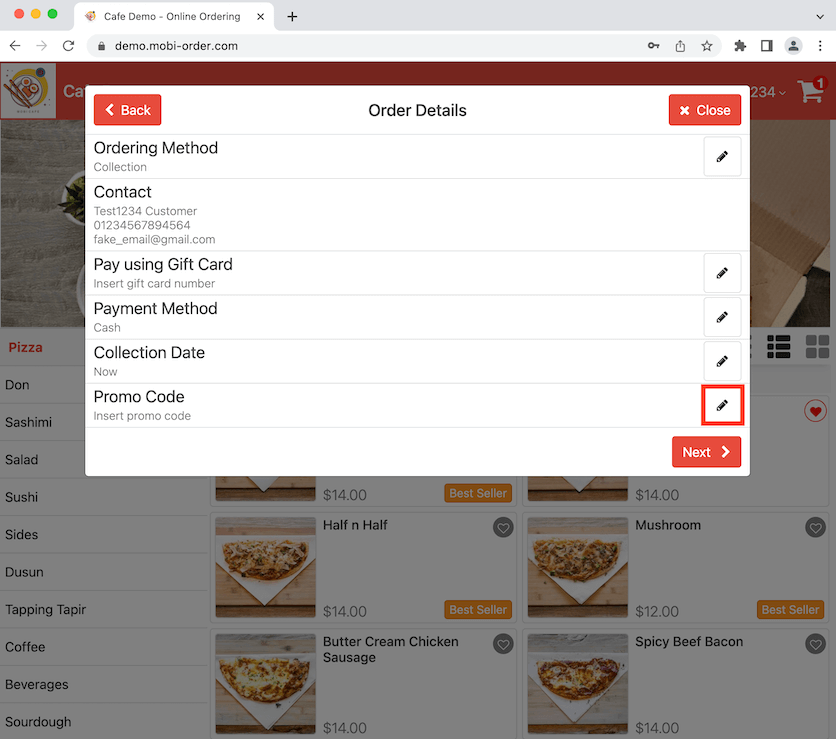
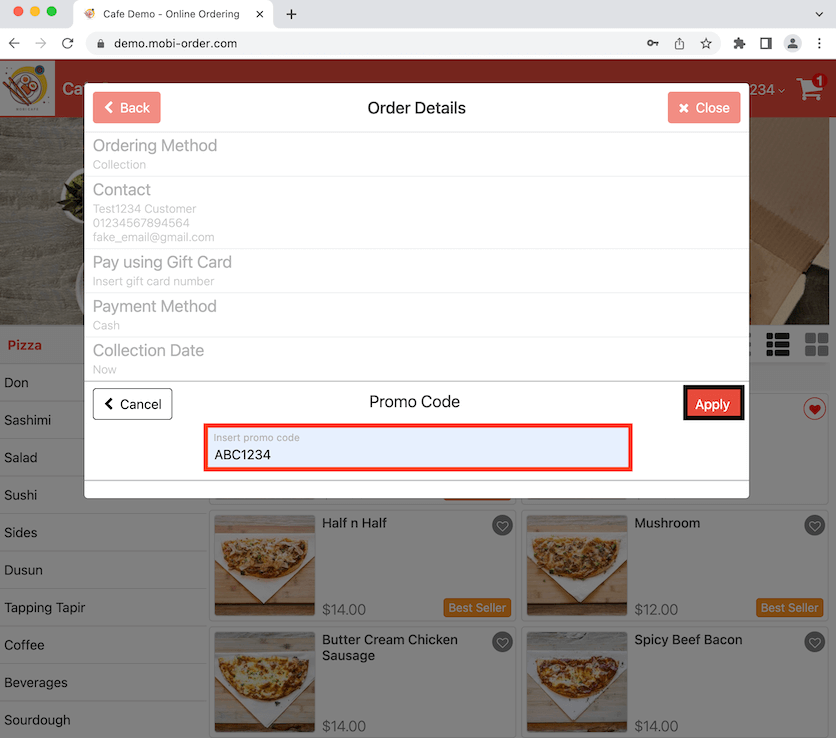
Click on the pencil icon to insert the promo code.
Insert the promo code then click Apply after.
Click on Next to continue.
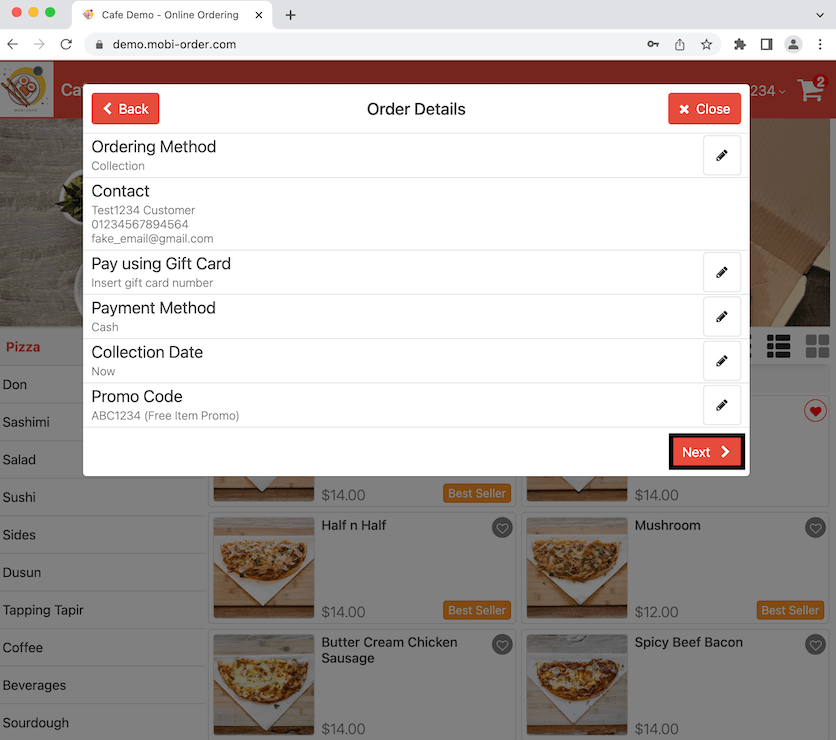
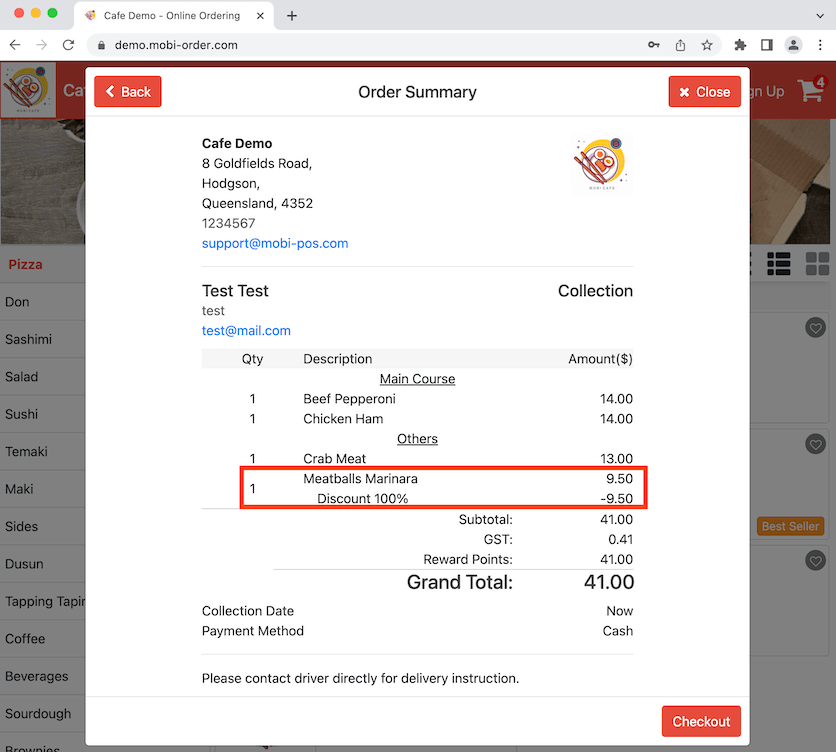
Now it shows the free item (Meatballs Marinara) in the bill where it is discounted at 100% with no additional charge. Click on Checkout to finalise the order.