Guide | MobiPOS > CloudSync > QuickBooks Integration
QuickBooks Integration
QuickBooks Integration allows users to integrate between MobiPOS and
QuickBooks accounting program.
It links up their Account Sales between the two services.
This guide will include an overview of the setup, functionality,
and steps to integrate your existing QuickBooks account.
To use QuickBooks Accounting Integration, user will first need to setup an account at QuickBooks website or have an existing one.
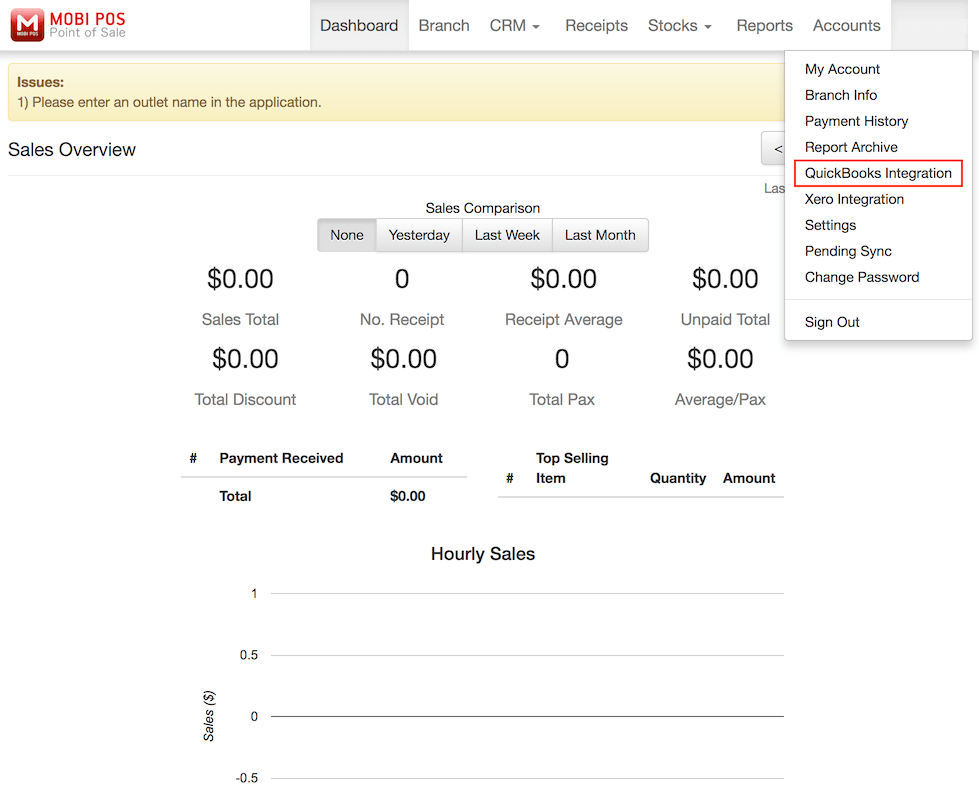
Next, login to MobiPOS CloudSync,
then click onto user's account, follow by selecting QuickBooks Integration at the top right column.
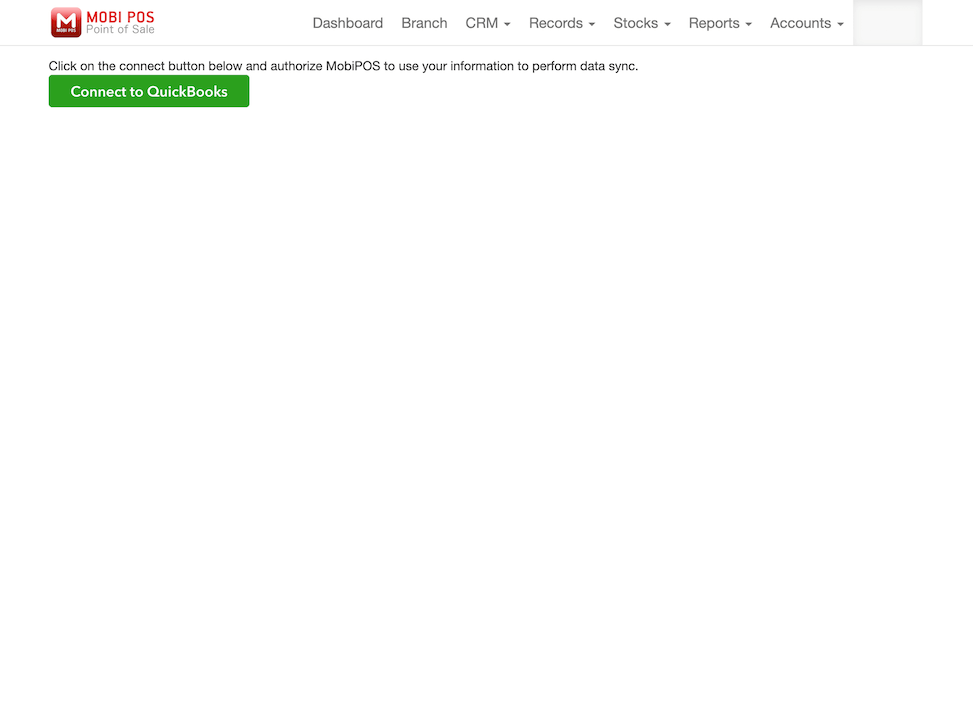
Then, click on the connect button as shown below to perform log in.
Connect With QuickBooks to authorize MobiPOS to use user information to perform data sync.
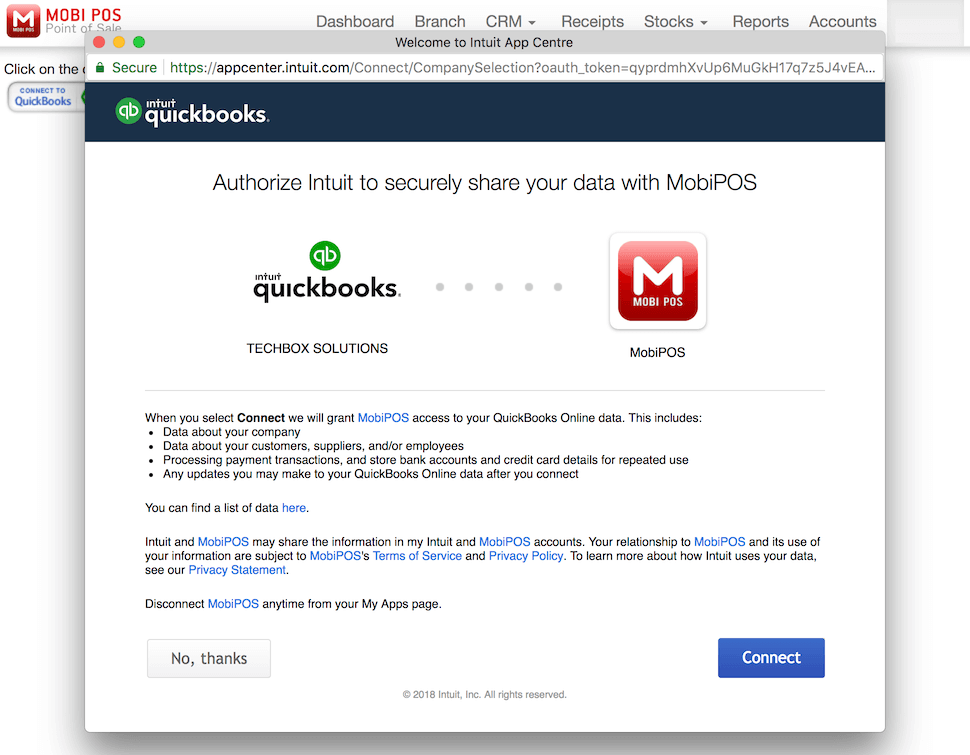
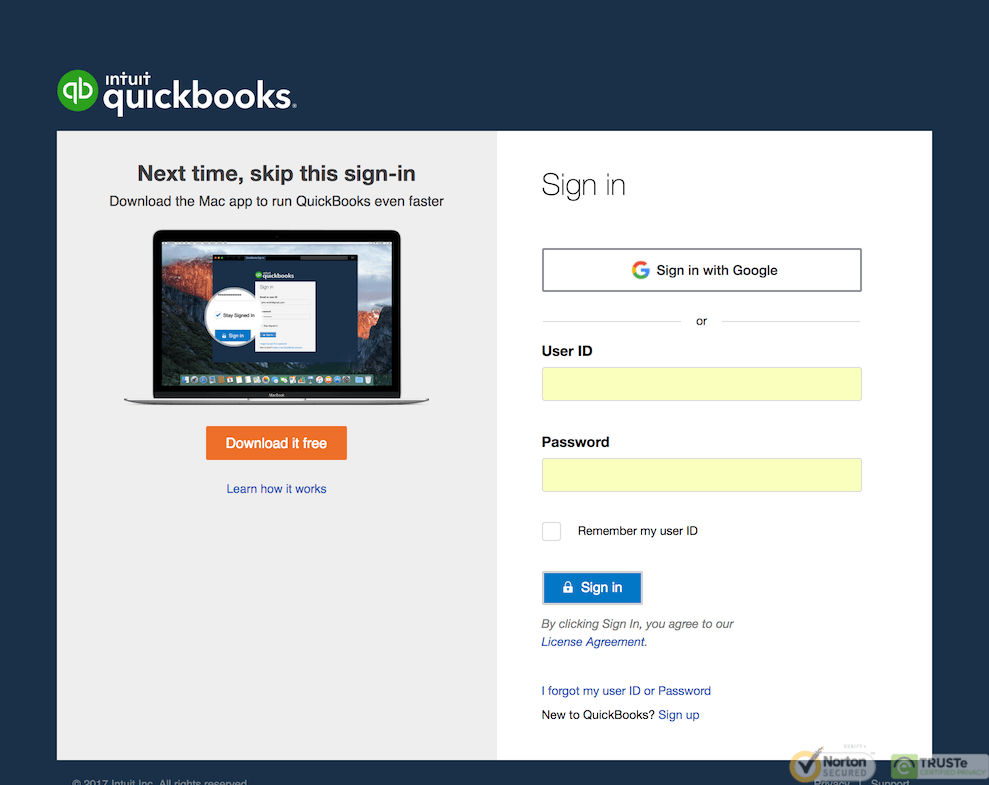
Upon clicking the Connect button, the page will be redirected to the QuickBooks login page as shown below.
Key in your email or QuickBooks user ID and password, then click Login.
This step is required only for the first-time login or when the user has disconnected MobiPOS from QuickBooks previously.

After that, QuickBooks will ask for authorization approval.
Click Connect as shown in the photo below.
After Allowing access, users will be able to use QuickBooks at MobiPos CloudSync website.
User is required to map each account type to the respective account in QuickBooks as shown below.
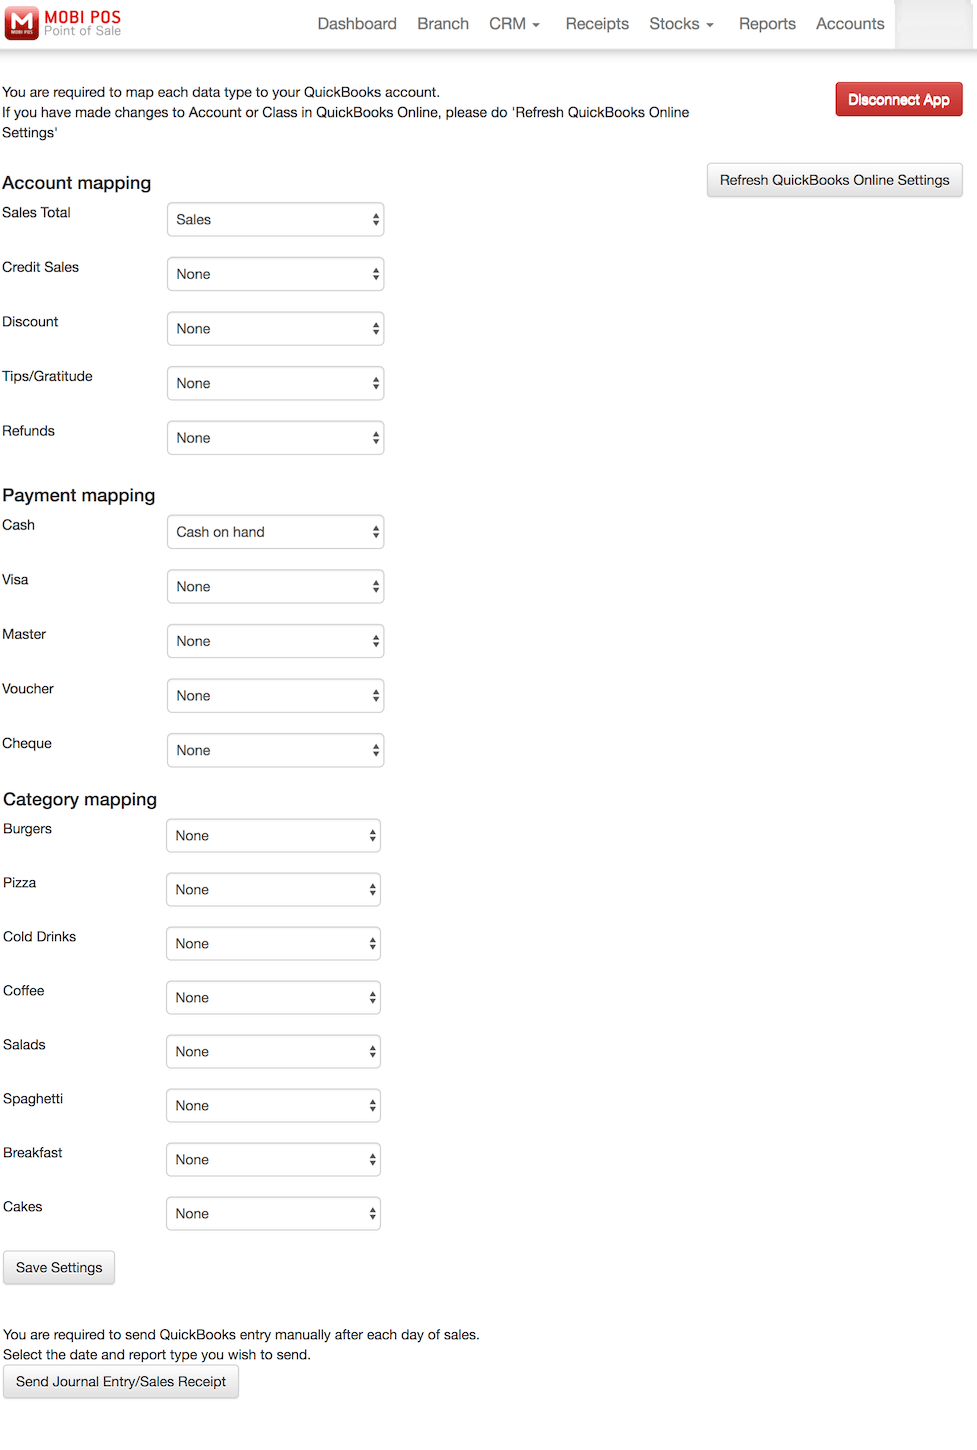
All the account types should have been set up at QuickBooks Accounting first.
On the left of the image above, each row represents account data from MobiPOS to be sent over to the QuickBooks account.
Leave the column as None if the data is not applicable.
If there are any changes made in any of the categories or classes, users can update the info by clicking onto
Refresh QuickBooks Online Settings located at the right top as shown as the image above.
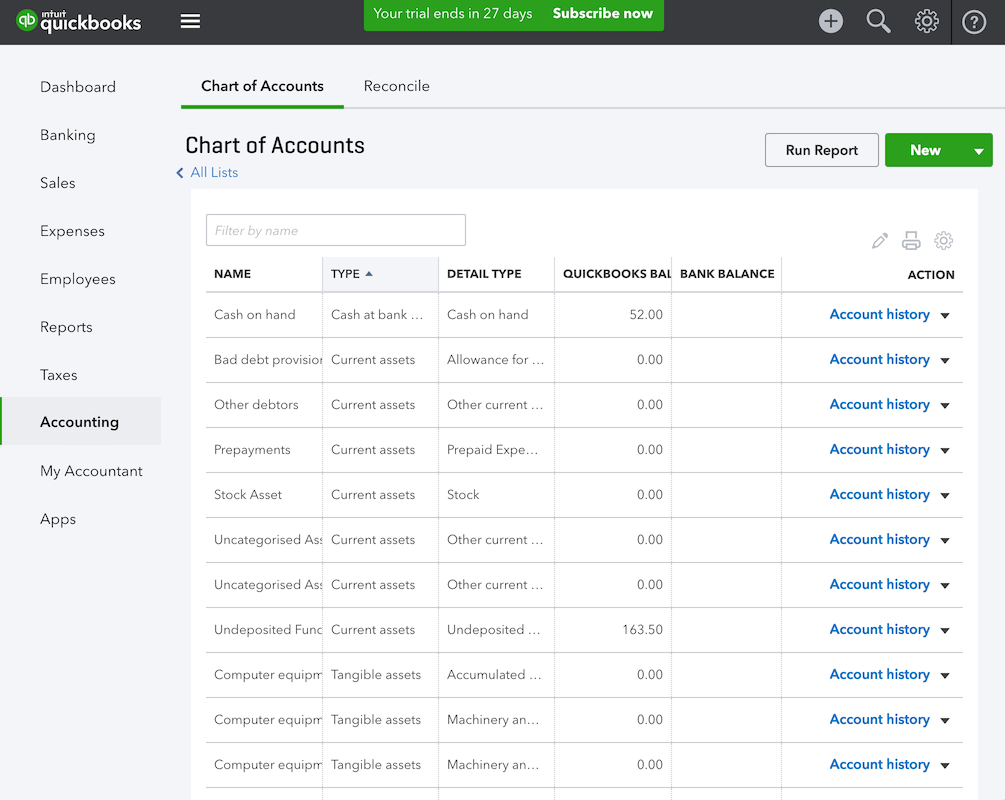
To access to Charts of Accounts, go to QuickBooks -> Accounting -> Chart of Account.
For categories mapping (which is also known as Classes in QuickBooks), users will first need to create
the classes manually at QuickBooks website.
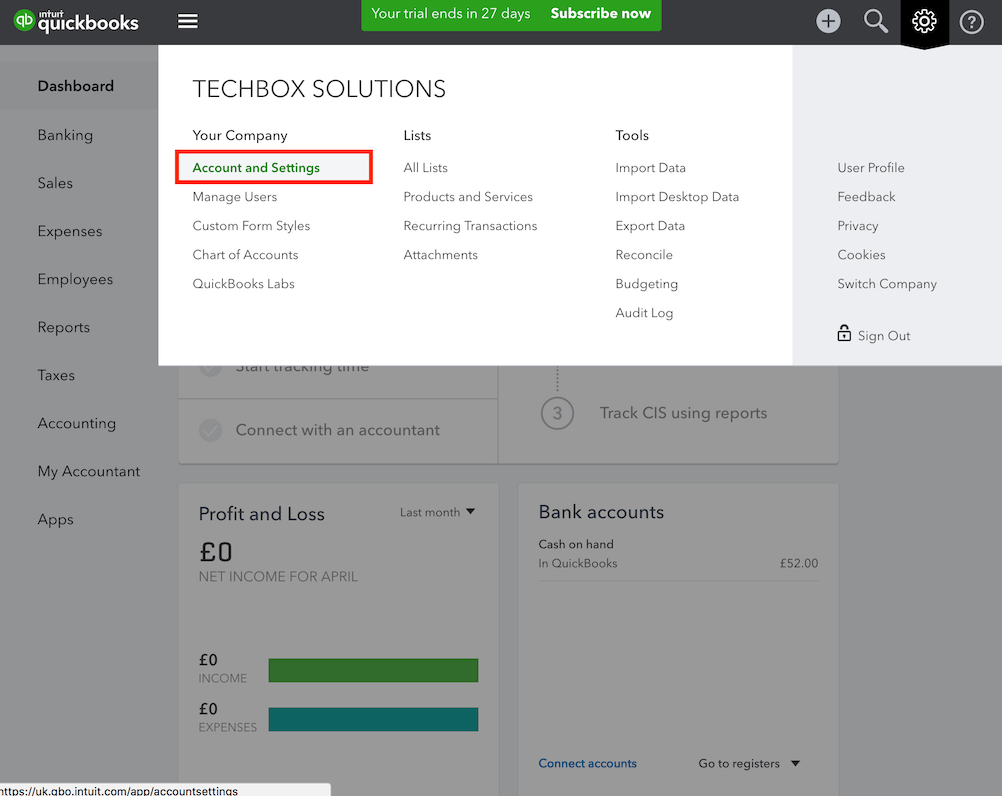
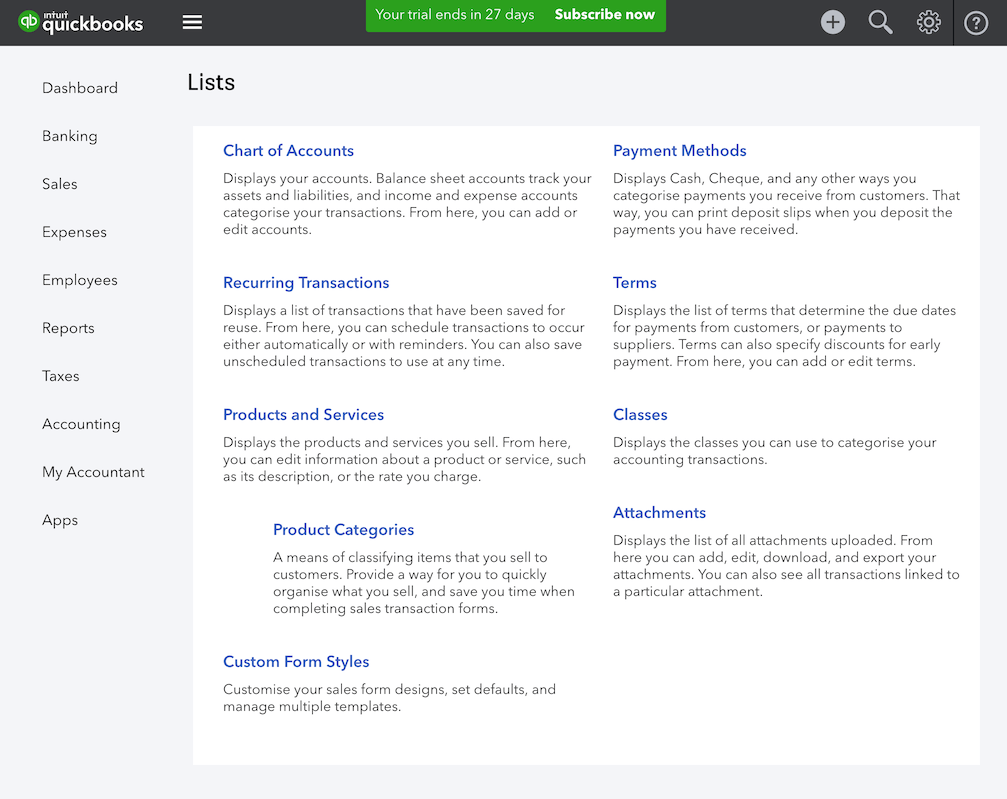
To set up classes, go to Settings icon (located at the right top) -> All Lists -> Classes as shown below.

If classes are not found, you might have to enable the Track Classes feature. This can be done by clicking onto the settings icon at the top right corner.
Under Your Company section, select Account and Settings as shown below.
Then, click on Advanced. Under Categories column, turn on Track Classes function byclicking the pencil icon at the right as shown below.

Do note that if Track Classes function is not enabled, Classes section will not appear as marked below and vice versa.
Back to MobiPOS account mapping page, when all account is mapped, click Save Settings as shown below.
If there are any charts of accounts that are not mapped to their respective categories, reports will not be sent through.
Do note that the user is required to send QuickBooks invoice entry manually through MobiPOS QuickBooks Integration each day.
Invoice from the previous dates can be generated as well.
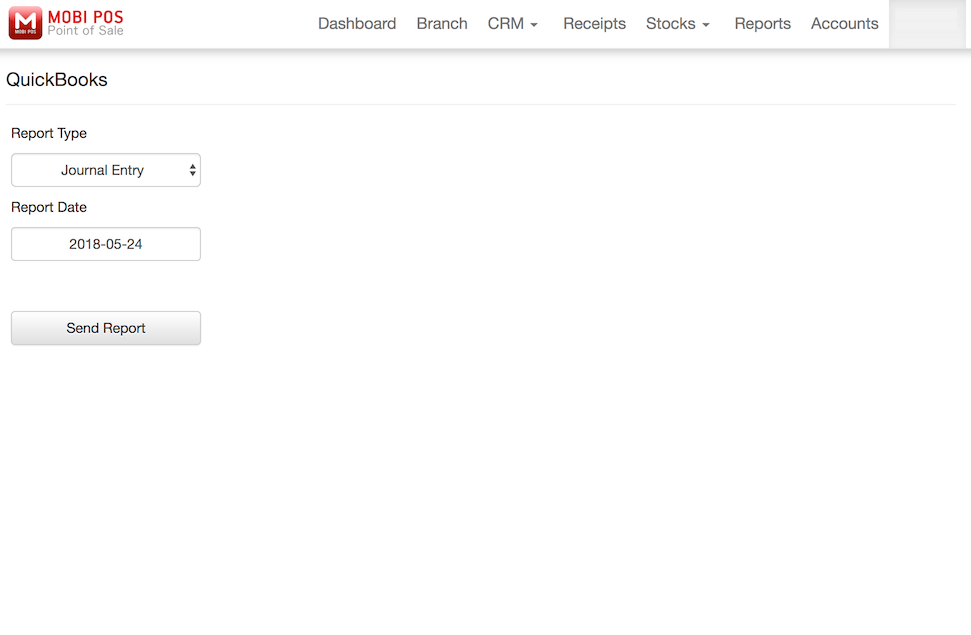
In order to do that, click Send Journal Entry/Sales Receipt located right at the bottom of the page as shown above.
Next, choose the desired report type and date, then click Send Report as shown below.
If the report is successfully sent to QuickBooks, success message will be shown on the right.
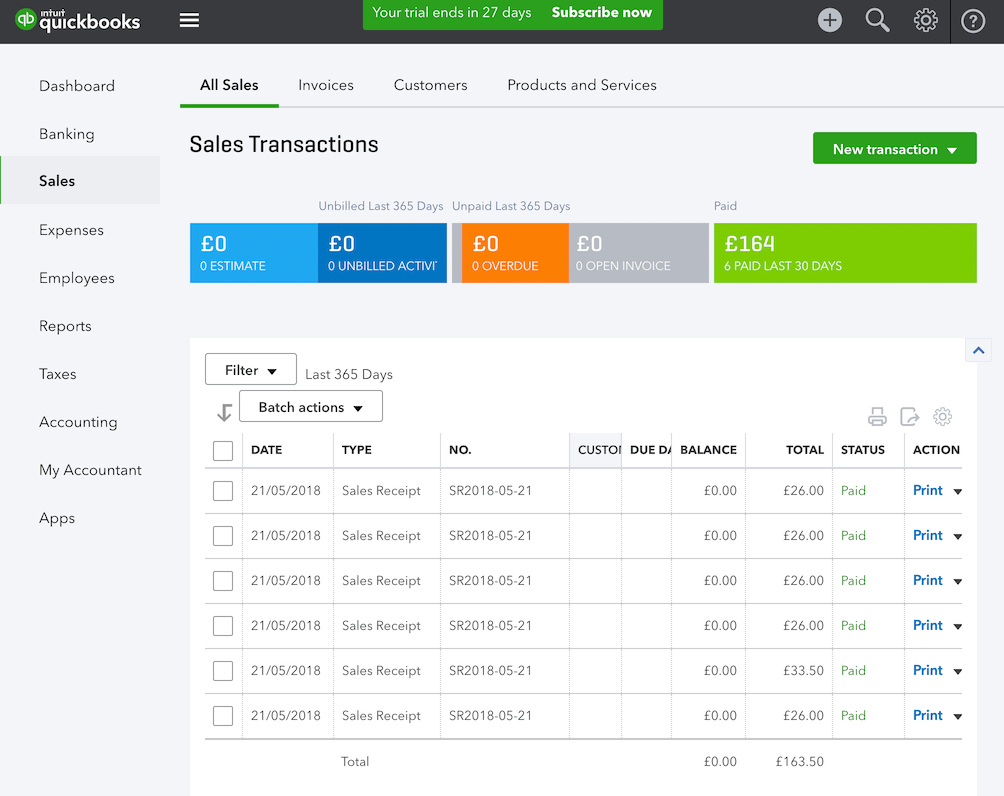
To view the report, log in to QuickBooks website as shown below.
To access to Sales Receipt, go to QuickBooks -> Sales -> then select the desired Sales Receipt as shown below.
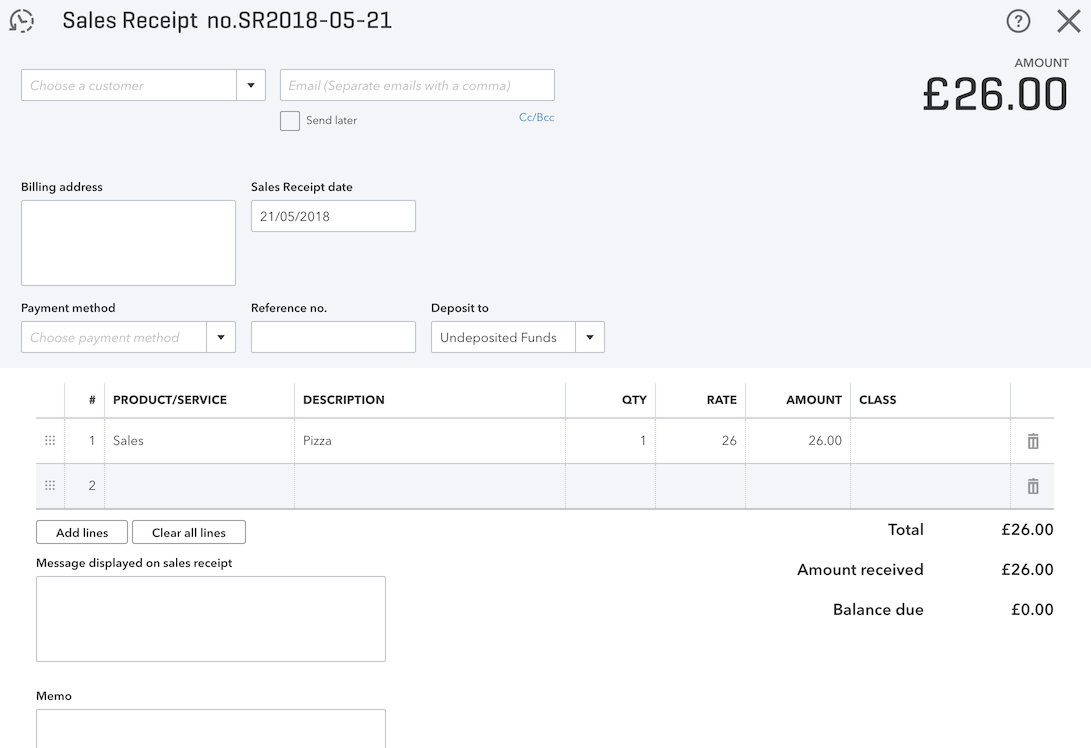
Example of a sales receipt:
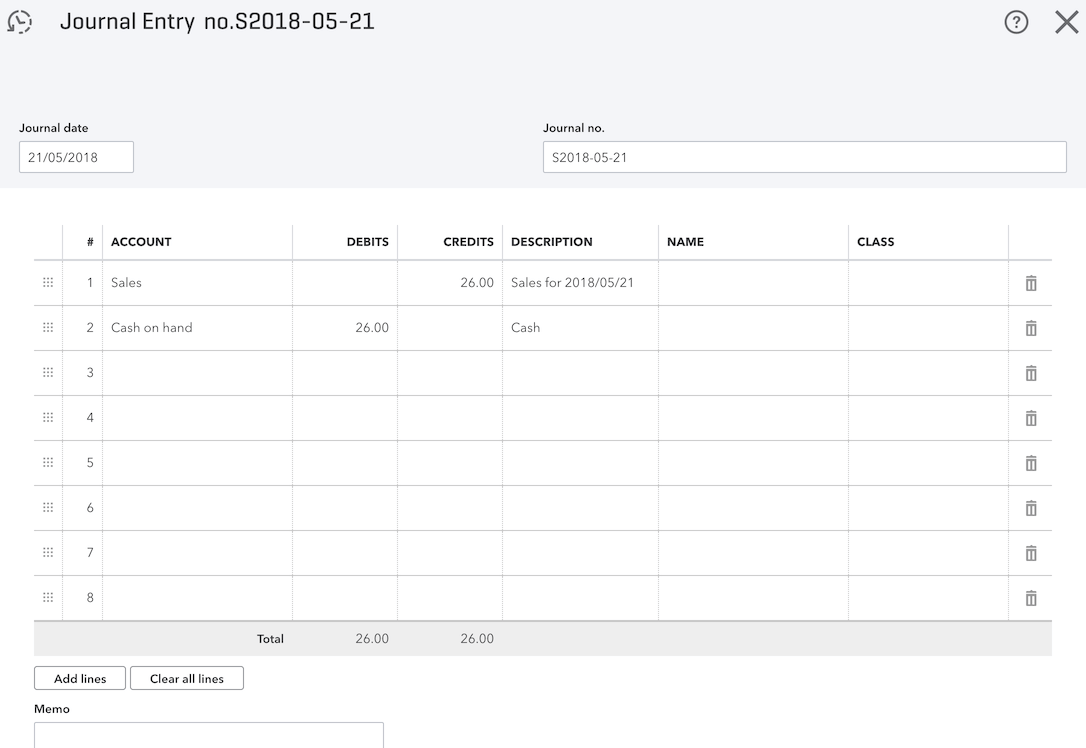
To access the Journal Entry, go to QuickBooks -> Reports -> scroll down to For My Accountant ->
then click onto the Journal.
This is an example of a journal entry.