Guide | MobiPOS > CloudSync > Inventory Management > CloudSync Stock Take
Stock Take
The Stock Take function in CloudSync allows you to create a stocktake record, manage your stocks, and rectify major discrepancies between expected stock and actual stock without using your POS terminals.
Things to note:
Please be reminded that stocktake should only be done when the business is not in operation or the stocks are not susceptible to change, as transactions made during the stocktake might not be reflected correctly in the Stock Take while the stocktaking process is ongoing.
To ensure your stocktake records created from CloudSync is synced to the POS:
In the iPad App, Settings -> CloudSync, make sure you have Enable CloudSync turned on and the Sync Interval is set to 1 minute.
Sync happens automatically if the POS in the outlet is online.
From CloudSync, under Stocks, click on 'Stock Take'.
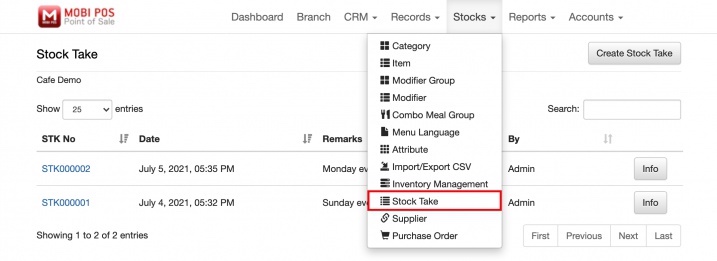
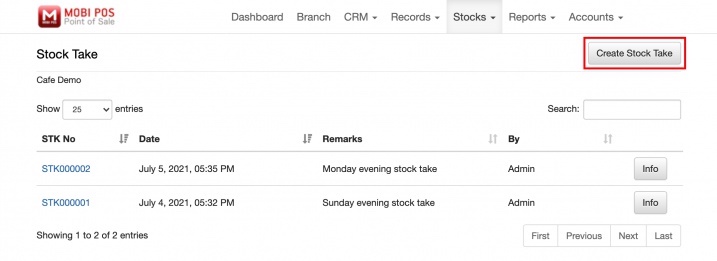
To start the stocktake procedure, we will need to create a stocktake record, do this by clicking the Create Stock Take button.
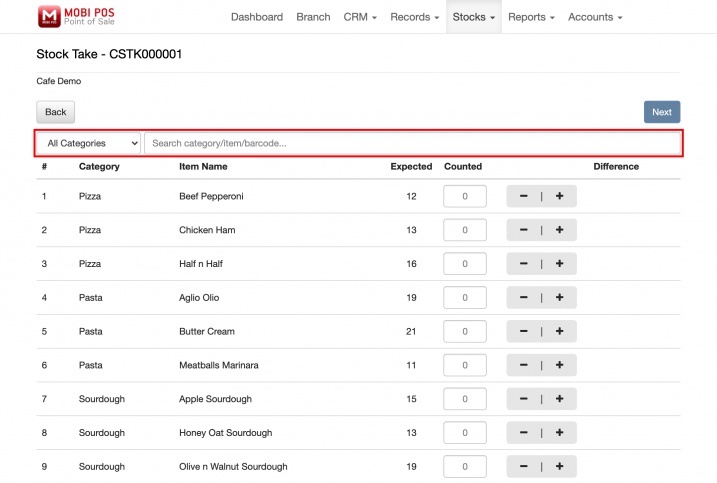
This page will show you all the product items with track inventory turned on.
You can search or filter your store items with the All Categories button and the Search Bar on top.
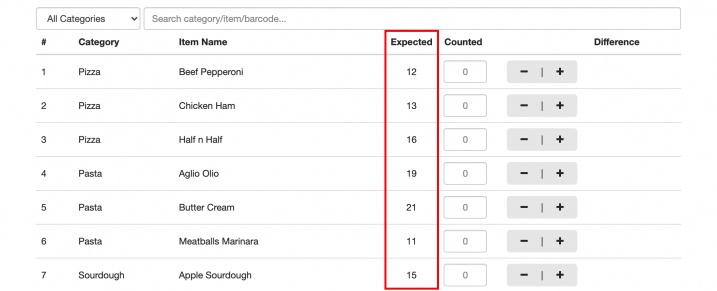
This Expected column shows your expected stock according to your business transactions within the system.
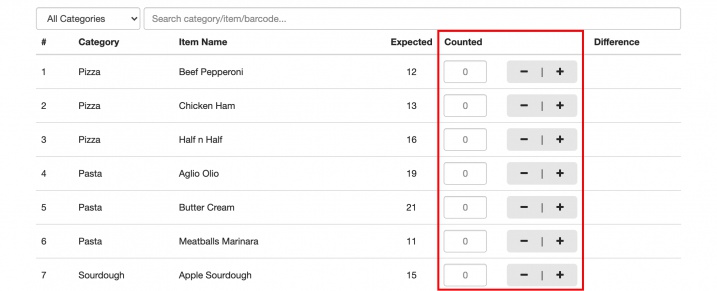
The Counted column is used to insert the actual stocks counted in your store.

If the actual stock is the same as the expected stock, simply click on the item row (as shown in the picture above, within the red boxes) and it will populate the value to be the same. If it isn't, you can manually type in the counted stocks in the text field, you can also use the + or - keys to add or subtract stocks from the counted column.
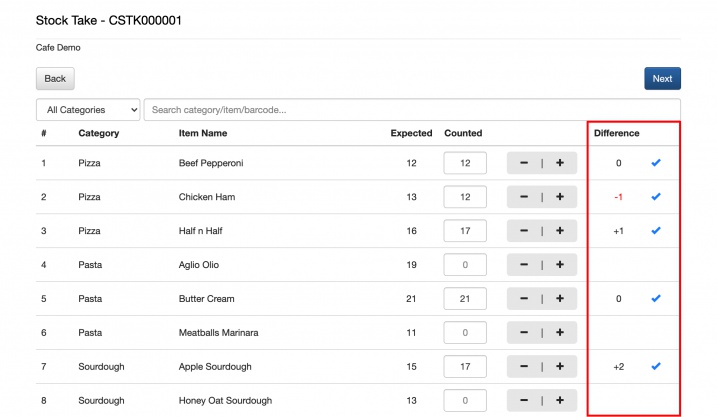
Once you have keyed in the number of stocks counted in the Counted column, the Difference would appear, which is the difference between the Expected stocks and the Counted stocks. The Blue Tick will appear on the right representing that stock take is taken for this particular product.
When you're done with the stocktake, you can click the Next button.

This will bring you to a final confirmation/preview page.
Here, you can choose to add Remarks at the bottom of the page.
Once you're satisfied with the stocktake, click on the Save button to create the Stock Take record.
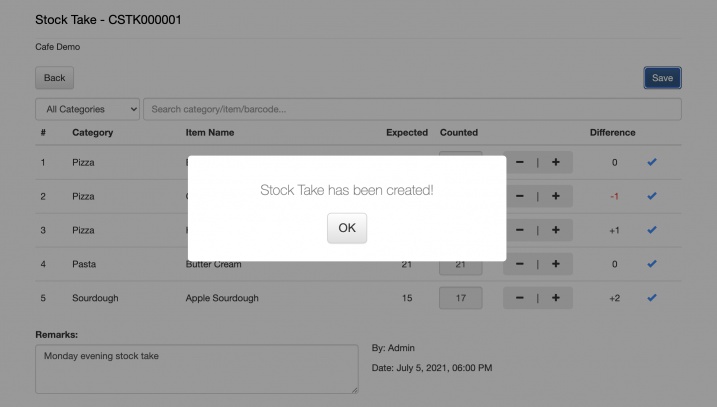
A confirmation will pop up showing you that you have successfully recorded the stocktake. With this, all product's inventory count will be adjusted according to the Counted count.
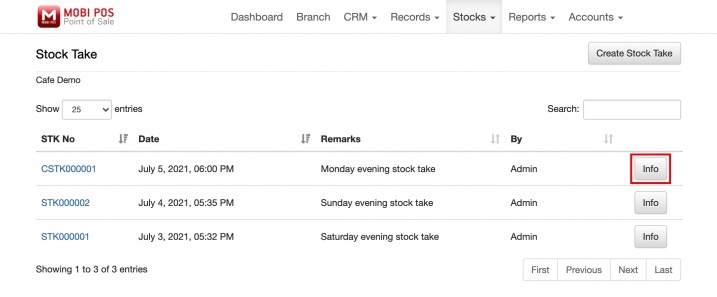
All past stocktake records will be shown here and by clicking on the Info button, you will be able to see the details of this particular stocktake's record.
Post Stock Take Adjustments
If you have made a mistake during the stocktaking procedure and wish to rectify it, you may:
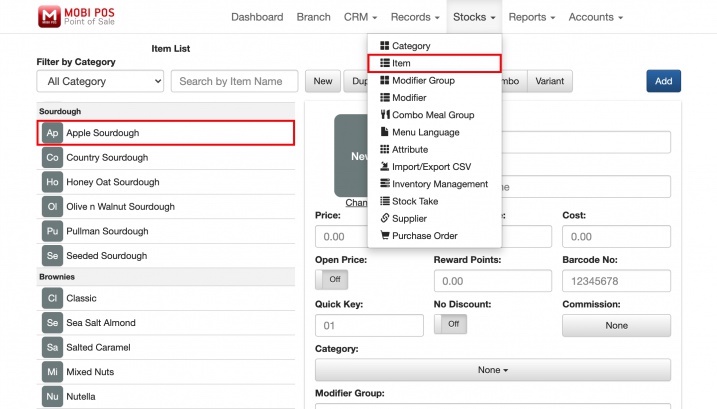
Go to Stocks, click on Item and select the item which you would like to adjust.
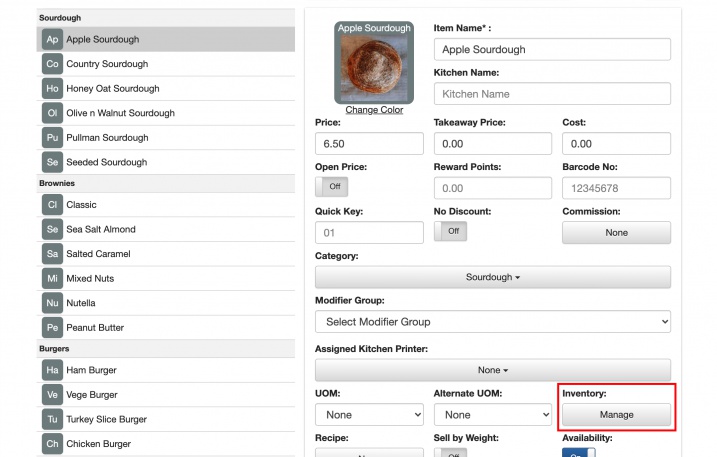
Click on Inventory.
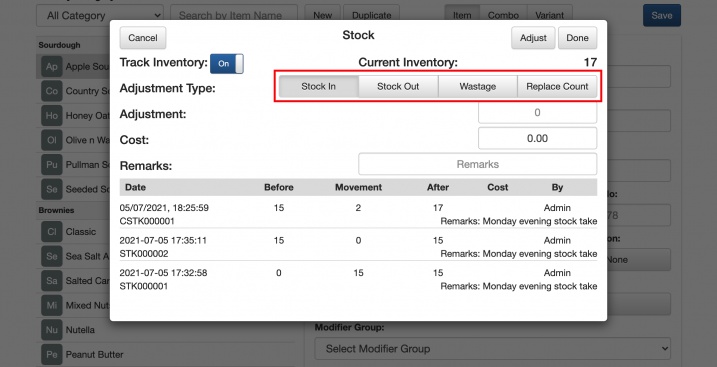
Choose your Adjustment Type.
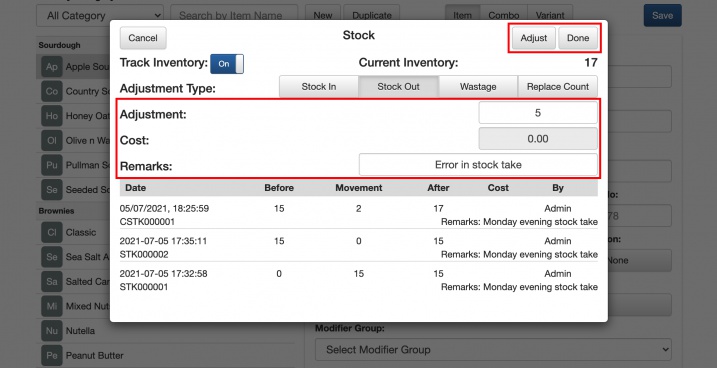
Insert the quantity adjusted and remarks.
Once you're done, click the Adjust button.
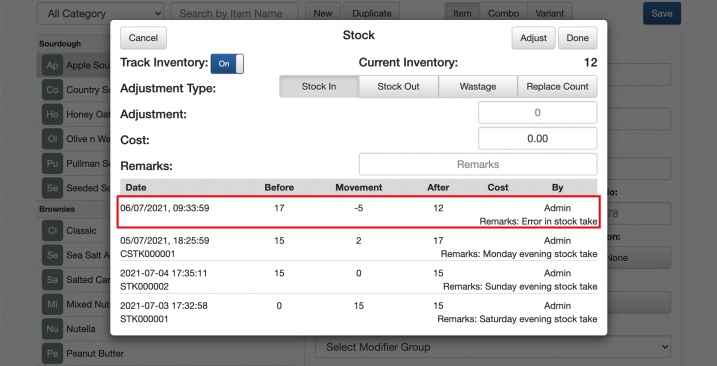
Your record will be shown below.
Things to note:
In the history section, stock adjustments made with the Stock Take function will show with its stocktaking record number (STK000001), manual adjustments will not have a Stock Take number.
Stocktaking record number that starts with "C" (CSTK000001) is the record created from CloudSync but is yet to sync to POS.