Guide | MobiPOS > Branch Linking > Menu Linking
Menu Linking
Menu linking joins similar product across outlets together, saving the hassle of creating or updating the same product information in different outlets.
Overview
In order for both outlets menu to link, the system checks for similarity in each property type or section of the product.
If you plan to set up menu linking on a new branch, it is best to use existing outlet's menu backup and transfer it to the new outlet before making modification.
Important note:
After opting in to use menu linking, users will need to refrain from making stock changes via iPad.
Menu linking feature will only be accessible via CloudSync.
Making stock changes via iPad will cause menu mismatch and hinder the link status of all your branches.
Property Types
A. Straightforward name checking applies to the following property types, according to priority:
1. Printer
2. Unit of Measurement
3. Discount
4. Course Setting
5. Attribute
6. Variant
7. Pricing Level
8. Account Type
9. Translated Menu
B. While a more complex checking will be applied to the following types, also according to priority:
1. Modifier Group
2. Category
3. Item
4. Modifier
5. Set Meal Group
6. Translated Menu Item
Example 1:
Outlet A has a category with the name of "Burgers".
It's printer is set to "Kiosk Printer".
Outlet B has a "Burgers" too.
However it's printer is set to "Do not print" .
In this case, the two products does not have the same property types, system will not link these two items together.
Example 2:
Outlet A has an item with the name of "Beef Pepperoni".
It's category is set to "Burgers".
Outlet B has a category"Beef Pepperoni" too.
However it's category is set to "Season Special" .
In this case, the two products does not have the same property types, system will not link these two items together.
Setting Up
Please contact us for initial setup.
We will go through your menu setup and advise if your outlets are suitable to be linked.
Users will need to decide a branch as the main branch, we will also provide our input.
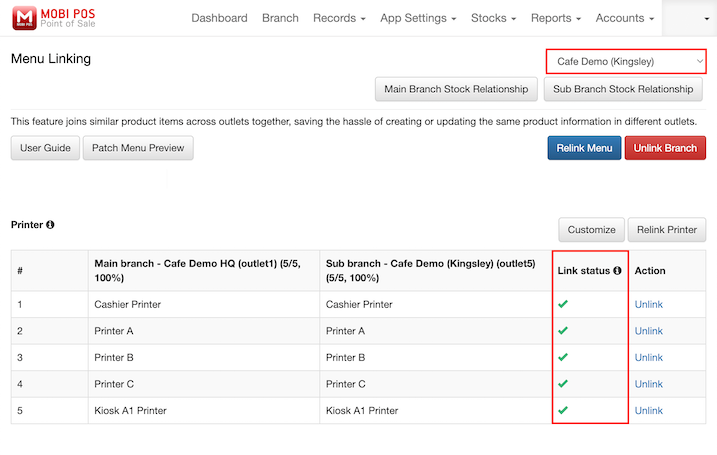
You may navigate to Menu Linking to view your products' link status.

If we already linked your branches, the page will look like the screenshot below.
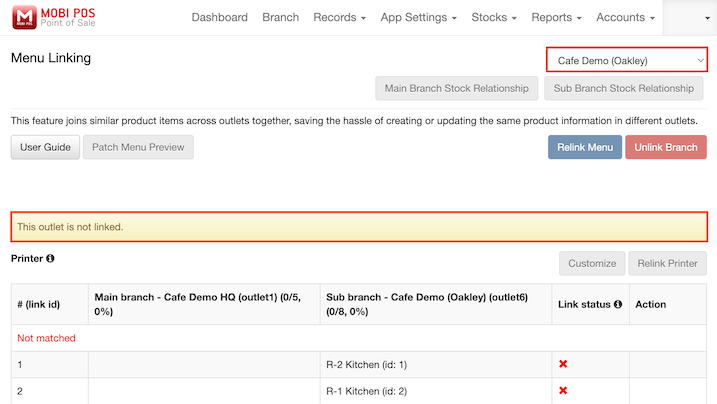
If we have not link your branches, users will see the alert message as shown below.
Link Status
Screenshot below shows the description of each link status.
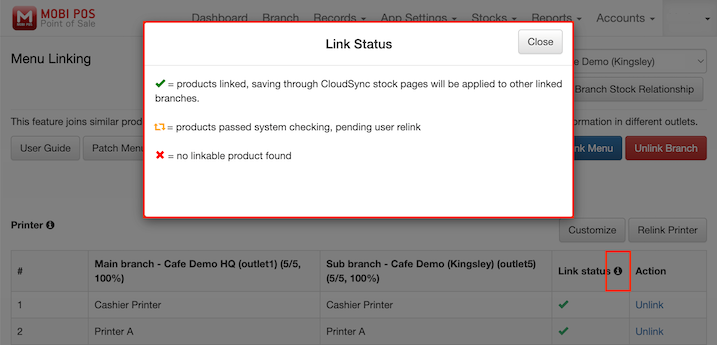
At the bottom of the page shows a summary of the current link situation.
In a perfect scenario, your menu should be 100% linked.

Content Management with Menu Linking
Now that your outlets are linked, you will be able to manage stocks of your linked branches.
View/Update existing products
For existing products, users will be able to see the total number of branch linked on the top right corner.
Any changes made to this Pizza category will automatically be applied to all 3 branches.

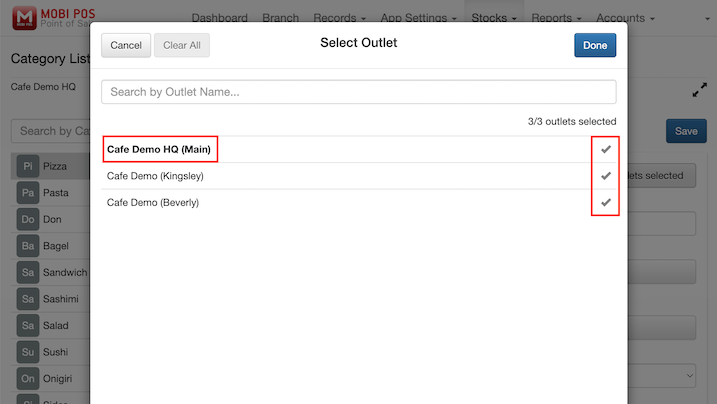
From this list of outlets:
1. Bolded outlet name indicates that you are currently viewing this branch.
2. (Main) is the main branch of all linked branches.
3. On the right side of the list, grey tick indicates that this product 'Pizza' is already created and linked for each of the branches. Any changes will be applied to all these branches.
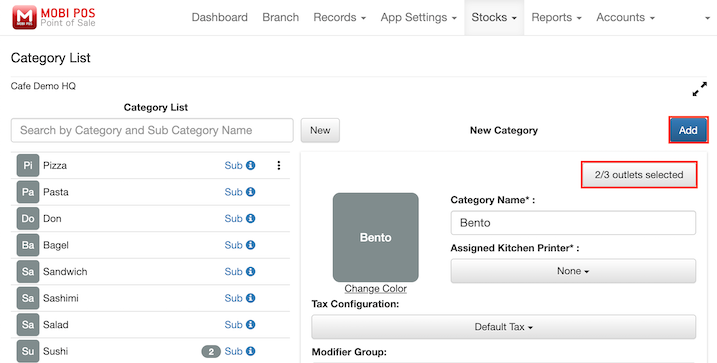
Creating new products for linked branch
By default, all branches will be selected.
Without further branch selection configuration, new category 'Bento' will be created for all linked branches.

Else, you may configure the branch selection from the same button.
Blue tick indicates that the product does not exist in the system/not created yet
In our example, we do not want to create this new category for branch 'Cafe Demo (Kingsley)'.
Deselect the unwanted branch, click on 'Done'.
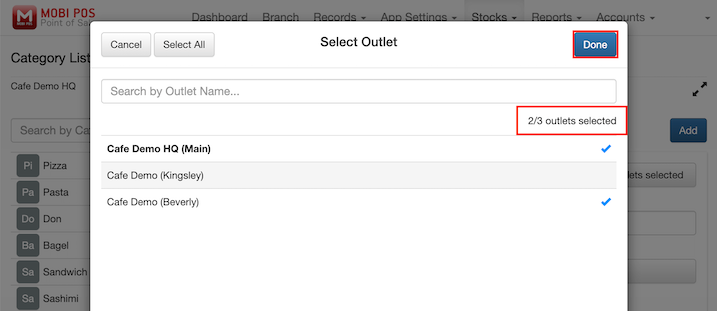
Now, you will see the number of selected branches is updated to 2/3.
Clicking 'Add' will create this new category for 2/3 outlets.