Guide | MobiPOS > Settings > Settings > Tax
Tax
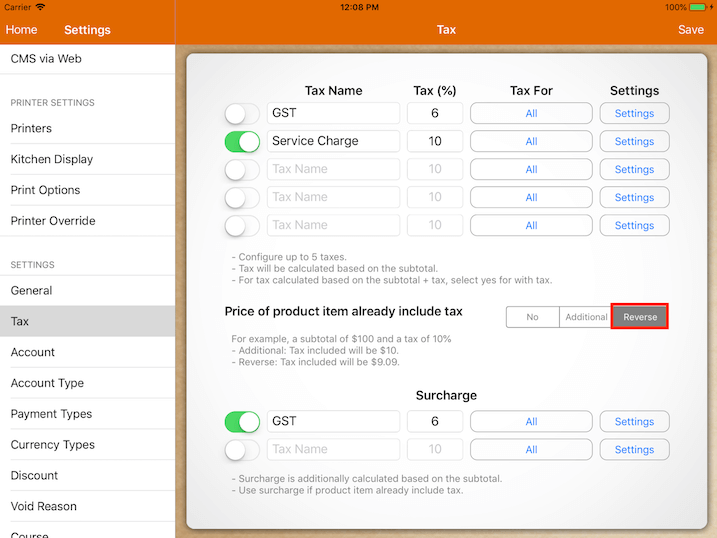
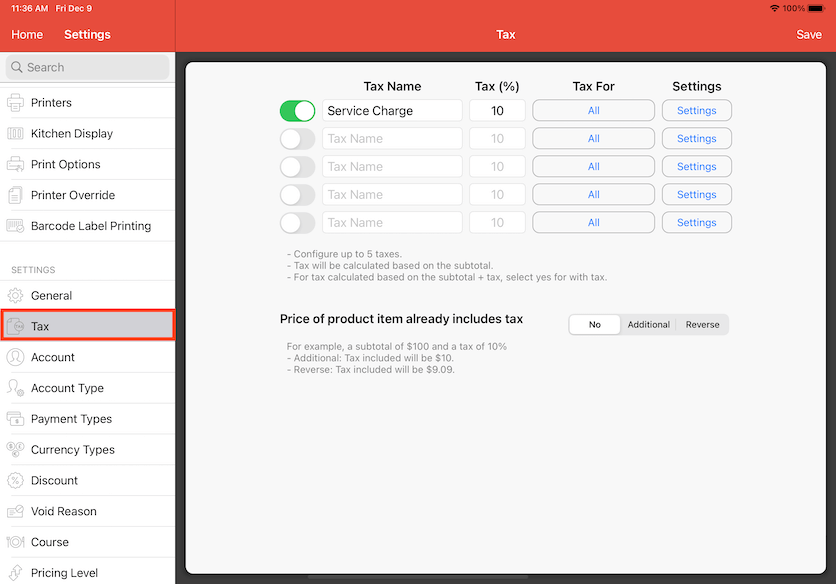
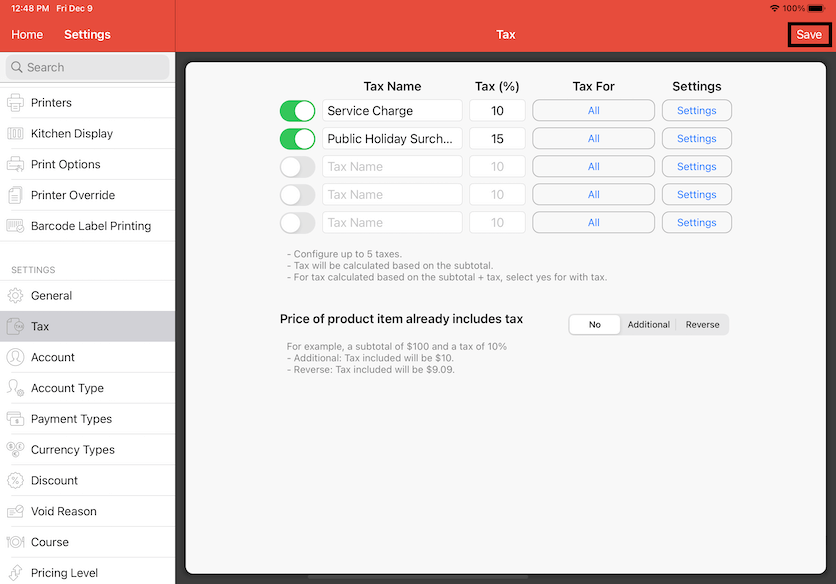
Located under Settings -> Tax, system allows up to 5 tax configurations.
There are a few setups for tax. To understand how it works, the user needs to know the concept of:
Tax-inclusive, tax-exclusive, and surcharge.
Tax Inclusive = tax is already included in the product price.
Tax Exclusive = tax is not included in the product price. It will be charged on top of theproduct price.
Surcharge = In tax inclusive situation, an additional amount that is added on top of the product price.
Tax settings shown below:
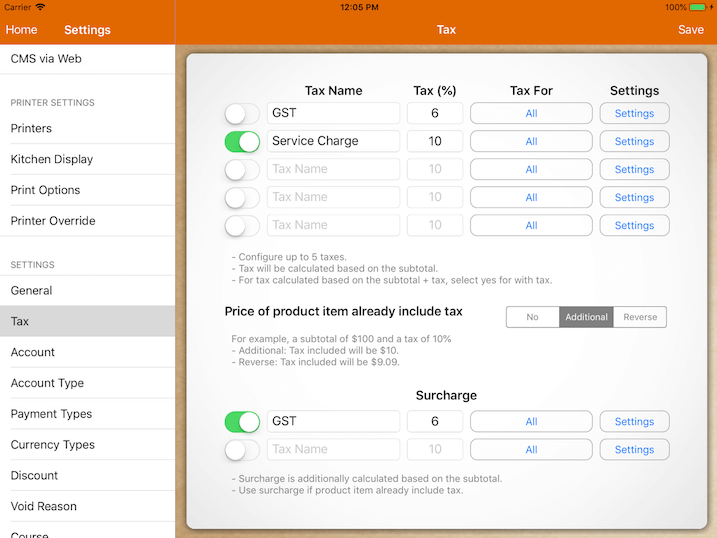
For each tax, users will need to insert information like tax name, tax percentage, tax for, and settings.
For Tax For option, the user is required to decide which transaction type this tax will be applied to.
Options available are: All, Eat-In, To-Go and Payment Surcharge.
Users can only choose one to be taxed for each tax set as shown below.
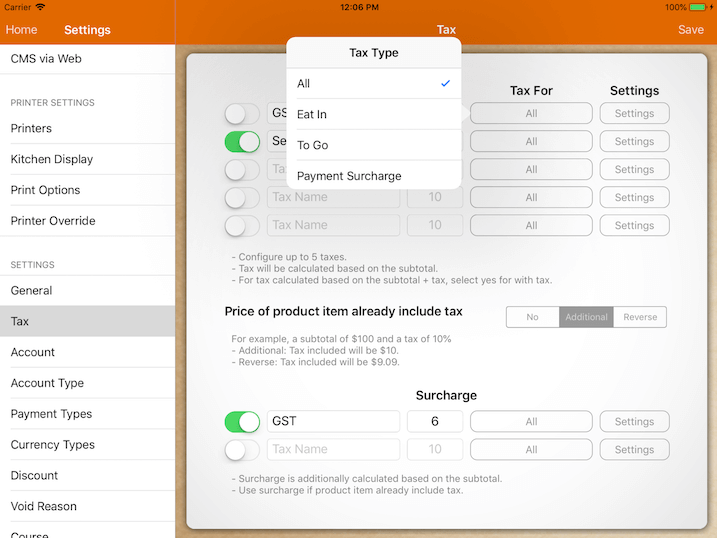
All - Tax set up is applied to all of the transaction types.
Eat In - Tax set up is applied to dine-in orders only.
To Go - Tax set up is applied to take out or take away orders only.
Payment Surcharge - Tax set up is applied when a certain payment type is applied (exaple: credit card payment).
In order to enable payment surcharge, users will also need to go to Settings -> Payment Type.
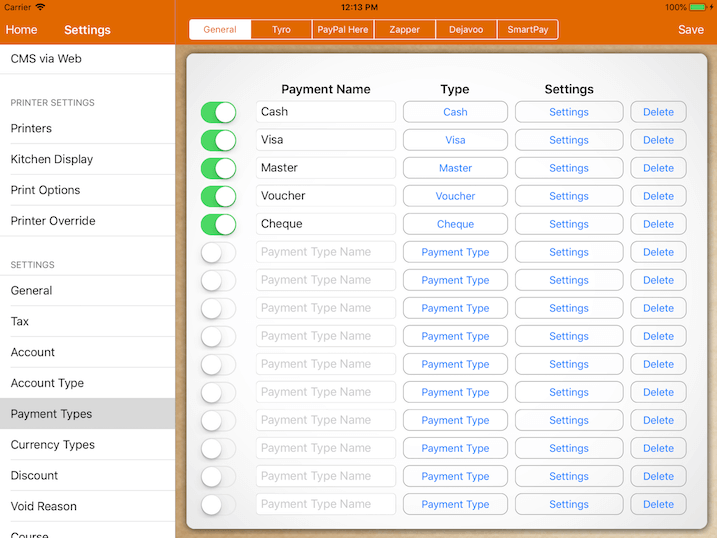
At this page with the selected payment, enable the "Extra Surcharge" button under the "Settings" column as shown below.
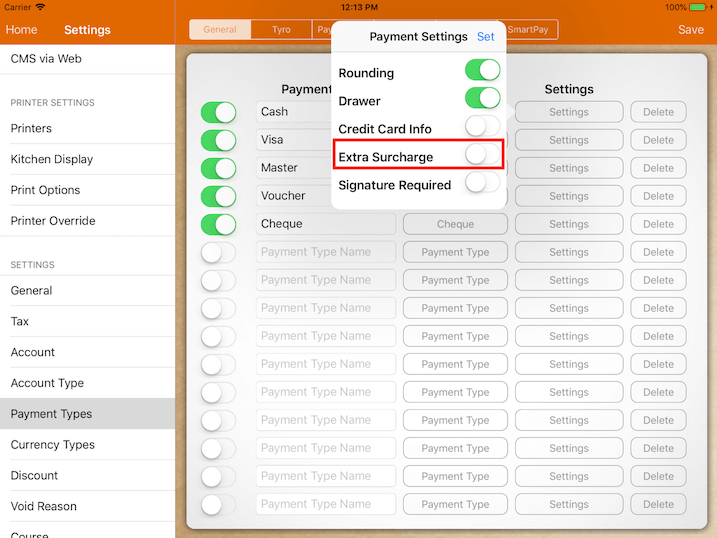
With "Extra Surcharge" being turned on, when this payment is selected for payment, payment surcharge type tax
will be applied to this bill.
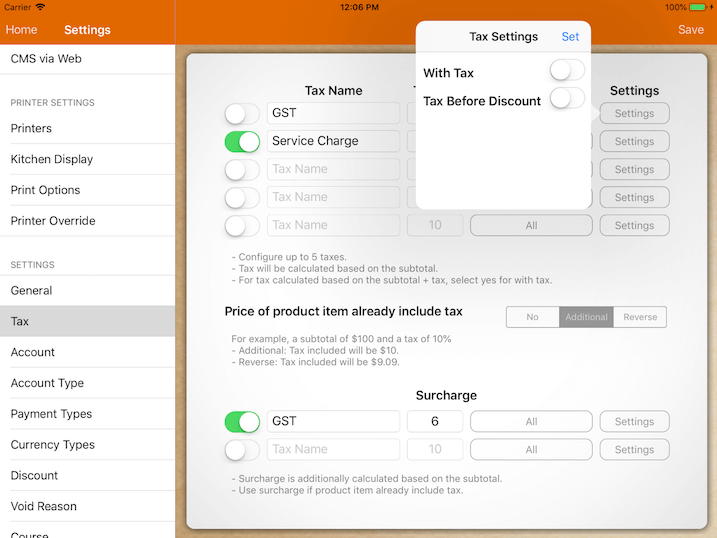
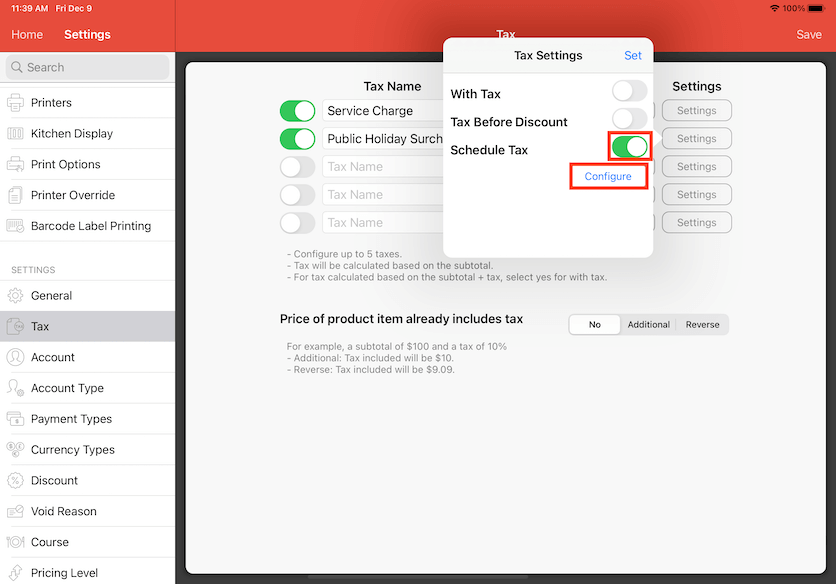
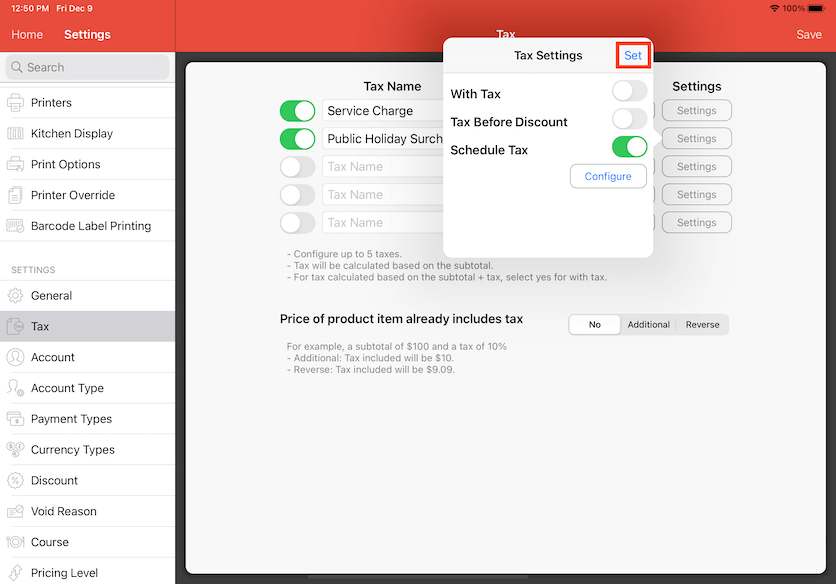
For "Settings", there are two tax settings.
With Tax and Tax Before Discount.
User can turn on the switch if it's applicable.
Then, tap on "Set" button as shown below.
For With Tax option, the tax imposed will be on top of the previous total amount including the tax.
Do note that the "With Tax" option will only be implied starting from the second tax onwards.
With Tax turned on for the second tax
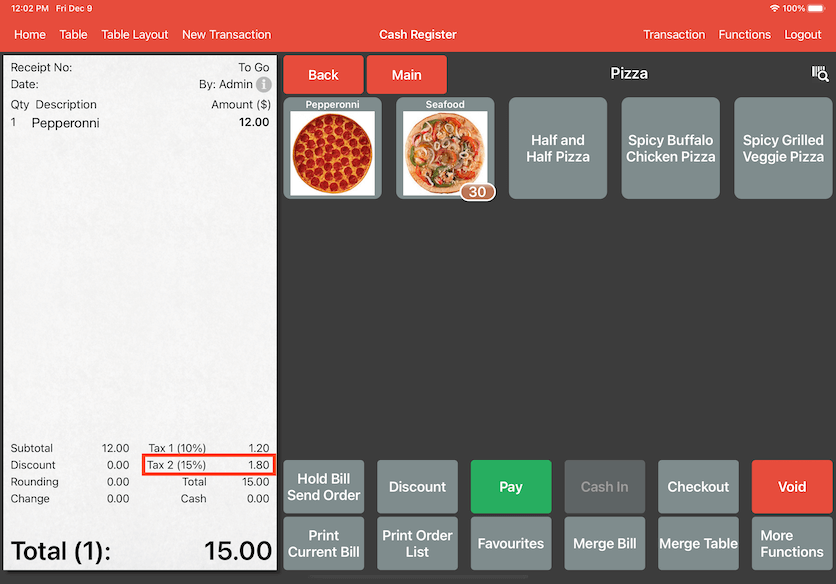
Product Price: $10
Tax 1 amount (10%):
Product Price x Tax 1 = $10 x 10% = $1.00
Tax 2 amount (10%, With Tax On):
(Product Price + Tax 1) x Tax 2 = ($10 + $1) X 10% = $1.10
Total: $10 + $1 + $1.10 = $12.10
In this example, you can see that on the second tax, it will tax based on the first tax as well.
With Tax turned off for the second tax
Product Price: $10
Tax 1 amount (10%):
Product Price x Tax 1 = $10 x 10% = $1.00
Tax 2 amount (10%):
(Product Price + Tax 1) x Tax 2 = ($10) X 10% = $1.00
Total: $10 + $1 + $1 = $12.00
In this example, both tax amounts are the same.
For Tax Before Discount, it applies the tax on the product price before it is discounted.
Example:
Product Price: $10
Tax 1 amount (10%): Product Price Before Discount x Tax 1 = $10 x 10% = $1
Discount: $5
Total: Product Price Before Discount - Discount + Tax On Original Price = $10 - $5 + $1 = $6
For Settings, there are two different setting options, With Tax and Tax Before Discount.
Both setting options can be enabled simultaneously.
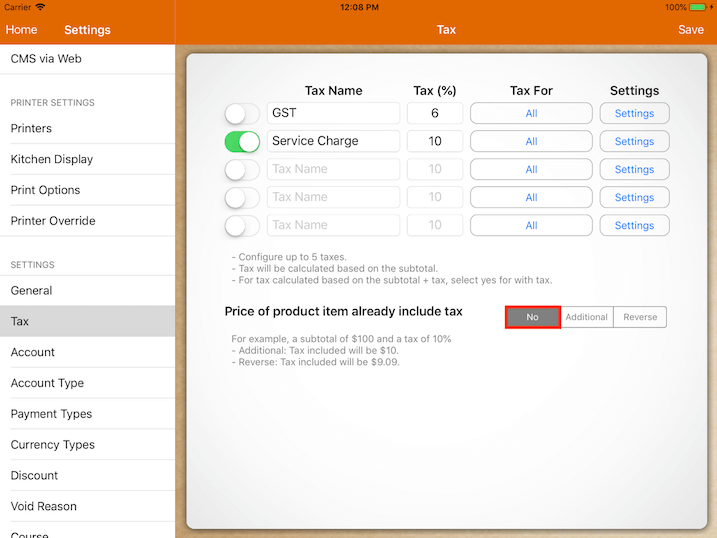
Tax Exclusive Setup
For tax-exclusive setup, set to No under the section of
Price of product item already include tax.
By doing so, the tax will be imposed and charged on top of the total amount.
Example:
Product Price: $10
Tax 1 amount (10%): Product Price x Tax 1 = $10 x 10% = $1
Total : Product Price + Tax 1 = $10 + $1 = $11
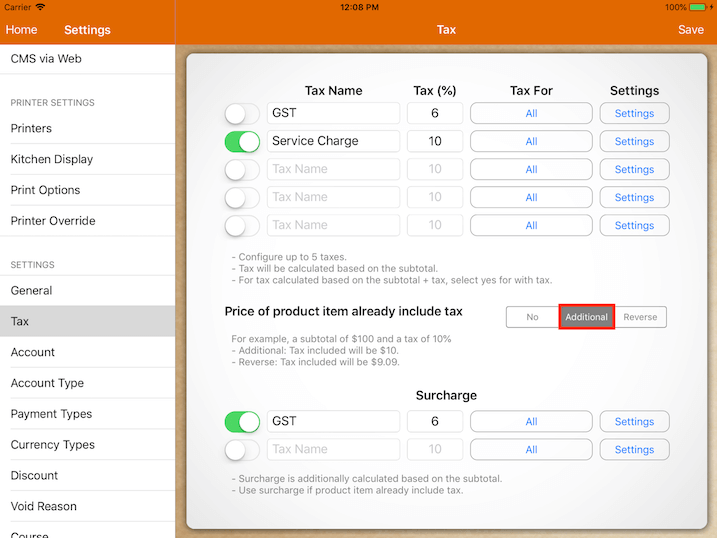
Tax Inclusive Setup
For tax inclusive setup, there are two variants: Additional or Reverse.
Example for the Additional variant:
Product Price: $10
Tax 1 amount (10%): Product Price x Tax 1 = $10 x 10% = $1
The total tax calculated or included in this product will be $1.00.
Example for the Reverse variant:
Product Price: $10
Tax 1 amount (10%): Product Price x (Tax 1/100 + 10) = $10 x (10/110) = $0.91
The total tax calculated or included in this product will be $0.91.
In another way, the actual product price is $9.09. After adding a 10% tax on top of it,
the product price becomes $10.
In Additional and Reverse tax situation, tax is already included in the product price.
However, if the user decides to charge additional tax on top of the product, a surcharge can be used.
An example of this would be holiday surcharge, as it is charged on top of the product.
Based on the previous example.
Product Price: $10
Tax Included In Product: $0.91
Additional 10% Surcharge: $1
The total payable in that bill would be $11.
MobiPOS supports only 1 tax system across the entire menu.
Which means if you decide to have tax-exclusive setup in your menu, you cannot have a
certain products to be exclusive and certain products to be inclusive.
Schedule Tax
Follow this guide for creating a Schedule Tax for specific days or time where a surcharge of tax is applied to the services.
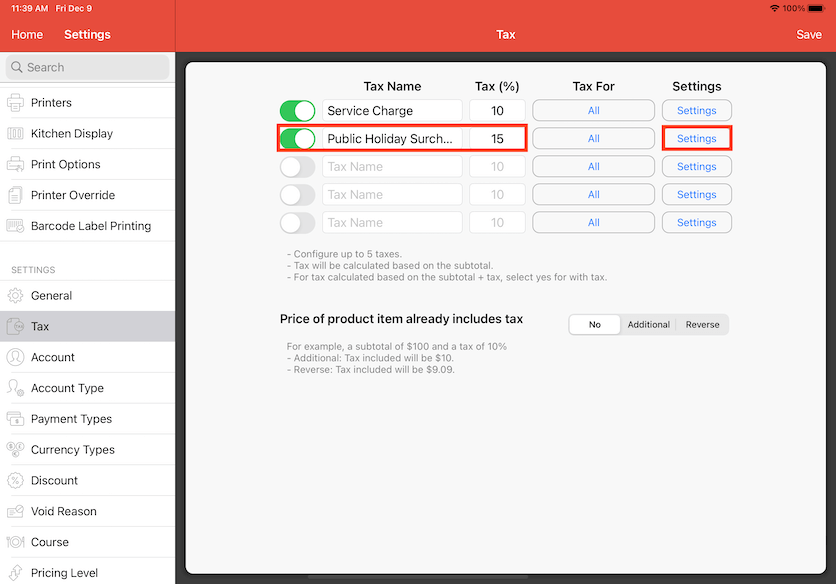
First, go to Settings and select Tax.
Enter the Tax Name and the amount of the Tax Percentage. "Public Holiday Surcharge" has been entered as a Tax Name and 15 as the Tax Percentage in the example photo. Click to turn on the tax for it to be effective. Click on Settings after.
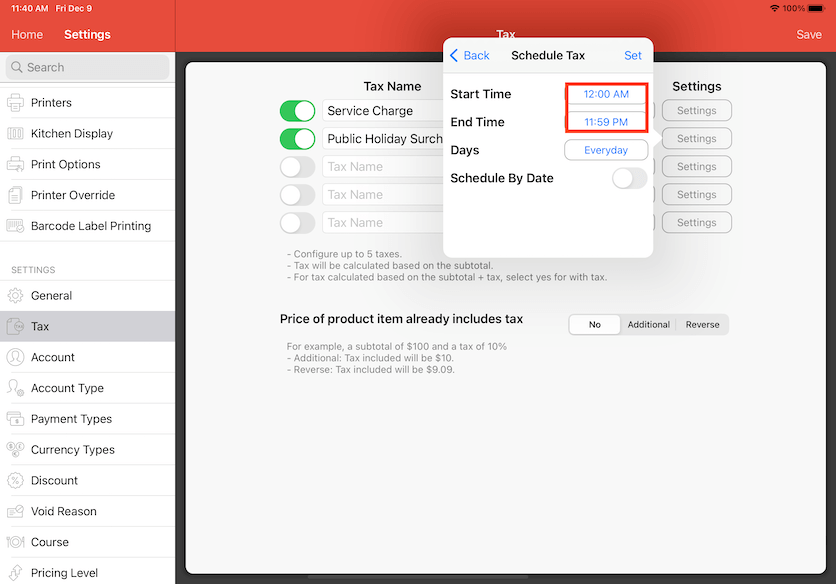
Click to turn on Schedule Tax and click on Configure after.
When Schedule Tax is turned on, this allows you to choose a day and a time for the surcharge of tax to be effective. Click on the time to change the Start Time and End Time. This is usually the business hours. In this case, a 24 hour time frame has been selected.
Click on Everyday to change the day for when the tax is applicable.
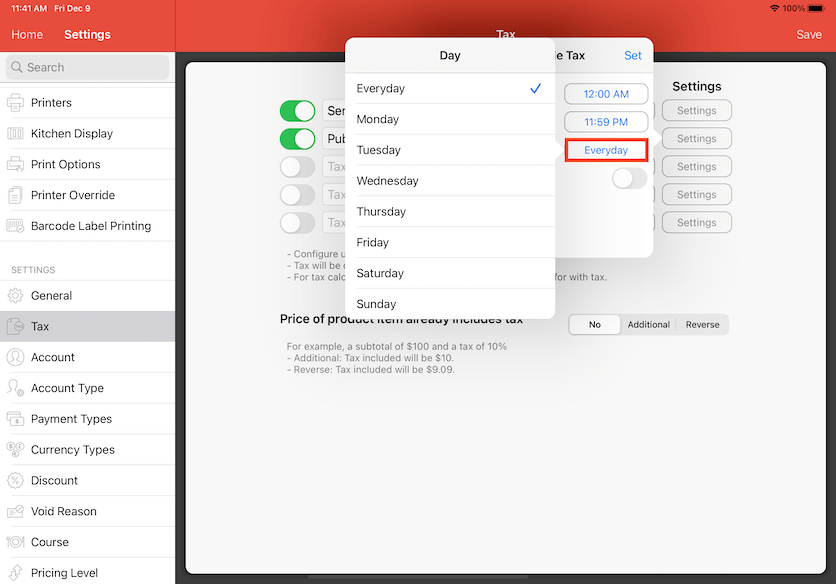
Multiple days can also be selected. In this case, Friday has been chosen as an example. After the days have been selected, simply click anywhere else on the screen to continue.

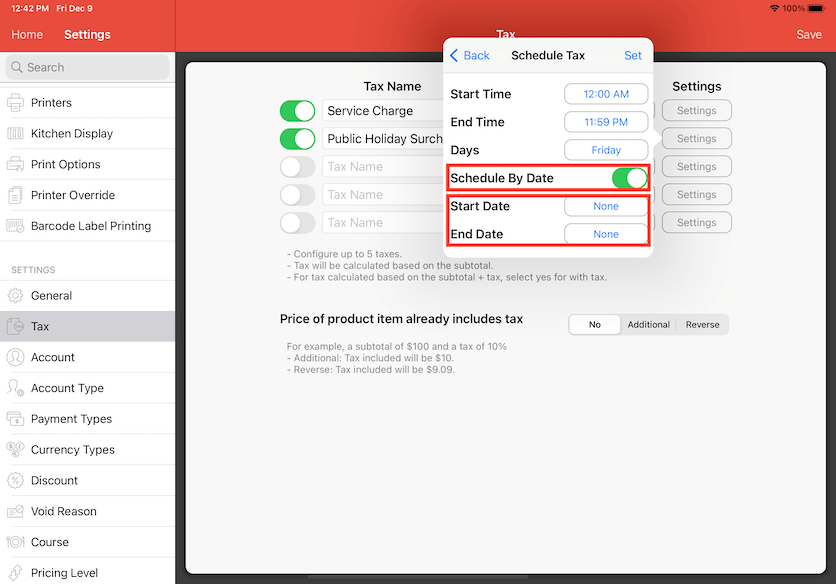
However, most Public Holidays are only on certain dates which means Schedule By Date needs to be turned on. If not, the tax surcharge will be effective every week of the chosen day.
Click to turn on Schedule By Date. Click on None to select a date for the Start Date and End Date.
Note that if there is no Start Date but an End date, it means the tax surcharge will be effective immediately from the day you set up a Schedule Tax.
Or the opposite where a Start Date is set and there is no End Date, it means the tax surcharge will start on the selected Start Date but will not end unless you have set an End Date.
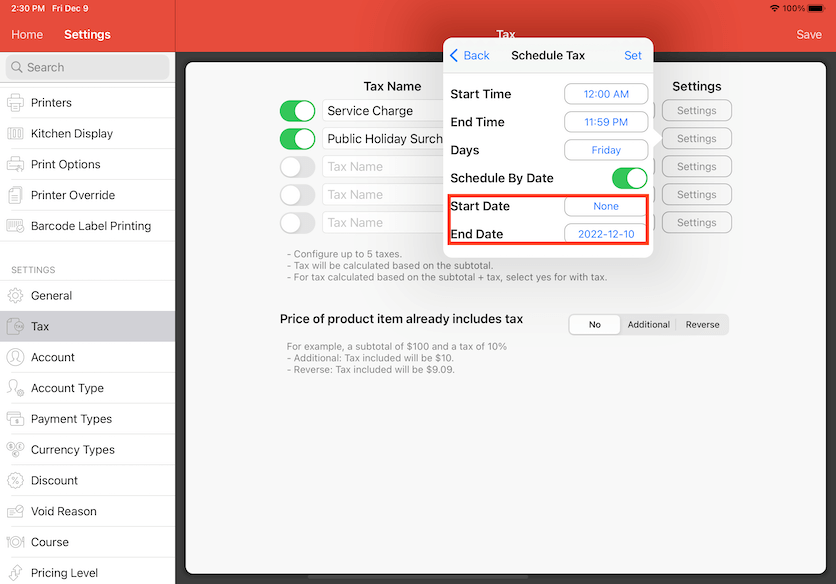
In this example photo, both Start Date and End Date are selected. 9th of December 2022 has been selected as the Start Date and 10th of December 2022 as the End Date.
Note that the Start and End Date cannot be the same date, so you can only choose the next available day as the End Date. However, that does not mean the tax surcharge is applicable on the next available day, it just ends on that date. Click on Set to continue.

Click on Set again in Tax Settings.
Click Save to finalise the tax surcharge.
When ordering an item in Cash Register, the tax surcharge will show up in the bill on the scheduled tax configuration.