Guide | MobiPOS >Settings Setup
Settings/Setup
MobiOrder/Online Ordering gives you the ability to have your menu online, allowing customers to take orders on your website, and send it directly into your POS and print it to the kitchen.
With the right setup, the entire process can be seamless and no human intervention is required.
To start using online ordering, you will need licenses as below:
- MobiPos Application
- MobiPos CloudSync
- MobiPos Online Ordering
You have to ensure that MobiPos CloudSync is setup and up and running.
You can refer to this guide on how to setup CloudSync.
If MobiPos CloudSync is set up correctly, you should see your stocks or report data in CloudSync.
iPad has to be in-app and turned on all the time. In the iPad Settings -> Display & Brightness -> Auto Lock should be set to Never.
To begin setting up online ordering, look for your username located at the right top of your screen, then click Online Ordering.
There's quite a few configurations in it. However, to start, you just have to fill in all the non-optional setting that has "*" beside it.
General Info
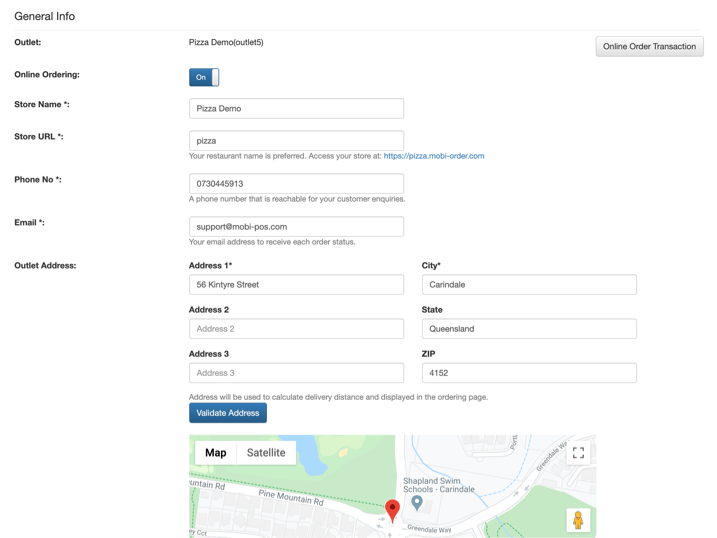
Store Name
Enter the store name of yours and it will be displayed on the top of the screen.
Store URL
System will generate your url accordingly based on your preferred name.
If you key in "demo" as the URL, you will be able to access your store at https://demo.mobi-order.com.
If you key in "myrestaurant" as the URL, access your store at https://myrestaurant.mobi-order.com.
As you can see, "mobi-order.com" will always be part of the URL, it can't be changed and you can only make changes to the subdomain.
You will need to use another store URL if it has been used by other store.
Enter an email that you are monitoring closely, as all event changes related to order will be sent to this email by the system.
For example if a customer made an order, but no one accepted it or the POS has no internet, system sends out an email with all the details of the order in it.
You can then reach out to your customer to confirm the order or ignore it.
Outlet Address
Key in the address of your store, then click on Validate Address.
Google will search for the location of your address.
If the location is not accurately pinned, you can drag the pin and move it to the exact location.
The address/location is required as the system uses it to calculate the route distance between customer and store.
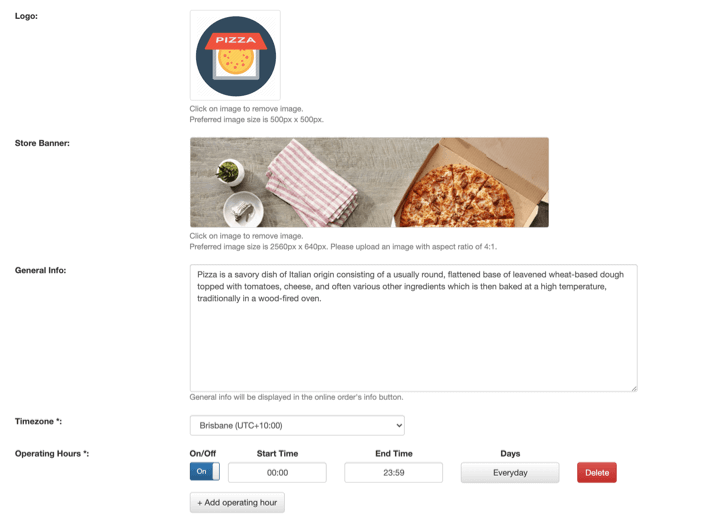
Logo
Upload your store'slogo to display at the left top of the online ordering page.
The dimension of it is fixed, photo in square and a size of 500px x 500px is preferred.
Store Banner
A banner to be display on the top of the page, giving personalization to your brand.
An image ratio of width:height (4:1) is preferred.
General Info
General Info will be displayed in the Info section .
A good section to introduce your store or message you would like to convey to your customer.
Timezone
Configure your timezone as the system use this to determine your operating hour, time to send out pre-order and much more.
System does not determine the time based on user's device time as it might not be accurate.
Operating Hours
Configure your operating hour, prevent customer from ordering anything that is out of the operating hour.
You would want to set your end time to be earlier if your outlet ends operation on time and you require a buffer to prepare the order.
Store's Policy
On the top right corner, tap on the Info button.
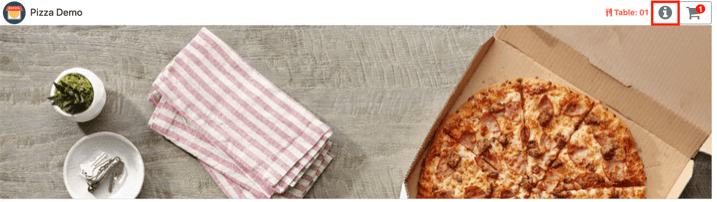
Add and edit your company store's policy, it will be shown at the bottom of the Store Info page as shown.
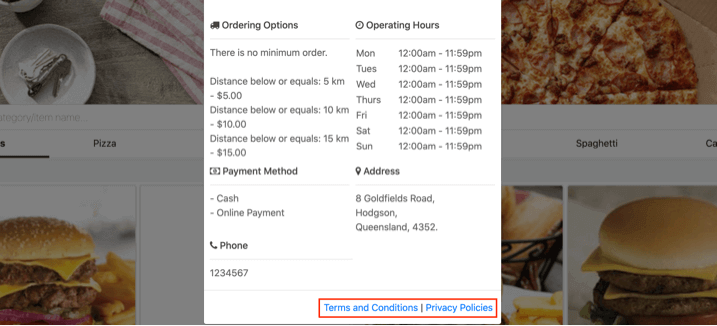
When you click View/Edit, a text box will appear.
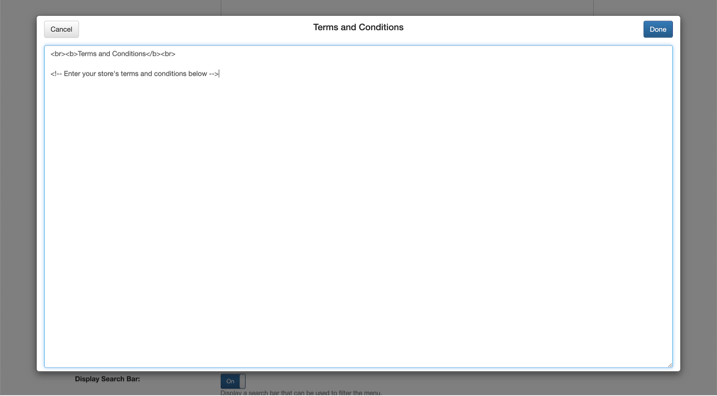
This text editor utilizes the HTML5 format, you can use one of the many available online html editors like this and copy the html format into the text box.
Menu
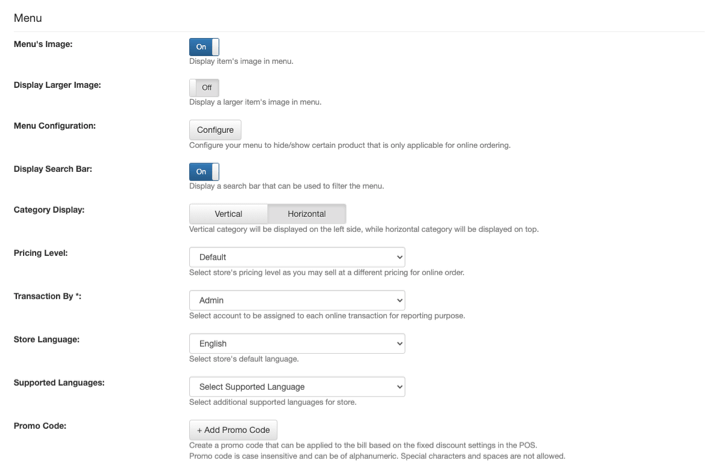
Menu's Image
You are encouraged to put in high quality product's image as it would increase customer's spending.
You can upload your menu's photo from the iPad or CloudSync's Stock section.
Turn it off if you do not wish to show product's image in the site.
Display Larger Image
Toggle larger sized images for your items in the menu.
Menu Configuration
You could choose to hide or disable certain category/product item in online ordering as certain product is not suitable for delivery.
Display Search Bar
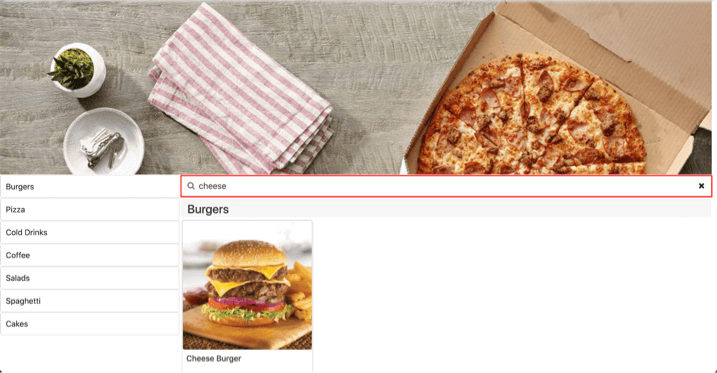
Toggle the search bar option for your customers.
Category Display
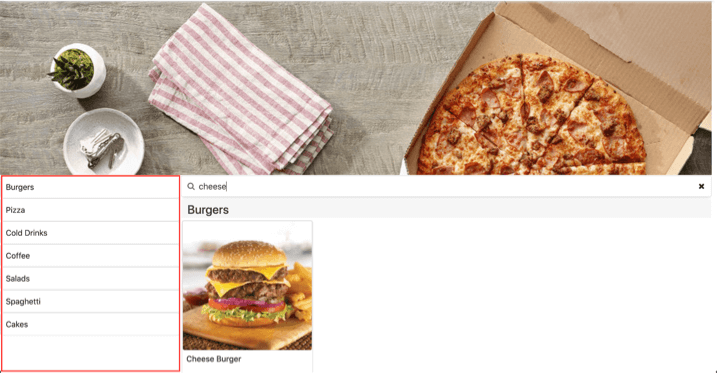
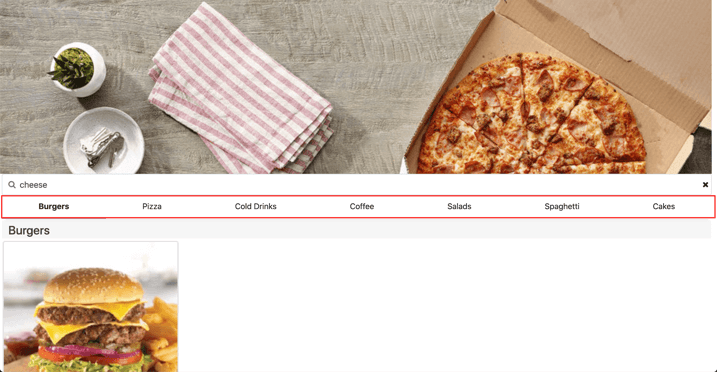
Toggle between vertical or horizontal display placements for your categories.
Pricing Level
To sell at a different pricing for online order, select a different pricing level.
You will need to setup pricing level in the app, Settings -> Pricing Level before changing it here.
Transaction By
For each online transaction, it will be automatically assigned to the account you selected here.
At the end of the day, you could generate an employee sales report to see how much sales were from online ordering.
Store Language
Select your default language of the store.
You can translate any missing phrase here.
Promo Code
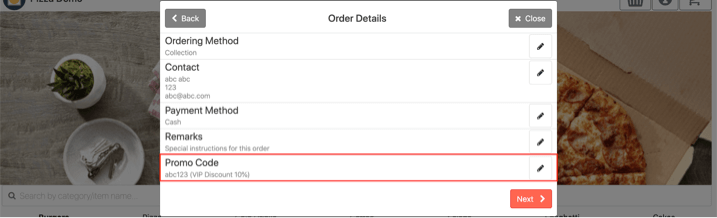
When promo codes are added to the Online Ordering Settings, customers will be able to apply the promo code upon checkout. The promo codes can be set available on specific dates. The discount settings can only be set through the POS system.
Table QR Ordering
Table QR Ordering allows dine in customer to scan a QR code that is on the table, send order directly using their own mobile phone.
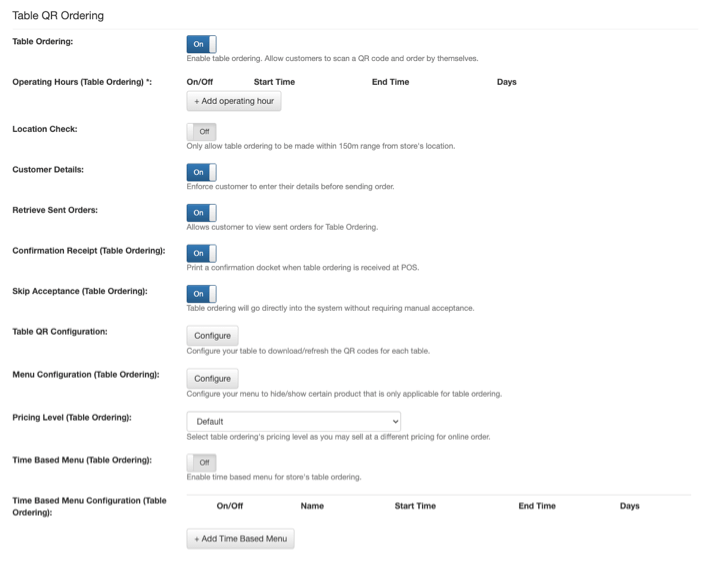
Table Ordering
Each table number is encoded into a unique QR code.
Orders will be sent into the kitchen directly and no acceptance is required.
Turn it on to enable this feature.
Location Check
To prevent customer from making bogus orders, system does a location check of the device to ensure they are within range before they can order.
If they disallow location check when prompted, they will not be able to send the order.
However this is not a foolproof solution as user can alter their location using 3rd party software.
Customer Details
When this is toggled on, the customer is required to fill in their contact information before completing their order. This helps in doing contact tracing in the case of a customer contracting the Covid-19 disease.
Retrieve Sent Orders
When this is toggled on, customers will be able to retrieve their previously sent orders.
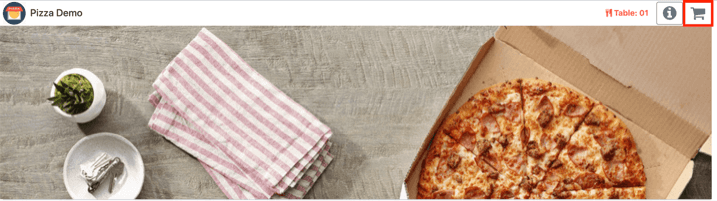
To retrieve sent orders, customers will need to tap on the "Cart" button.
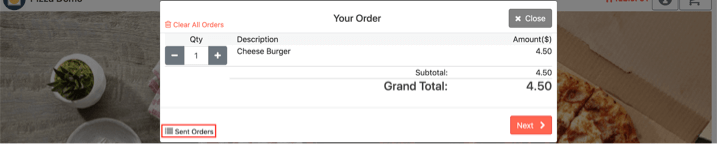
Next, select "Sent Orders".

Sent Orders successfully retrieved. However, customers will not be able to retrieve orders once they checkout their bills.
Confirmation Receipt
When someone places an order, a confirmation receipt will be printed automatically at the cashier's printer.
Turn it off if it's not needed.
Table Configuration
To generate the QR code for each table, then print them out to paste it on the table.
Menu Configuration
You could choose to hide or disable certain category/product item for table ordering as certain product is for internal usage only.
Time Based Menu

Toggle the Time Based Menu option.

Once turned on, the Time Based Menu Configuration will be shown for you to configure the settings.
To add a time based menu, click on + Add Time Based Menu.

An additional row will appear, fill in your Menu Name, Start Time, and End Time.

To set the menu to appear on specific days of the week, click on Everyday button under the Days column.
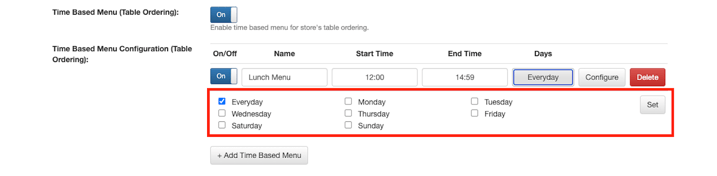
This will prompt another row where you will be able to select on which day you'd like the menu to be available from.

Once you are satisfied with the settings, click on Configure.
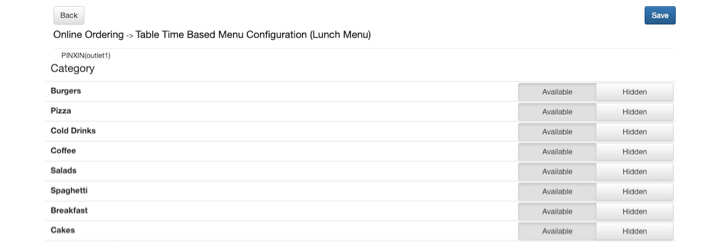
This will bring you to another page where you can select categories within your menu to be served on the selected time based menu.
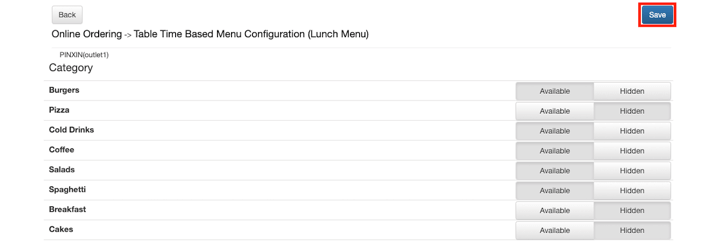
Once you have selected whichever categories to be shown, click on Save.
Note: If you wish to hide specific items in the menu, you can only do so via the Menu Configuration setting, and it would be reflected throughout the day.
If an item is made unavailable through the iPad, it will override the existing items in the online menu, but please do note that this will be reflected at the Sync Intervals determined in the Cloud Sync setting in the iPad itself.
Delivery Options
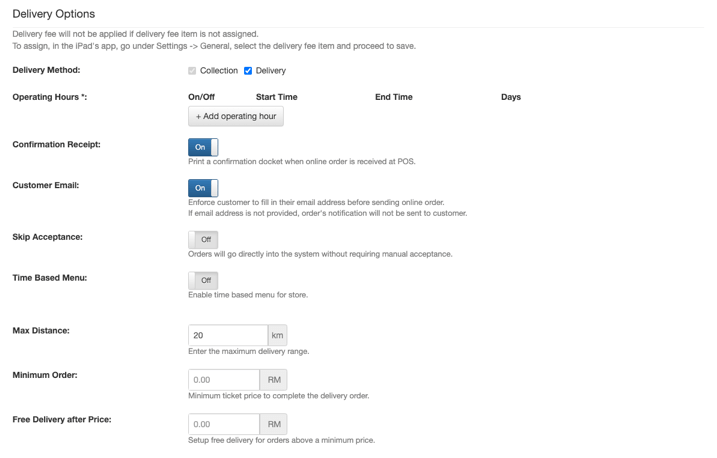
Delivery Method
Collection method will always be set to on, to support delivery is optional.
Max Distance
Set the maximum distance you would deliver to.
Minimum Order
Set the minimum ticket price to complete the delivery order.
This does not affect collection method. Collection is default to no minimum order.
Free Delivery after Price
Setup no delivery fee for orders above a price.
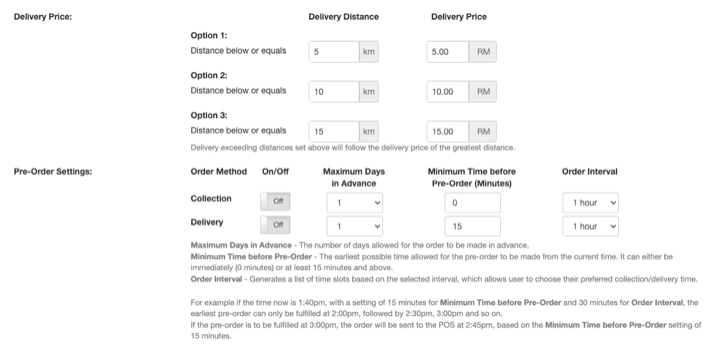
Delivery Price
Define the delivery fee in relation to the delivery distance.
This function will not work if delivery fee is not setup in the POS.
To setup, in the iPad app go under Settings -> General -> Delivery Fee, assign an open price item.
Pre-Order Settings
Upon receiving a pre-order, an email will be sent to both customer and your store's email.
However system will only fire the order to the POS when its due based on Minimum Time Before Pre-Order.
If at moment the POS is not reachable due to connection issue, another email will be sent out to your email stating that the order is missed.
Take necessary action to fulfill the order as customer considers their order to be accepted.
No Delivery Zone
Max delivery range is only able to calculate distance based on radius. Actual calculations may vary according to route availability. This function will allow you to configure no delivery zones within the max distance of your delivery range to ensure your driver will not cross the max distance threshold.
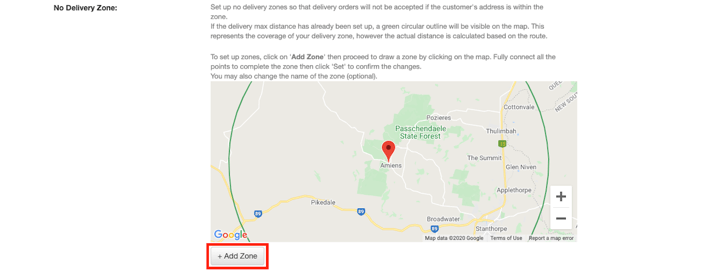
To set up a no delivery zone, click on +Add Zone.
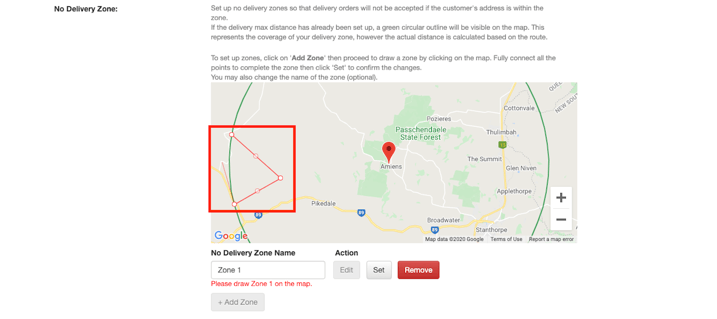
Your cursor will turn into a + sign, proceed to select the area by clicking and connecting the points to mark an area.
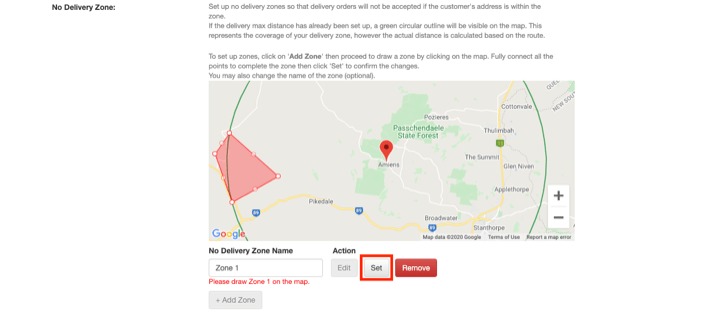
Once you are satisfied proceed to click on the Set button.
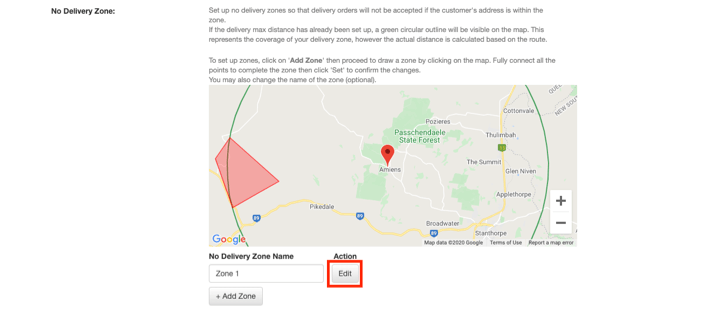
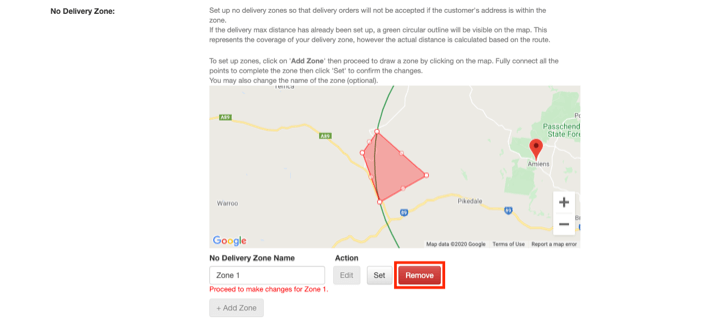
To remove a no delivery zone, click on Edit on a existing zone, then click on Remove.
Tips
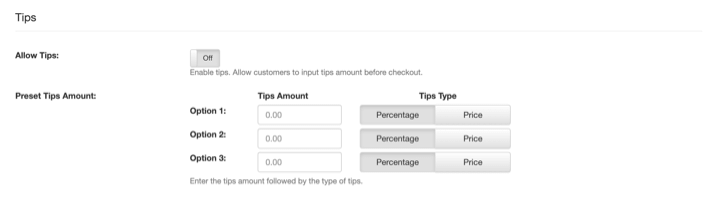
Configure tips so your customer could put in the amount they would like to tip.
Setup up to 3 standard option to simplify the tipping process.
Payment

Configure different payment method to be accepted for different ordering mode.
If online payment is used, bill need not to be checkout again in the POS.
The bill will be closed automatically with receipt printed when order is received.
As for non online payment, bill has to be checkout again in the POS.
Online Payment
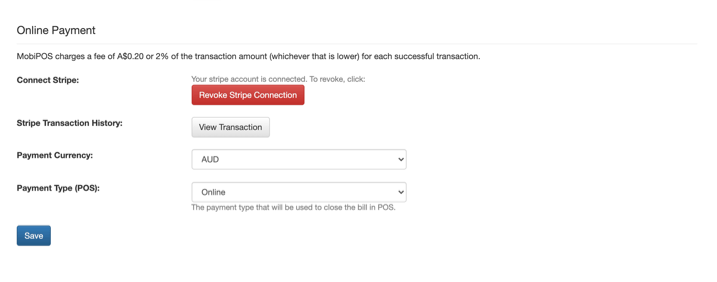
We will continuously add more online payment solution to our platform.
If your preferred credit card processor is not listed, do contact us.
Upon setting up, a preferred web URL of yours will be generated.
With that your customer could start taking orders from the website immediately.