Guide | MobiPOS > Kiosk Terminal > Settings/Setup > Kiosk General Info
General Info
Kiosk Ordering allows you to set up a self-service ordering system, enabling customers to browse your menu and place orders.
To start using kiosk, you will need licenses as below:
- MobiPos Application
- MobiPos CloudSync
- MobiPos Kiosk Terminal
You have to ensure that MobiPos CloudSync is setup and up and running.
You can refer to this guide on how to setup CloudSync.
If MobiPos CloudSync is set up correctly, you should see your stocks or report data in CloudSync.
iPad has to be in-app and turned on all the time. In the iPad Settings -> Display & Brightness -> Auto Lock should be set to Never.
Using a web browser, go to https://cloud.mobi-pos.com or click
here.
On the website, log into your account.
To begin configuring your kiosk settings, look for your username located at the right top of your screen, then click Kiosk Configuration.
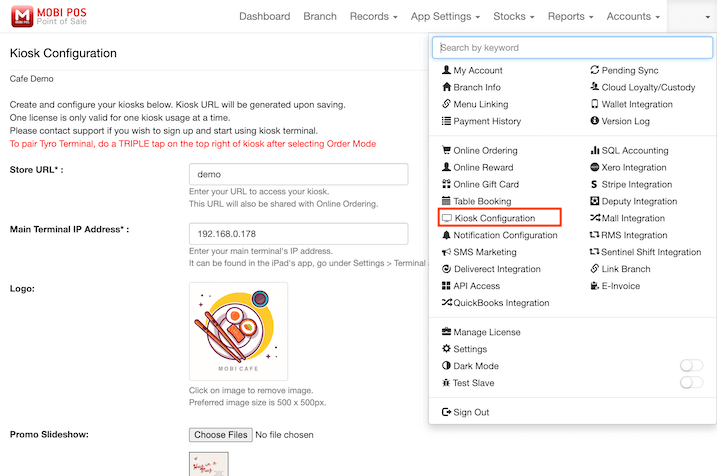
There are multiple configuration options available, but to get started, simply complete all the required settings marked with "*".

Store URL
System will generate your URL accordingly based on your preferred name.
This URL will also be shared with Online Ordering.
These changes will be visible at the Kiosk URL provided at the bottom of the page.
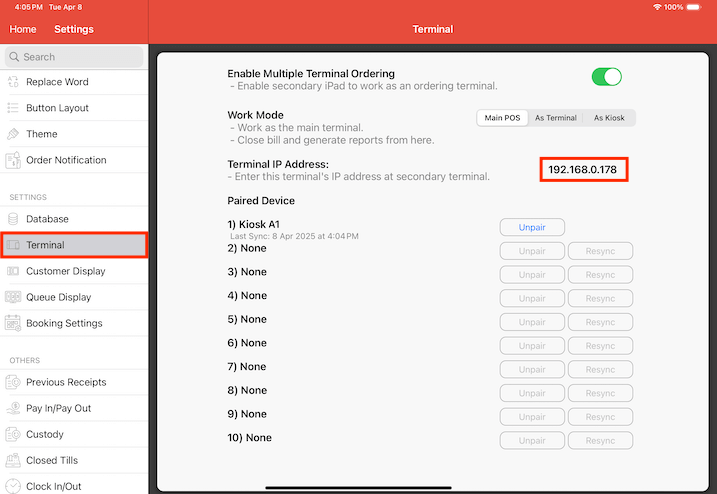
Main Terminal IP Address
Enter your main terminal's IP address, which can be found in your MobiPOS iPad app under Settings -> Terminal.
There, you’ll see the Terminal's IP Address.
Logo
Upload your store's logo to display at the left top of the online ordering page.
The dimension of it is fixed, photo in square and a size of 500px x 500px is preferred.
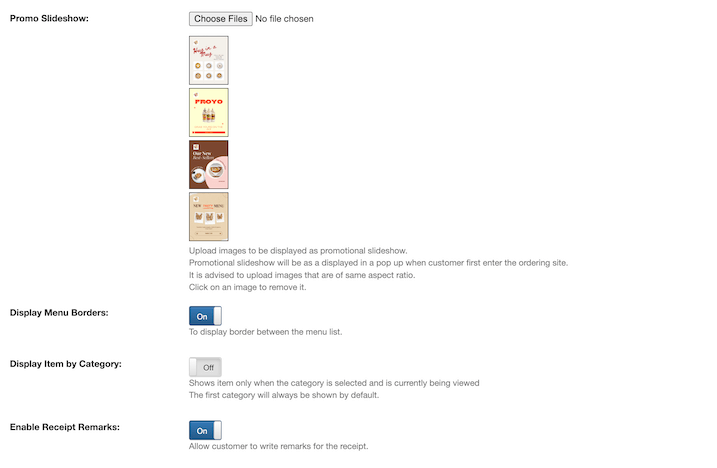
Promo Slideshow
The promotional slideshow is to allow you to upload images which will be displayed as a pop-up when customers first enter the ordering site.
It is recommended to use images with the same aspect ratio for a consistent display.
This is a great way to highlight promotions, specials, or important announcements.
Display Menu Borders
When enabled, borders will be displayed between the menu items.
With borders disabled, menu items appear seamlessly without the dividing lines.
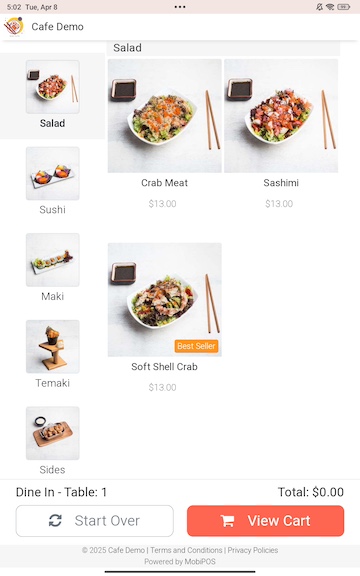
Display Item by Category
When enabled, only items from the selected category are shown.
For example, if Salad category is selected, only the salad section is visible.
Users must click on another category to view items from another category.
The first category will always be displayed by default.
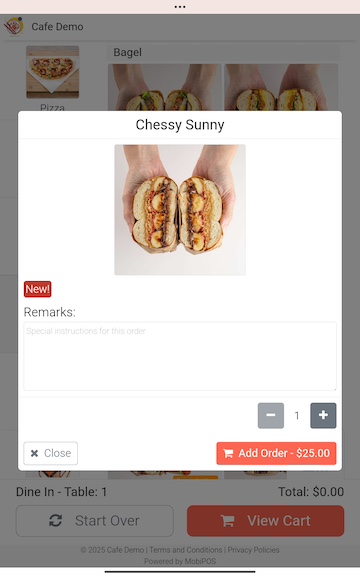
Enable Receipt Remarks
When enabled, customers will be able to write remarks on their receipt, allowing them to add special requests, instructions, or additional notes.
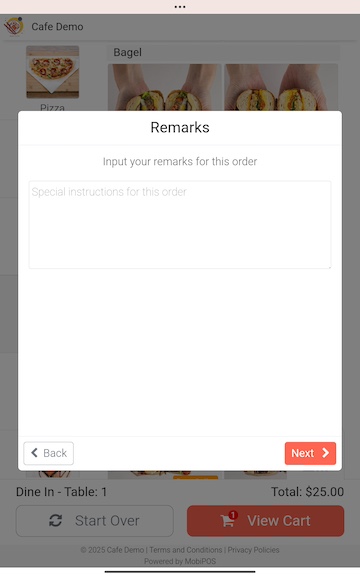
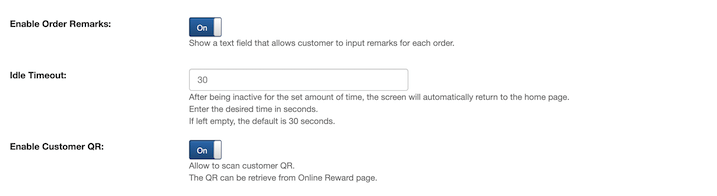
Enable Order Remarks
When enabled, a text field will be displayed, allowing customers to enter remarks for their orders.
This can be used for special instructions, preferences, or additional requests for each order.
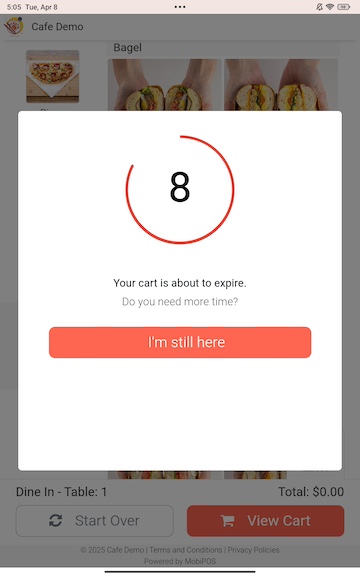
Idle Timeout
Idle timeout automatically returns the screen to the home page after a set period of inactivity.
Enter the desired time in seconds to customize how long the system should wait before resetting.
If left empty, the default timeout is 30 seconds.
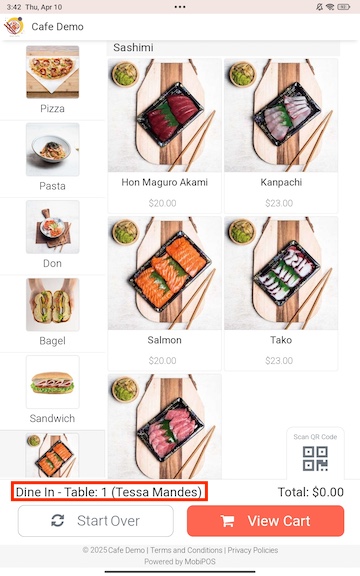
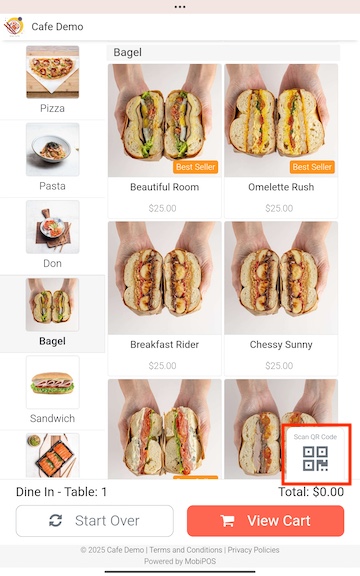
Enable Customer QR
When enabled, customers can scan their QR code for identification or rewards.
The QR code can be retrieved from the Online Reward page.
Tap on the "Scan QR Code" button.
Then, a scanning frame appears on the screen.
Customers would need to position the QR code within this frame to initiate scanning.
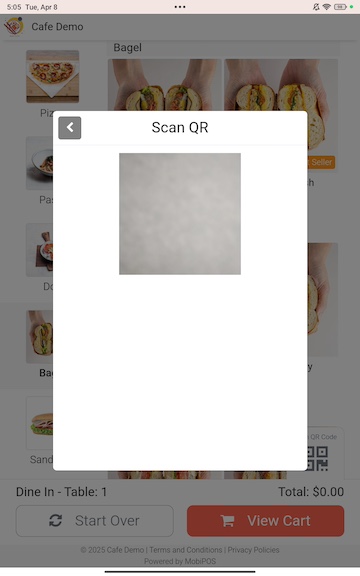
Once the QR code is successfully scanned, the customer's name will appear in the bottom-left corner of the screen.